Section 4 – FLY-JIB INSTALLATION AND STOWAGE Mini-Crawler Crane M A E D A
4-152 1/2019 MC405C-3
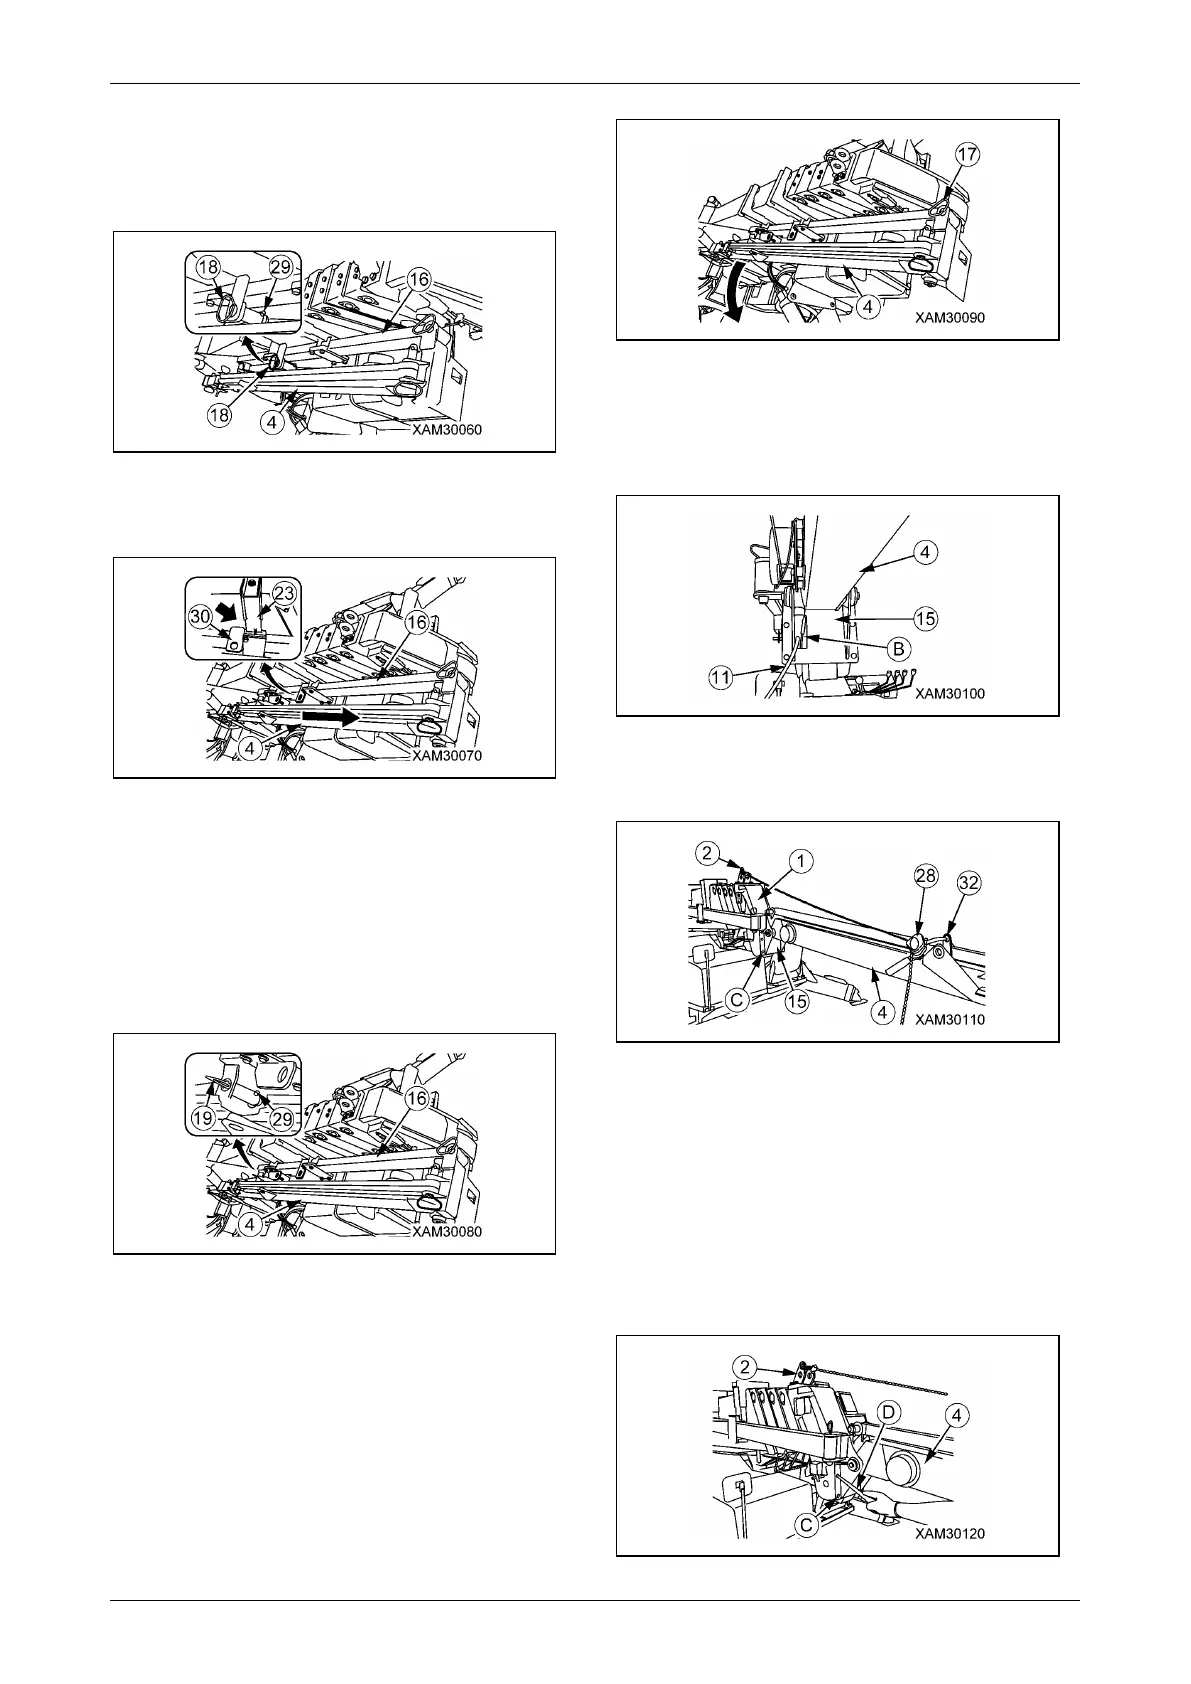
6. Pull lynch-pin (29) out from position pin (18)
inserted at storage bar (16), then pull
position pin (18) (length: 55mm) out from
storage bar (16).
Fig. 4-432
7. Slide No.1 Fly-jib (4) and storage bar (16) to
head of the main boom direction.
Fig. 4-433
NOTICE: Slide No.1 Fly-jib (4) and storage bar
(16) until stopper (30) of storage bar (16) hit the
bar guide A (23).
8. Pull lynch-pin (29) from position pin (19)
inserted at storage bar (29), then pull
position pin (19) (length: 95mm) out from
storage bar (16).
Fig. 4-434
9. Lift up No.1 Fly-jib (4) tip to take it out from
stow stay, then slew it around the position
pin (17) (length: 150mm) on the right side of
the head of main boom.
Fig. 4-435
10. Lace the wire rope (11) which pulled out at
section five through the hole (B) of No.1 Fly-
jib bracket (15), and pull the wire rope (11)
out to Fly-jib side.
Fig. 4-436
11. Hang attachment lever block (28) between
No.1 Fly-jib bracket (32) and bracket (2).
Fig. 4-437
NOTICE: Lever block (28) will be easy to operate
to hook lever to No.1 Fly-jib bracket side.
12. Operate lever block (28) to put attachment
hole of No.1 Fly-jib bracket (15) with the hole
on the underneath of main boom together.
NOTICE: Insert bar (D) into attachment hole (C)
to put the hole (C) on No.1 Fly –jib bracket (15)
and the hole on the downside of main boom.
Fig. 4-438