Section 4 – FLY-JIB INSTALLATION AND STOWAGE Mini-Crawler Crane M A E D A
4-156 1/2019 MC405C-3
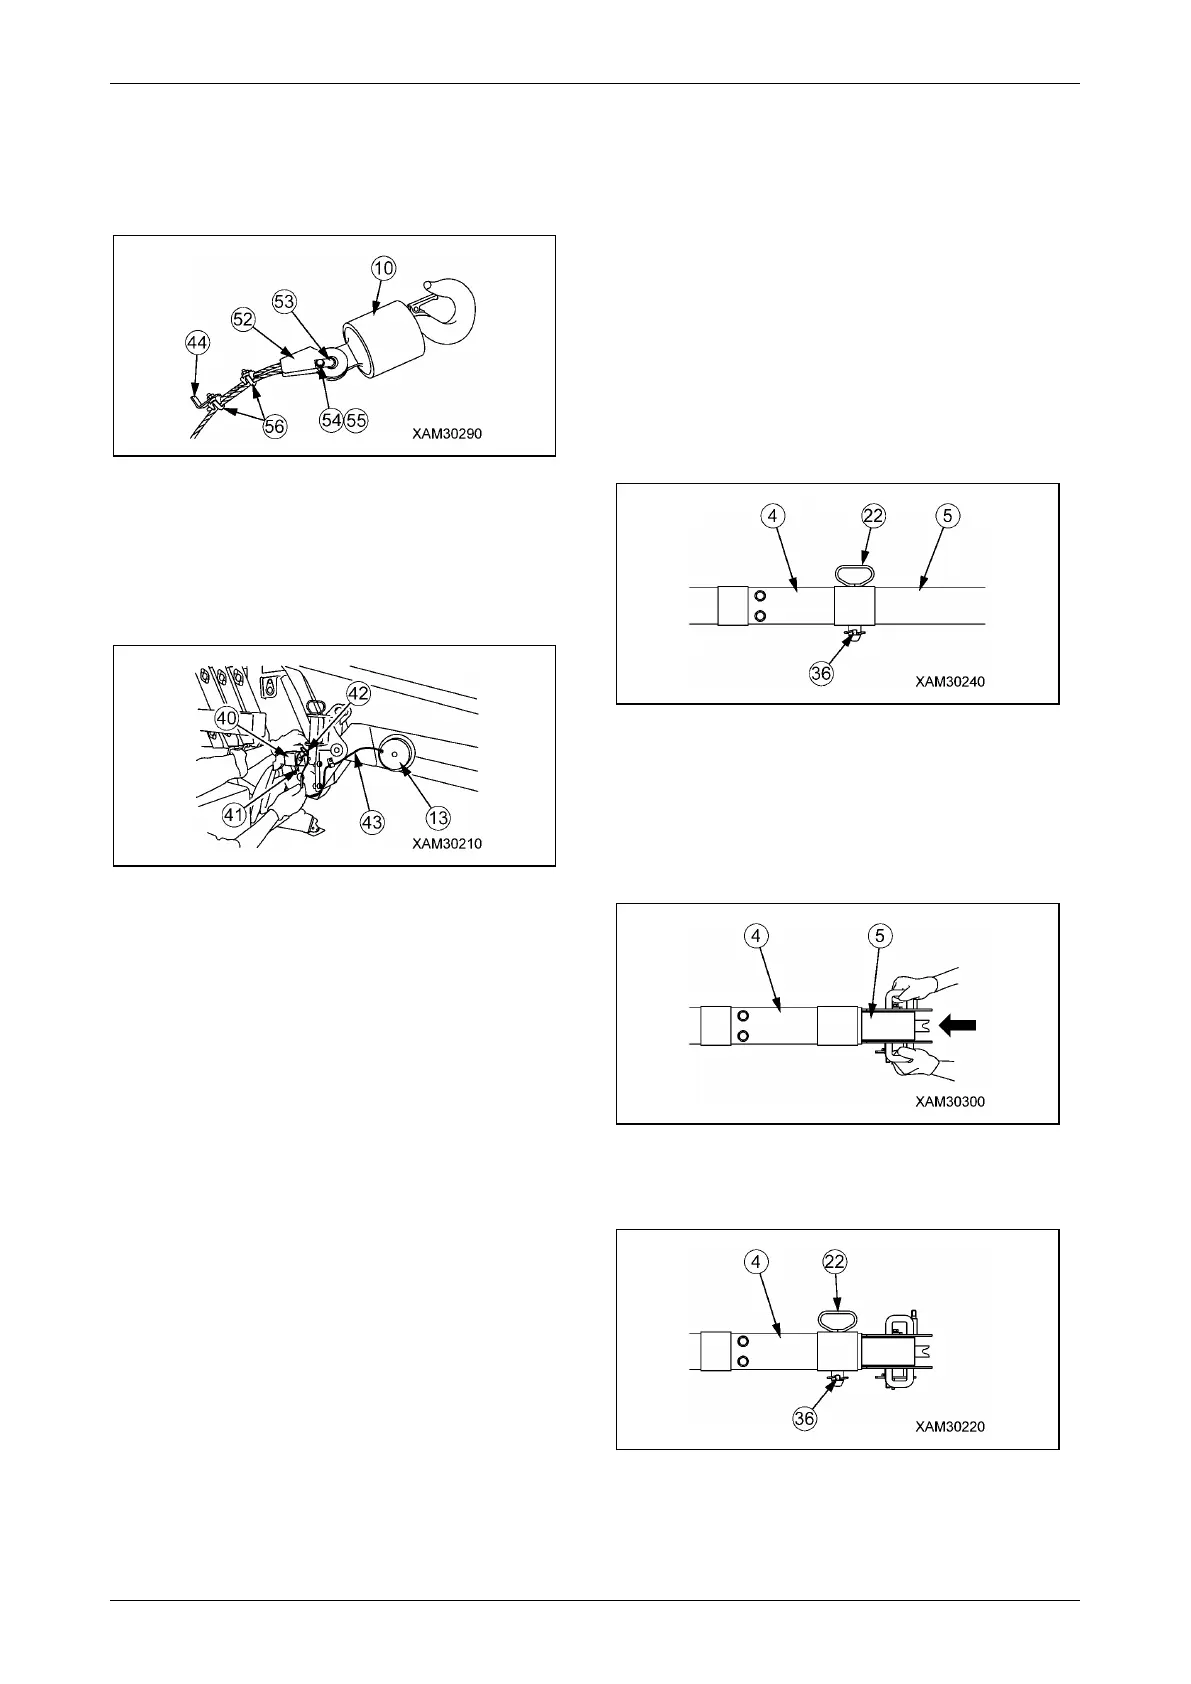
(6) Set wedge socket (52) to single fall
hook (10) and insert wedge socket pin
(53), and fix firmly by one bolt (54)
(M8x12L) and one washer (55).
Fig. 4-456
27. Disconnect of wiring (41) of over winding
detector (40) and wiring (42) from main
boom at connector, then connect wiring (42)
with extension cord (43) from No.1 Fly-jib
code reel (13).
Fig. 4-457
NOTICE: After connect wiring (42) with extension
cord (43), push wiring into inside of main boom.
WARNING!
• Always connect wiring (42) from main boom
with extension cord (43) from No.1 Fly-jib
cord reel (13). If you do not change the
connection of wiring, over winding detector
will not work normally and may cause the
hook or load to drop resulting in a serious
hazard.
• After connected extension cord (43), please
confirm that wiring is not strained. If wiring
is strained strongly, it will cause wiring to
snap.
• Before crane operation, regularly raise hook
to confirm whether hook will stop
automatically when hook hits the over
winding detector weight.
Fly-Jib Stowage (Single Fall Hook
Mode)
NOTICE: This section is an explanation of
method to stow fly-jib with single hook.
WARNING! Stop the engine before stowage
operation crane. If not the crane may
suddenly move and result in a serious
hazard.
1. Pull lynch-pin (36) out from position pin (22)
on No.1 Fly-jib (4), then pull position pin (22)
out from No.1 Fly-jib (4).
Fig. 4-458
NOTICE: The position pin (22) will be used for
fixing No.2 Fly-jib (5) after retract No.2 Fly-jib (5).
2. Hold the handle on the both side of the head
of No.2 Fly-jib (5) and push No.2 Fly-jib (5)
into No.1 Fly-jib (4).
Fig. 4-459
3. Put the hole together on the side of No.1 Fly-
jib (4) and No.2 Fly-jib (5).
Fig. 4-460
4. Insert position pin (22) and fix it firmly by
lynch-pin (36).