Mini-Crawler Crane M A E D A Section 4 – FLY-JIB INSTALLATION AND STOWAGE
1/2019 MC405C-3 4-155
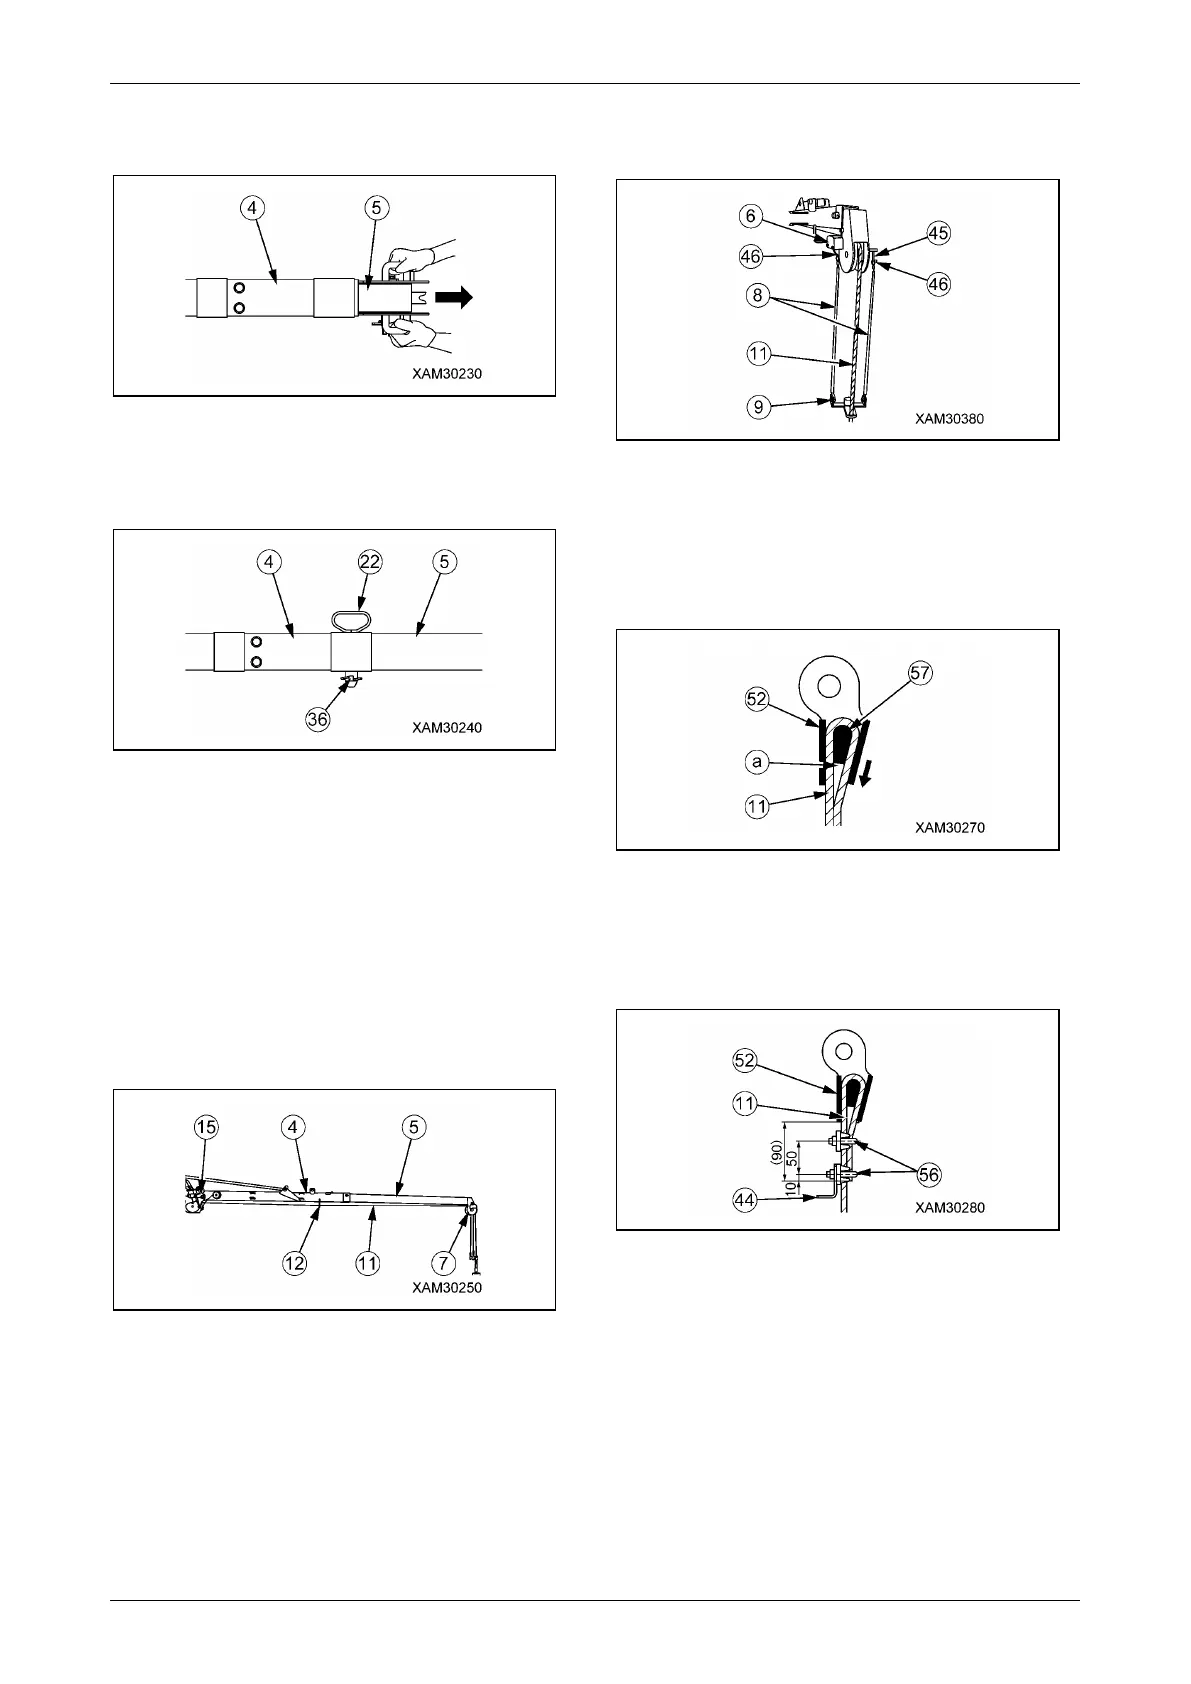
27. Hold handles on the both side of No.2 Fly-jib
(5) to pull out No.2 Fly-jib (5).
Fig. 4-450
28. After pull out No.2 Fly-jib (5), put the hole
together on the side of No.1 (4) and No.2
Fly-jib (5).
Fig. 4-451
29. Insert position pin (22) into the hole on the
side of No.1 Fly-jib (4), and lock position pin
(22) firmly by lynch-pin (36).
30. Connect wire rope with hook block according
to following point.
(1) Lace the wire rope (11) which pulled out
at section 10 through hook rack (12) on
the bottom of No.1 Fly-jib (4) or guide
sheave (7) on the head of No.2 Fly-jib
(5).
Fig. 4-452
(2) Use shackle (46) to attach two over
winding detector ropes (8) (length:
700mm) and weight (9) to over winding
detector (6) and plate (45) on the head
of No.2 Fly-jib (5).
(3) Lace the wire rope (11) through the hole
of over winding detector weight (9).
Fig. 4-453
(4) See the figure to lace wire rope (11)
through wire socket (52) removed on
Step 5, and put rope wedge (57) into
position (a), and pull wire rope (11) to
direction which arrow indicate.
Fig. 4-454
(5) Attach two wire clips (56) and weight
stopper (44) to wire rope (11). See the
figure for the points to attach of rope
clips (56).
Fig. 4-455
NOTICE: Fasten wire clips (56) and weight
stopper (44) together 10mm back from end of the
wire.