Section 4 – FLY-JIB INSTALLATION AND STOWAGE Mini-Crawler Crane M A E D A
4-154 1/2019 MC405C-3
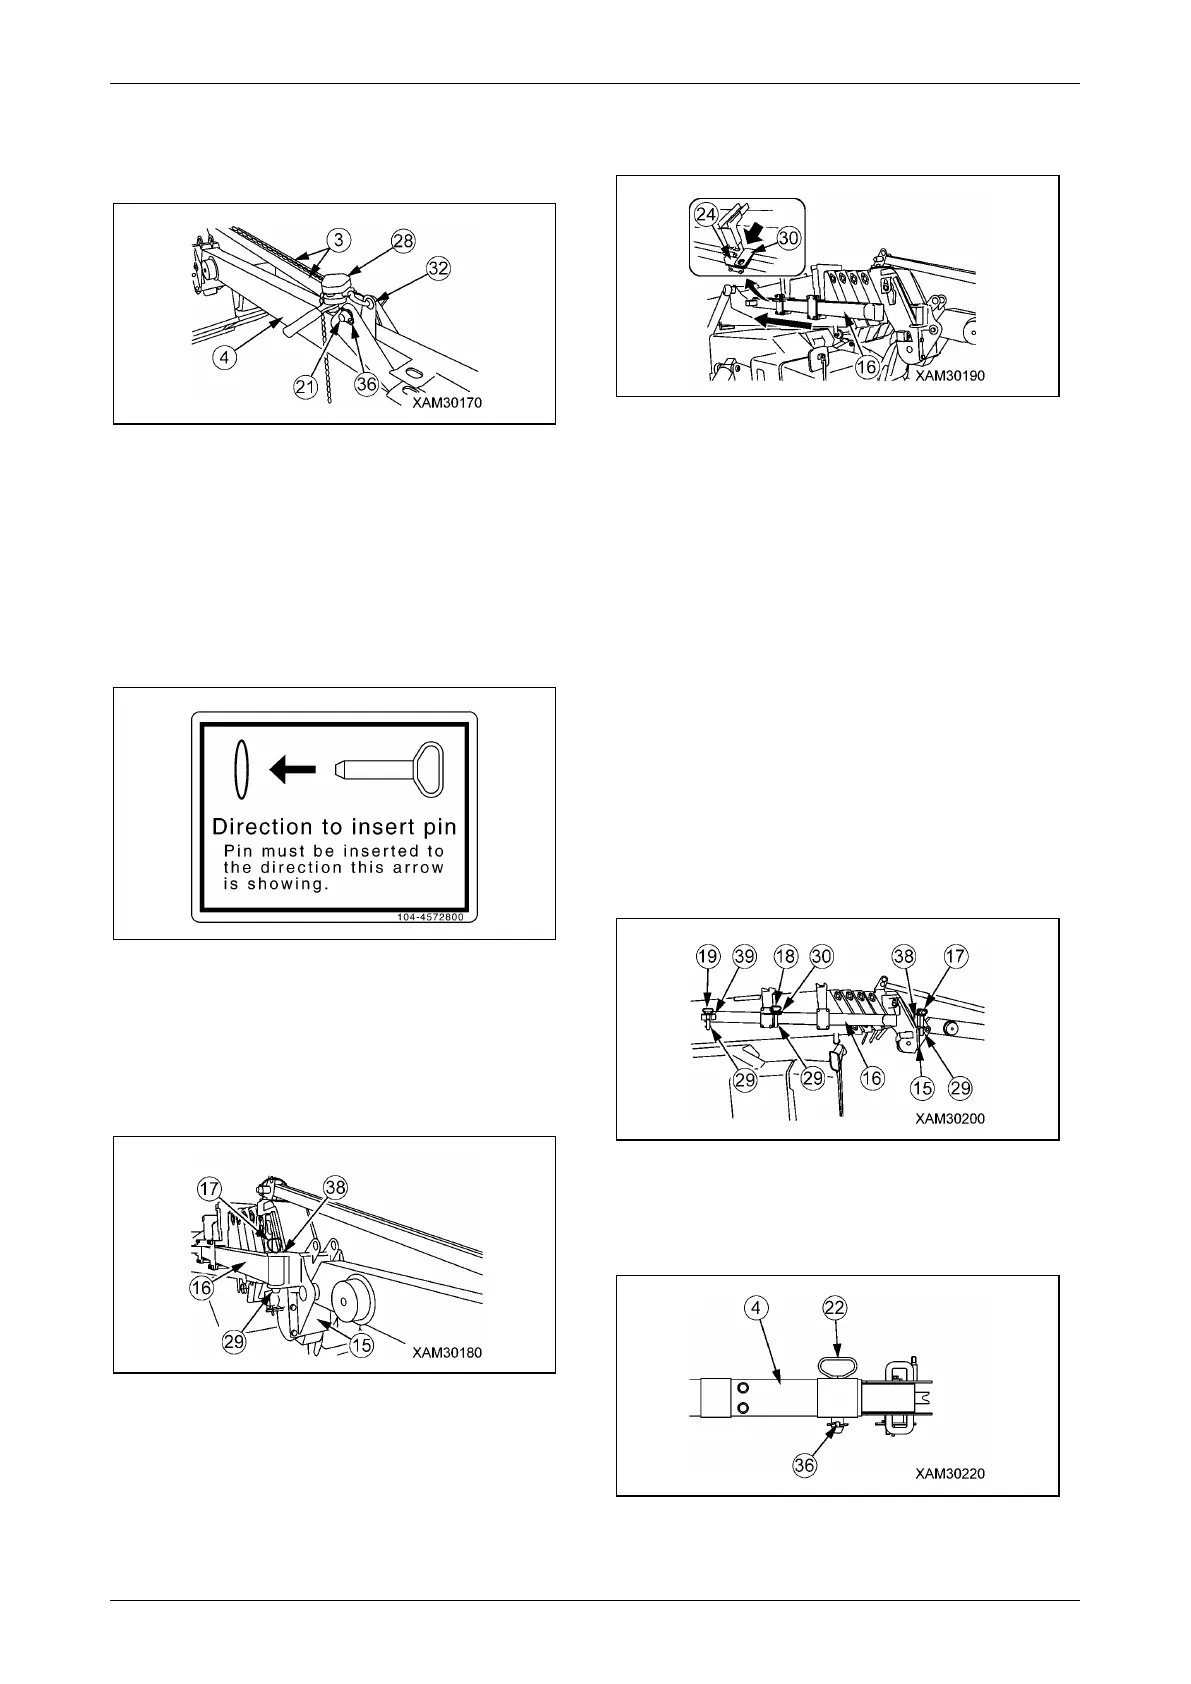
19. Insert position pin (21) (length: 135mm) into
the No.1 Fly-jib bracket (32), and lock
position pin (21) firmly by lynch-pin (36).
Fig. 4-444
CAUTION: According to decal on the machine
to insert position pin from the direction
shown in the figure. If you insert position pin
from opposite direction, it makes it difficult to
remove supporting rod because of
interference of lever block and grip of
position pin.
Fig. 4-445
20. Remove lever block (28).
21. Pull lynch-pin (29) out from position pin (17)
on the head of storage bar (16), then pull
position pin (17) (length: 150mm) out from
storage bar (16).
Fig. 4-446
22. Slide the storage bar (16) to the back edge
side of the main boom.
Fig. 4-447
NOTICE: Slide storage bar (16) until stopper (30)
of storage bar (16) hit the bar guide B (24), and
put the hole of stopper (30) and bar guide B (24)
together.
23. Insert position pin (18) (length: 55mm) into
the hole of stopper (30) on the centre of
storage bar (16), and lock position pin (18)
firmly by lynch-pin (29).
24. Insert position pin (19) (length: 95mm) into
the hole of the bracket (39) on the tail of
storage bar (16), and lock position pin (19)
firmly by lynch-pin (29).
25. Insert position pin (17) (length: 150mm) into
the hole of the bracket (38) of the No.1 Fly-
jib bracket (15), and lock position pin (17)
firmly by lynch-pin (29).
Fig. 4-448
26. Pull lynch-pin (36) out from position pin (22)
on the head of No.1 Fly-jib (4), then pull out
position pin (22).
Fig. 4-449
NOTICE: Position pin (22) which pulled out is
used to fix No.2 Fly-jib (5).