Mini-Crawler Crane M A E D A Section 5 – GENERAL MACHINE MAINTENANCE
1/2019 MC405C-3 5-75
Always use tap water when diluting. Contact us
or our sales service agency if river water, well
water, or water through the small water-supply
system is necessarily substituted for tap water.
The mixing proportion of super coolant is
recommended to be controlled by using the
super coolant concentration meter.
Cleaning Method
1. Remove the machinery cover as described
in "Removing Machinery Cover" on page 5-
18.
2. Ensure that the surface temperature of the
radiator cap (5) is as low as can be touched
with a bare hand, and slowly turn it until it
comes into contact with the stopper to
relieve the internal pressure.
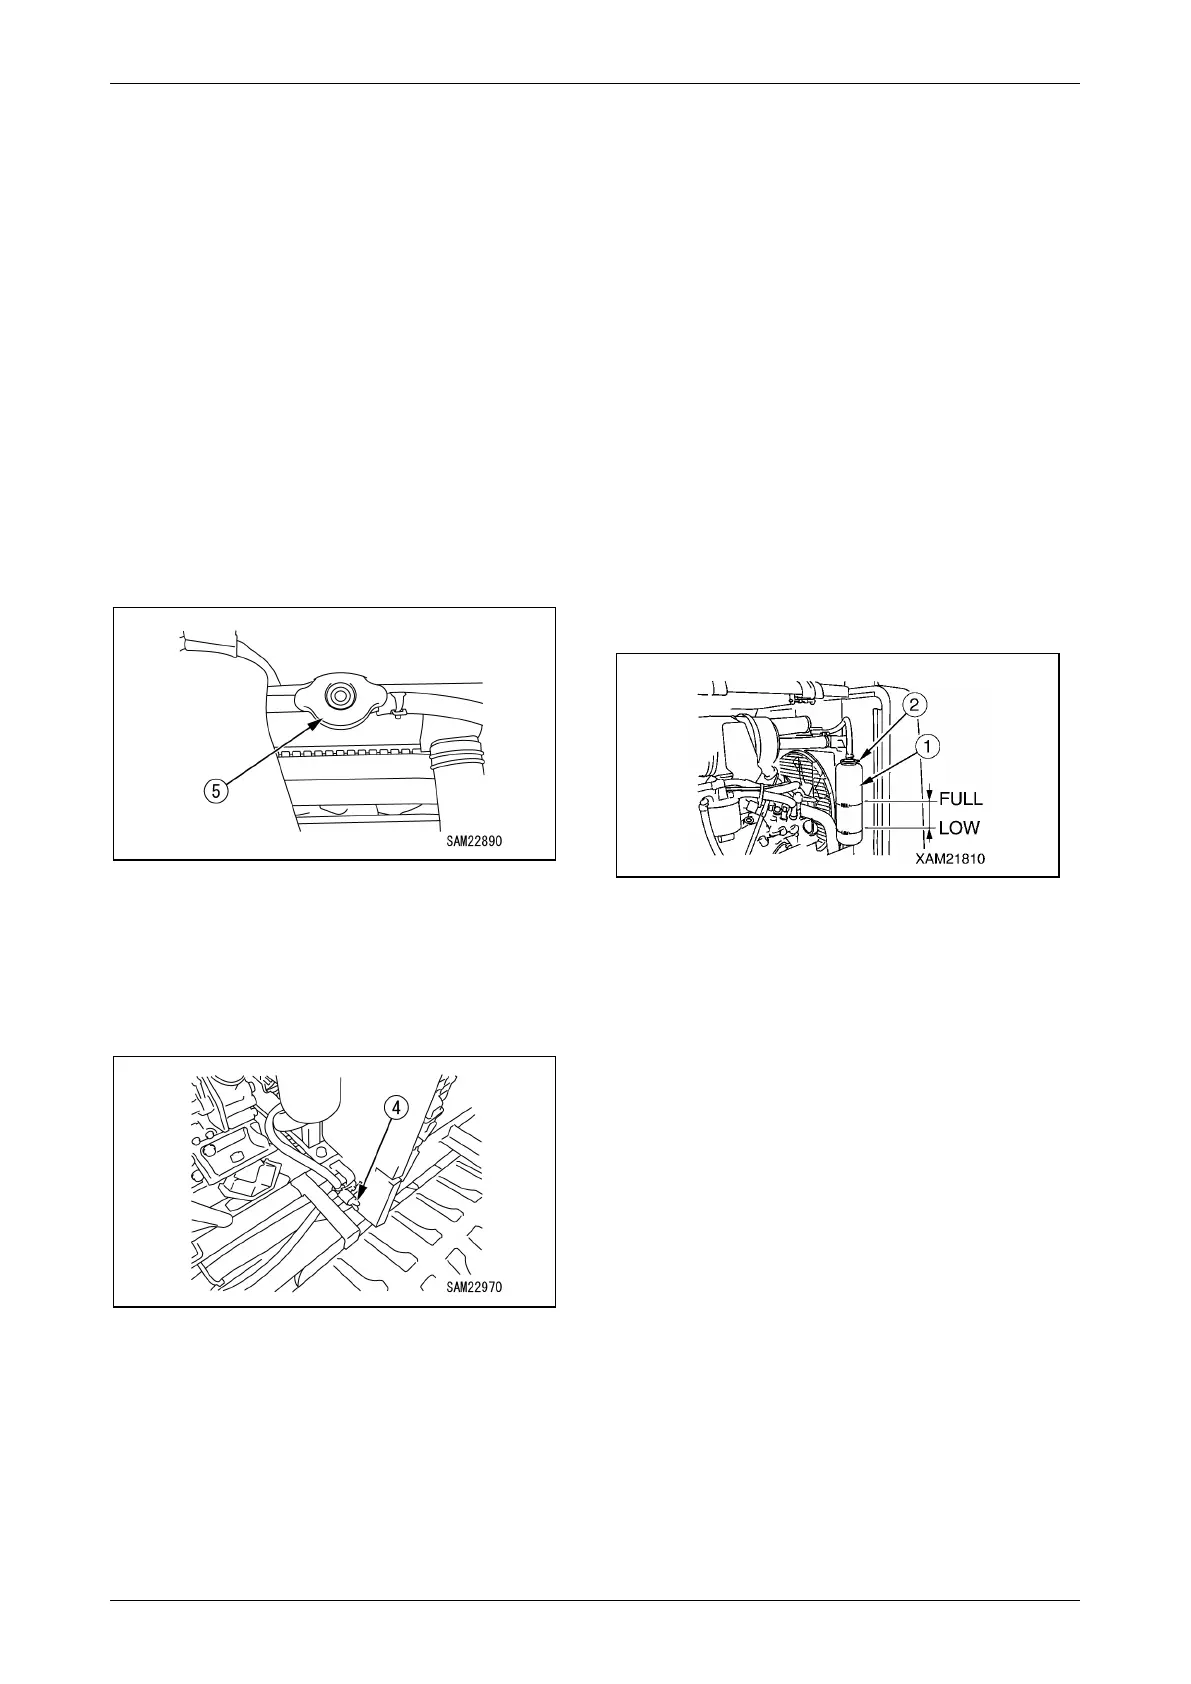
Fig. 5-190
3. Further, remove the radiator cap (5) while
turning it until it comes into contact with the
stopper.
4. Place a container underneath the drain plug
(4) to collect the coolant.
Fig. 5-191
5. Remove the drain plug (4) and drain the
coolant.
6. After draining, close the drain plug (4), and
inject tap water; when the radiator is filled
with water, start the engine, put it in low
idling state, raise the water temperature to
90 ºC, and run it for approximately 10
minutes.
7. Stop the engine, remove the drain plug (4),
and drain the coolant.
8. After draining, clean it using cleaning agent.
Clean according to instructions provided on
the cleaning agent used.
9. Close the drain plug (4).
10. Inject super coolant and tap water from the
water inlet up to the mouth. For the mixing
proportion of water and the super coolant,
see "Table of Mixing Proportion of Water and
Super Coolant" on page 5-74.
11. To remove air mixed into the coolant,
operate at low idling for 5 minutes, and a
further 5 minutes at high idling. (Keep the
coolant cap off at this time.)
12. Drain the coolant from the sub-tank, clean
the interior of the sub-tank, and fill with
coolant up to the middle point of FULL-LOW.
Fig. 5-192
13. Stop the engine, wait approximately 3
minutes, fill with tap water up to near the
water inlet, and tighten the cap.
14. Reattach the machinery cover as described
in "Installing Machinery Cover" on page 5-
18.