Procedures for Testing with the DX Host
megger.com 75
8. Use the Increase Current Display Scale (I+) or Decrease Current Display Scale (I-)
icons as needed to adjust the current’s scale.
a.
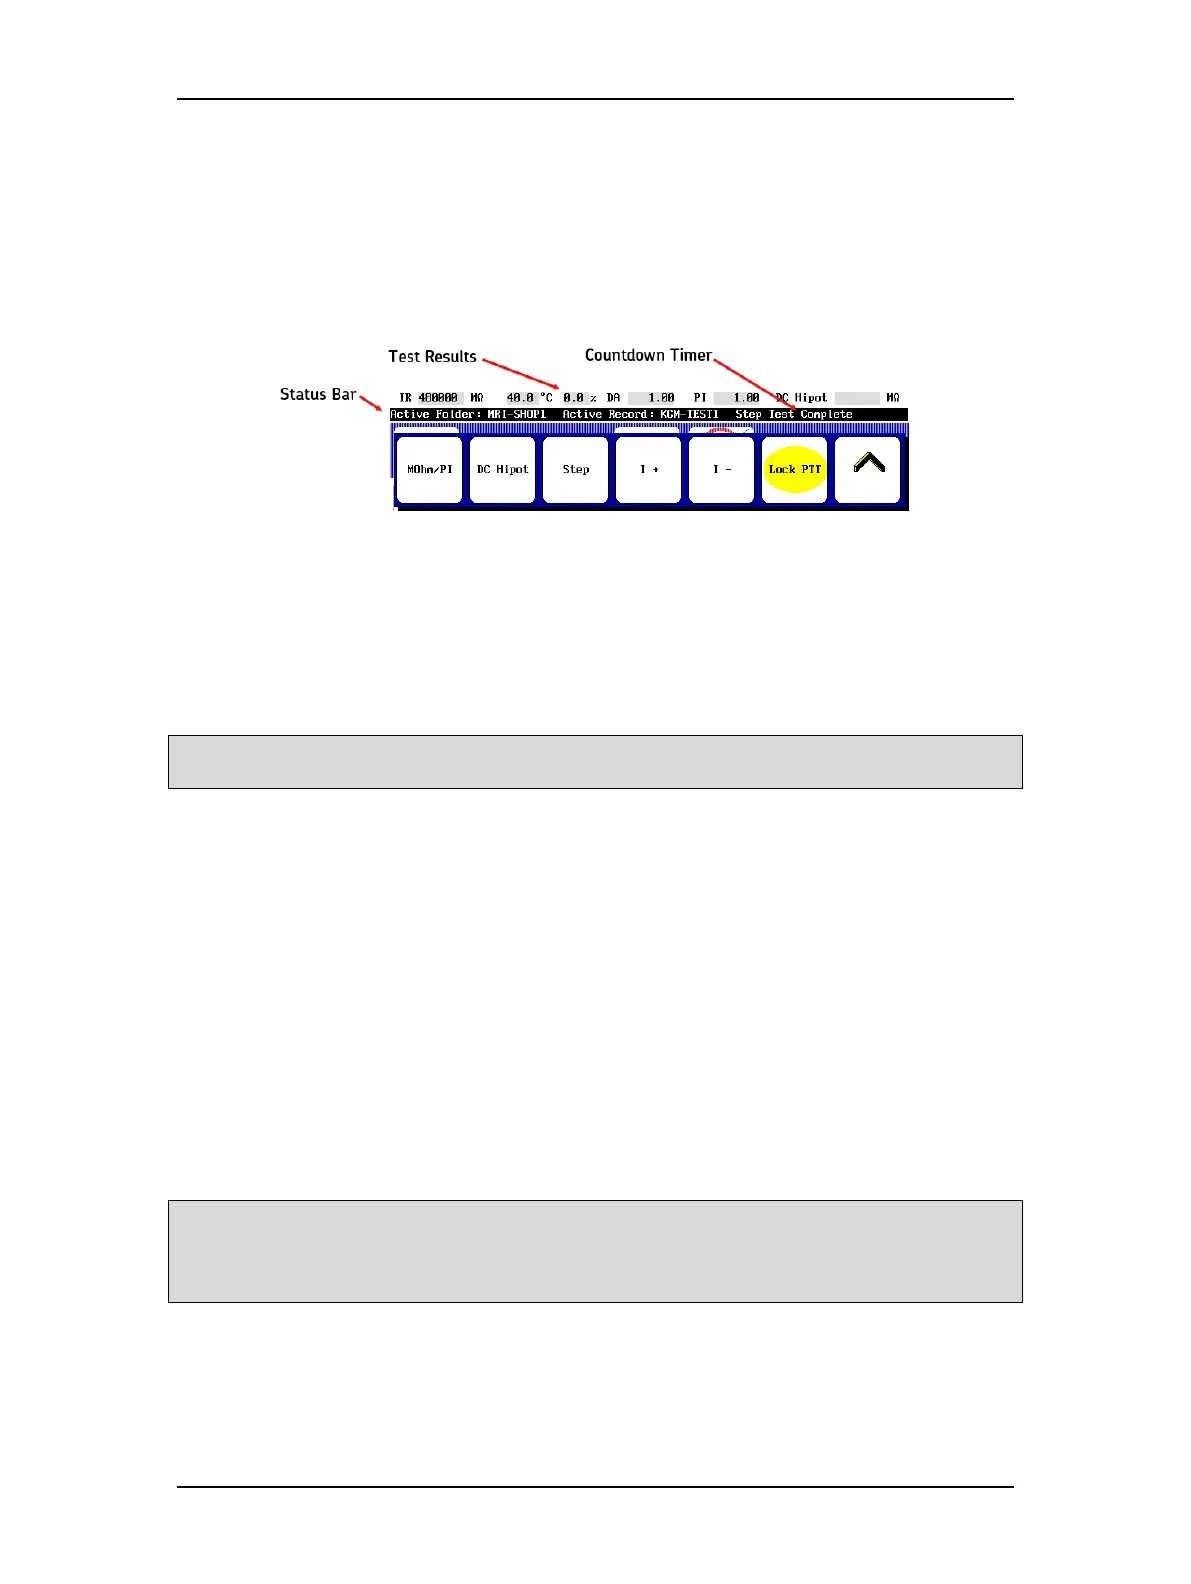
The Status Bar displays a countdown timer for each of the DC test run as shown
in the following example. The IR (MegOhm) test runs for 60 seconds, DA runs
for 180 seconds, and the PI test runs for 600 seconds. Conventional DC HiPot
runs for 60 seconds.
Figure 80. Status Bar with Countdown Timer.
b. As each test progresses, the strip just above the Status Bar displays the test
results as each test completes.
Conduct a Step Voltage Test
If needed or preferred, conduct a step voltage test following the PI test.
NOTE: Incremental steps have the advantage of quantifying the voltage at which a specific HiPot test fails
compared to the pass/fail results of the conventional test.
1. Touch the Fast or Slow icons as needed to set the ramp rate.
2. Use the Voltage Output Control knob to raise the voltage to the next step (1000 volts
for this example).
3. Touch the Step icon to program/set a 60-second test. The timer will begin the count
down. Repeat the process for each step until you complete the second to the last step.
(1500 volts is the third step for this example.)
4. For the last step, after raising the voltage level to the desired maximum voltage for your
motor, touch the DC HiPot icon to complete the process. (For this example, we use
2000 volts for the last step.)
5. When the test completes, and Lock PTT was selected, touch the Lock PTT icon to
unlock and release the testing process. Otherwise, release the Start (PTT) button, and
allow the unit to discharge completely before disconnecting test leads.
6. If you will be conducting a Surge test, do not disconnect high-voltage test leads.
NOTE: The HiPot overcurrent trip indicator detects any arc-over in the insulation and immediately stops
testing. The overcurrent trip will remove the high voltage from the test leads, stop the test, and display an
ARC DETECTED message on the front panel display. If you press the Push To Test button, it resets the trip
circuitry, removes the HIPOT TRIP message, and readies the tester for a new test.
7. Touch the Save icon to save the test results to the active folder and active record.
Conduct a Conventional DC HiPot Test
Alternatively, you can conduct just a conventional DC HiPot test to complete your DC testing.