Procedures for Testing with the DX Host
megger.com 101
NOTE: After saving your test data, the software will ask if you want to save the reference. You can assign a
name to the reference at this time if you have not done so already. If you have already given the reference a
name and saved it during another step, you can simply press cancel to complete the process.
Switching Active Leads
By default, the Baker DX tests coils with lead 1 set as the active lead (hot side). Surge flow starts
from this direction. If you want to switch surge flow direction to test your coils, you should
consider the following issues.
Typically, you will have a different wave shape when you switch from 12 (lead 1 active) to
2
1 (lead 2 active) because various factors (such as the pole, direction of current flow through
the circuit) can affect the waveform shape. For this reason, a different reference waveform will
be needed for each direction.
If test lead reversal is required or desired, you should test all coils with lead 1 active and using an
appropriate reference waveform first. After pressing the Select active lead icon to activate lead
2 (icons display 2
1), ramp up a known good coil as described in the process above to obtain a
new reference waveform and set the new reference before testing all coils with lead 2 active.
After setting the new reference, testing with the Zero Start Override process can be used for all
remaining coils.
NOTE: For Baker DX testers using the single-lead option, you will need to manually switch the red test lead to
coil lead 2 and the black ground lead to coil lead 1.
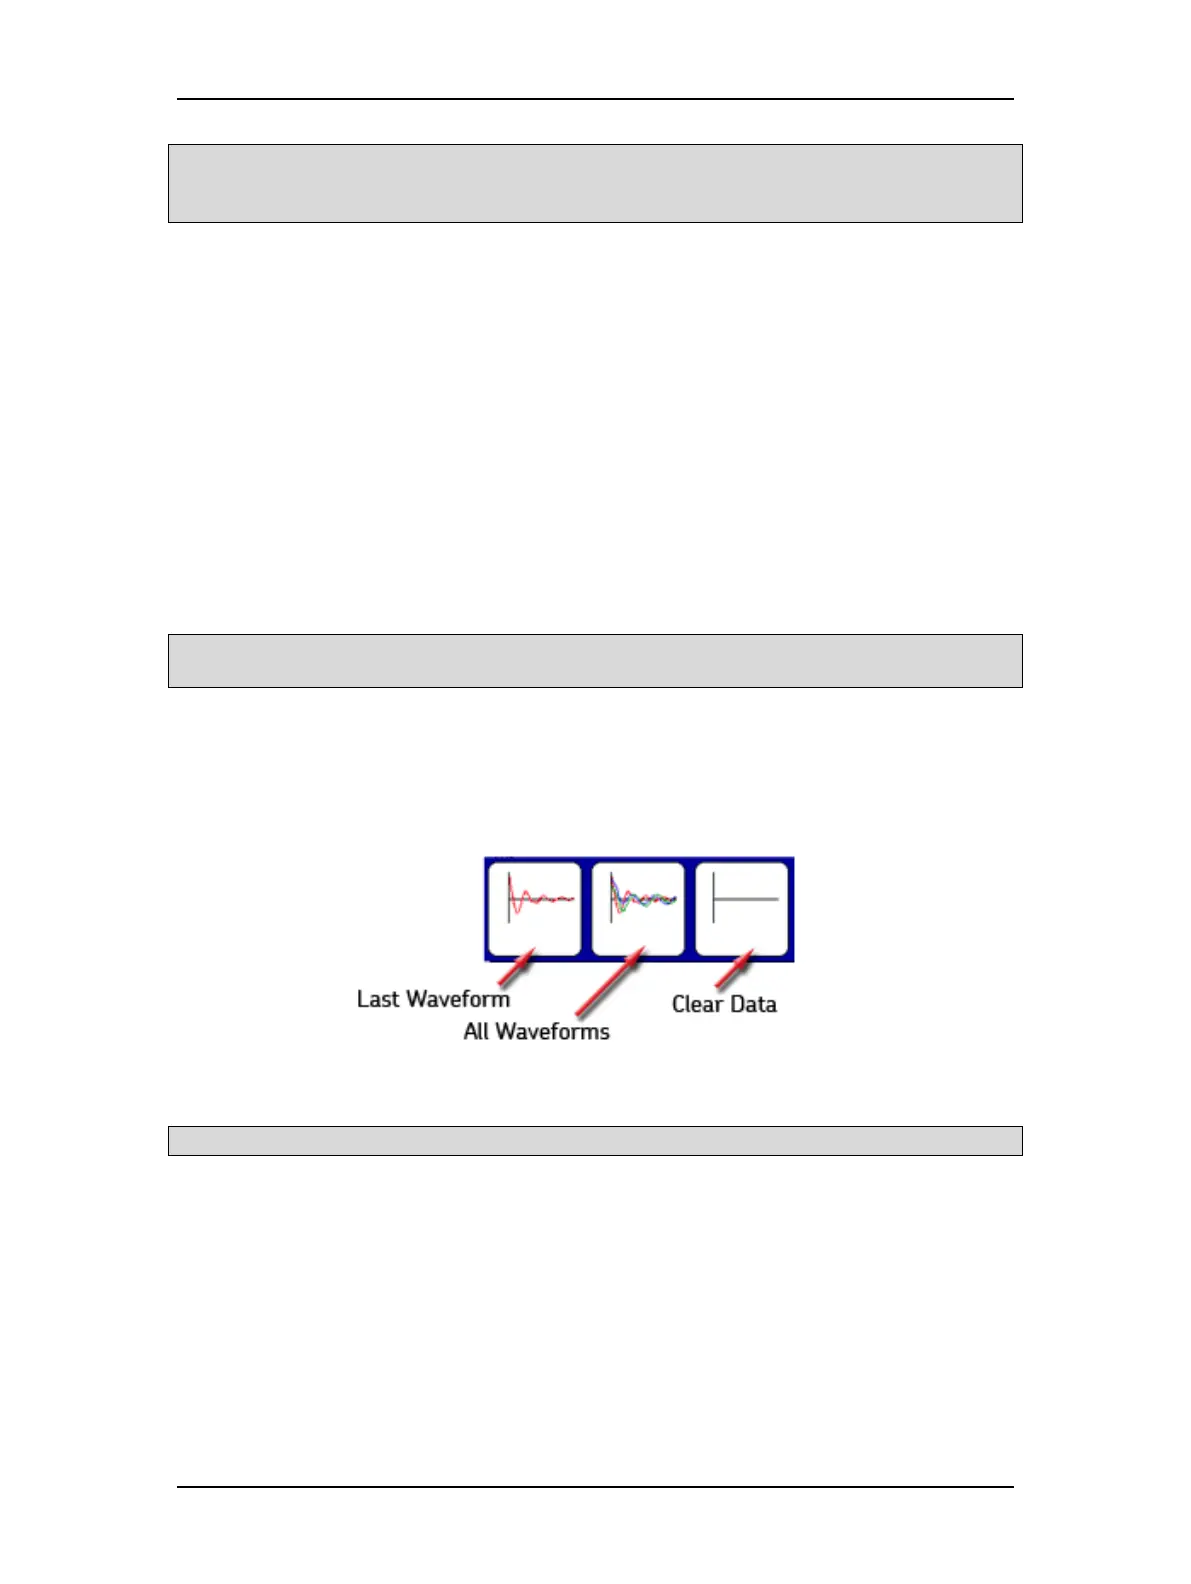
Viewing Coil Test Results
1. As you work through the testing process, you can view the results of testing a series of
coils by touching the Waveform Selection icon. A new set of options appears in
popup menu as shown below.
Figure 113. Waveform selection submenu.
NOTICE: Selecting the Clear Data icon immediately deletes all data and the reference test.