Procedures for Testing with the DX Host
104 Baker DX 71-030 User Guide EN V10 www.megger.com
Partial Discharge Testing–Single-coil Mode
Refer to the “Partial Discharge Testing Overview and Preparation” section found earlier in this
chapter for details on PD testing and setting up for the process.
Performing PD Tests–Single-coil Mode
PD testing for single-coils follows a similar procedure to regular Surge testing in single-coil mode.
NOTE: For a basic overview on partial discharge testing and information on preparing for PD testing, refer to
“Partial Discharge Testing Overview and Preparation” found earlier in this chapter.
1. If you are not already there, ensure that the tester is in Surge testing single-coil mode.
2. For this example, touch the Standalone Unit icon then the Coil Mode Selection icon
in the Mode Submenu.
3. From the popup menu, select the Single-coil mode icon.
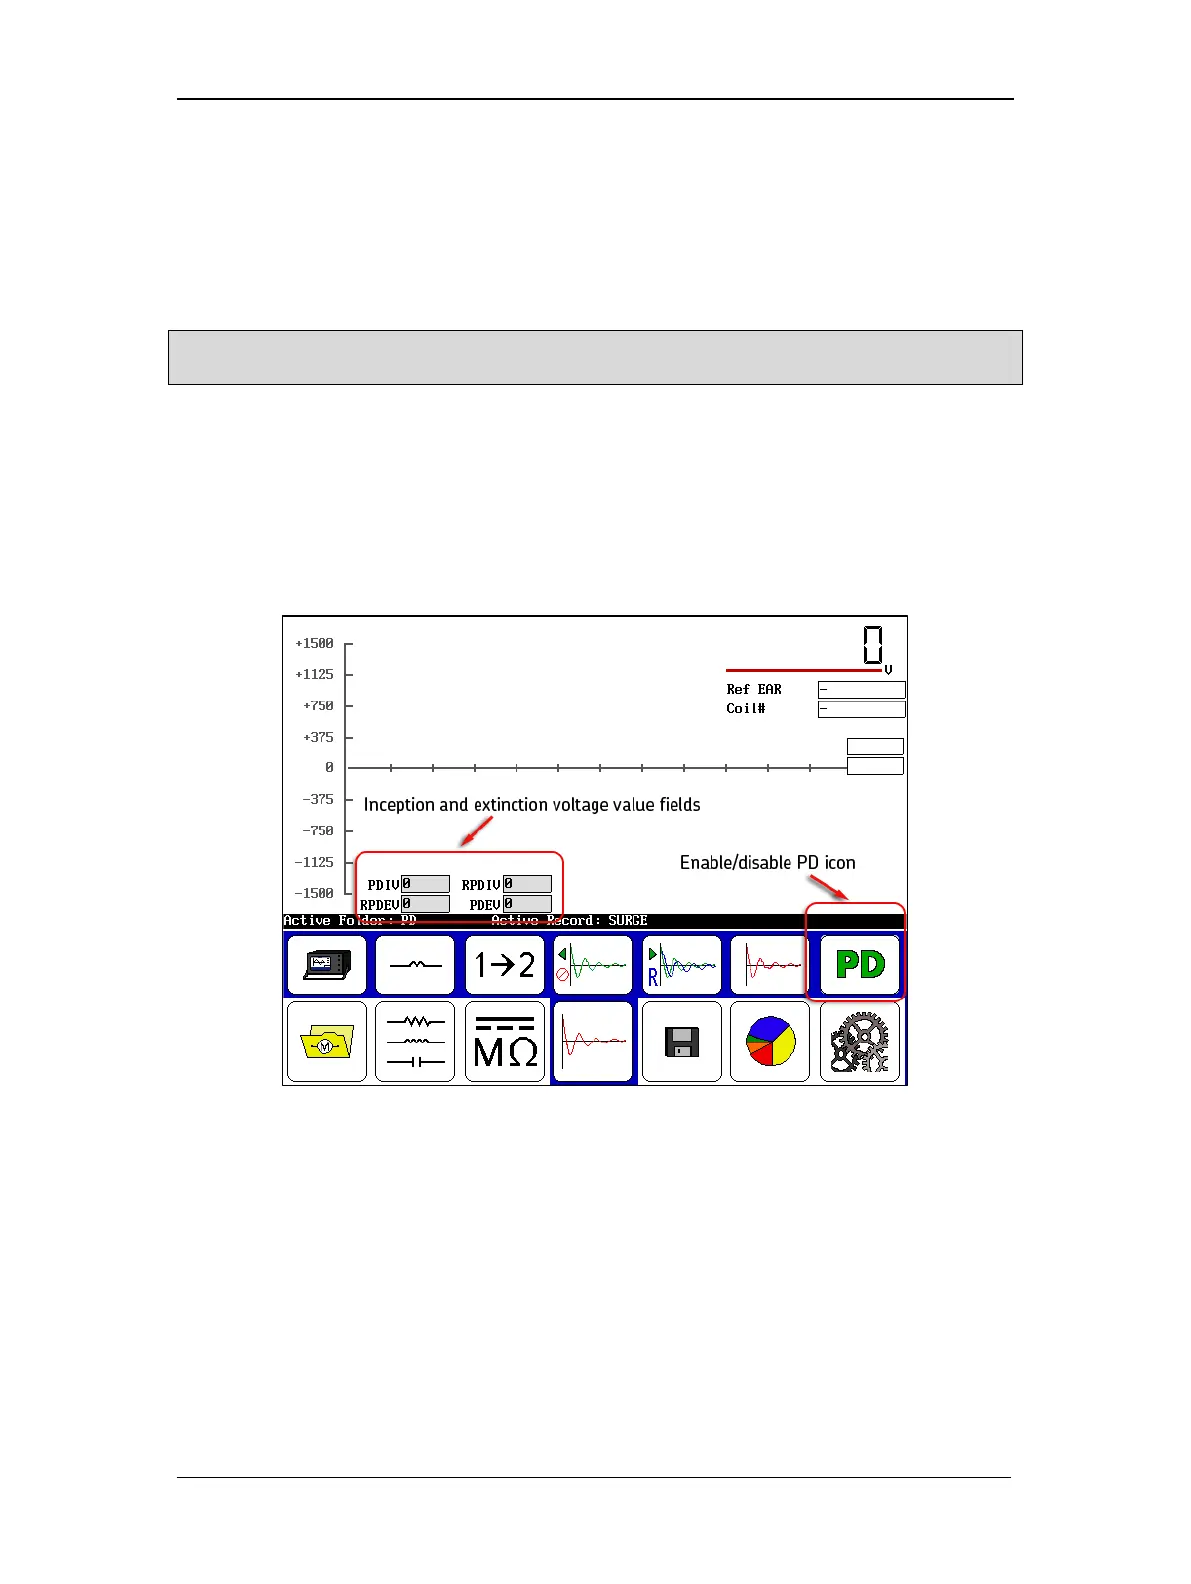
4. Touch on the Enable PD icon on the right side of the screen. This activates the detector
circuit and tells the tester to display a PD waveform along with the surge waveform.
Figure 116. Enabling PD testing.
After the enable PD icon is touched, the inception and extinction voltage value fields will appear
as shown above. Other PD display elements will appear after testing begins.
5. Touch the 12 icon to test the coil from lead 1 to lead 2. Testing with lead 1 active is
required; testing with lead 2 active is not necessary for PD testing.
6. Hold down the PTT button and use the Voltage Output Control knob to ramp up the
voltage slowly and evenly.
7. Ensure that ramping is slow enough to allow observation of PD events.