A
THE ENGINE
Refitting the
cylinder head
Make
sure
that
the surfaces
of
both the cylinder
head and
the cylinder block
are
clean.
It will be noticed that the
cylinder
head gasket
is
marked ‘FRONT’
and ‘TOP’
to
assist
in
replacing
it
correctly
with the
copper
side
uppermost.
Having slipped the gasket
over
the
studs,
next
lower'the
cylinder head
into position.
Replace
the
vacuum
control
pipe
clip
and
fit the
seven
cylinder head external
nuts
■nger
tight.
Replace the push-rods
in
the
positions
from which they
were
taken.
Replace
the rocker assembly
and
securing
nuts
■nger tight. Tighten the
1]
cylinder head
nuts,
a
turn at
a
time, in
the order
given in
Fig.
A.2.
Finally,
tighten
the
four rocker
assembly
nuts.
Reassembly
continues in
the
reverse
order
to
the
dismantling procedure.
Switch
on
the
ignition
and check the fuel
system
for leaks.
Start
the
engine
and
run
it until
the
normal working
temperature
is
reached.
Remove the rocker
cover
and check
the valve
clearances
(see
Section
A.7).
Replace the
rocker
cover
and
connect
the breather hose.
Section A.7
VALVE GEAR AND VALVES
Removing
and
replacing
valves
Remove the
cylinder head
as
in
Section A.6.
Remove
the valve circlip.
Compress
the
double valve
springs, using
Service tool 18G45, and
remove
the
two
valve
cotters.
Release
the
valve
springs
and
remove
the
compressor,
valve
spring
cap,
shroud
(early
engines
only),
inner
and
outer
springs,
and
bottom
collar.
Fig. A.4
Parts
of
the valve assembly, showing
the valve,
cotters,
circlip, bottom collar, double
valve springs, shroud (early
engines only),
packing ring, and
spring
cap.
The inset
shows
the
valve
packing
ring fitted
correctly
at
the bottom
of the
cotter
groove
below the
cotters
A.8
Hutu!"
mmmmmmmmmllltII
Vlllll
\“
A483“
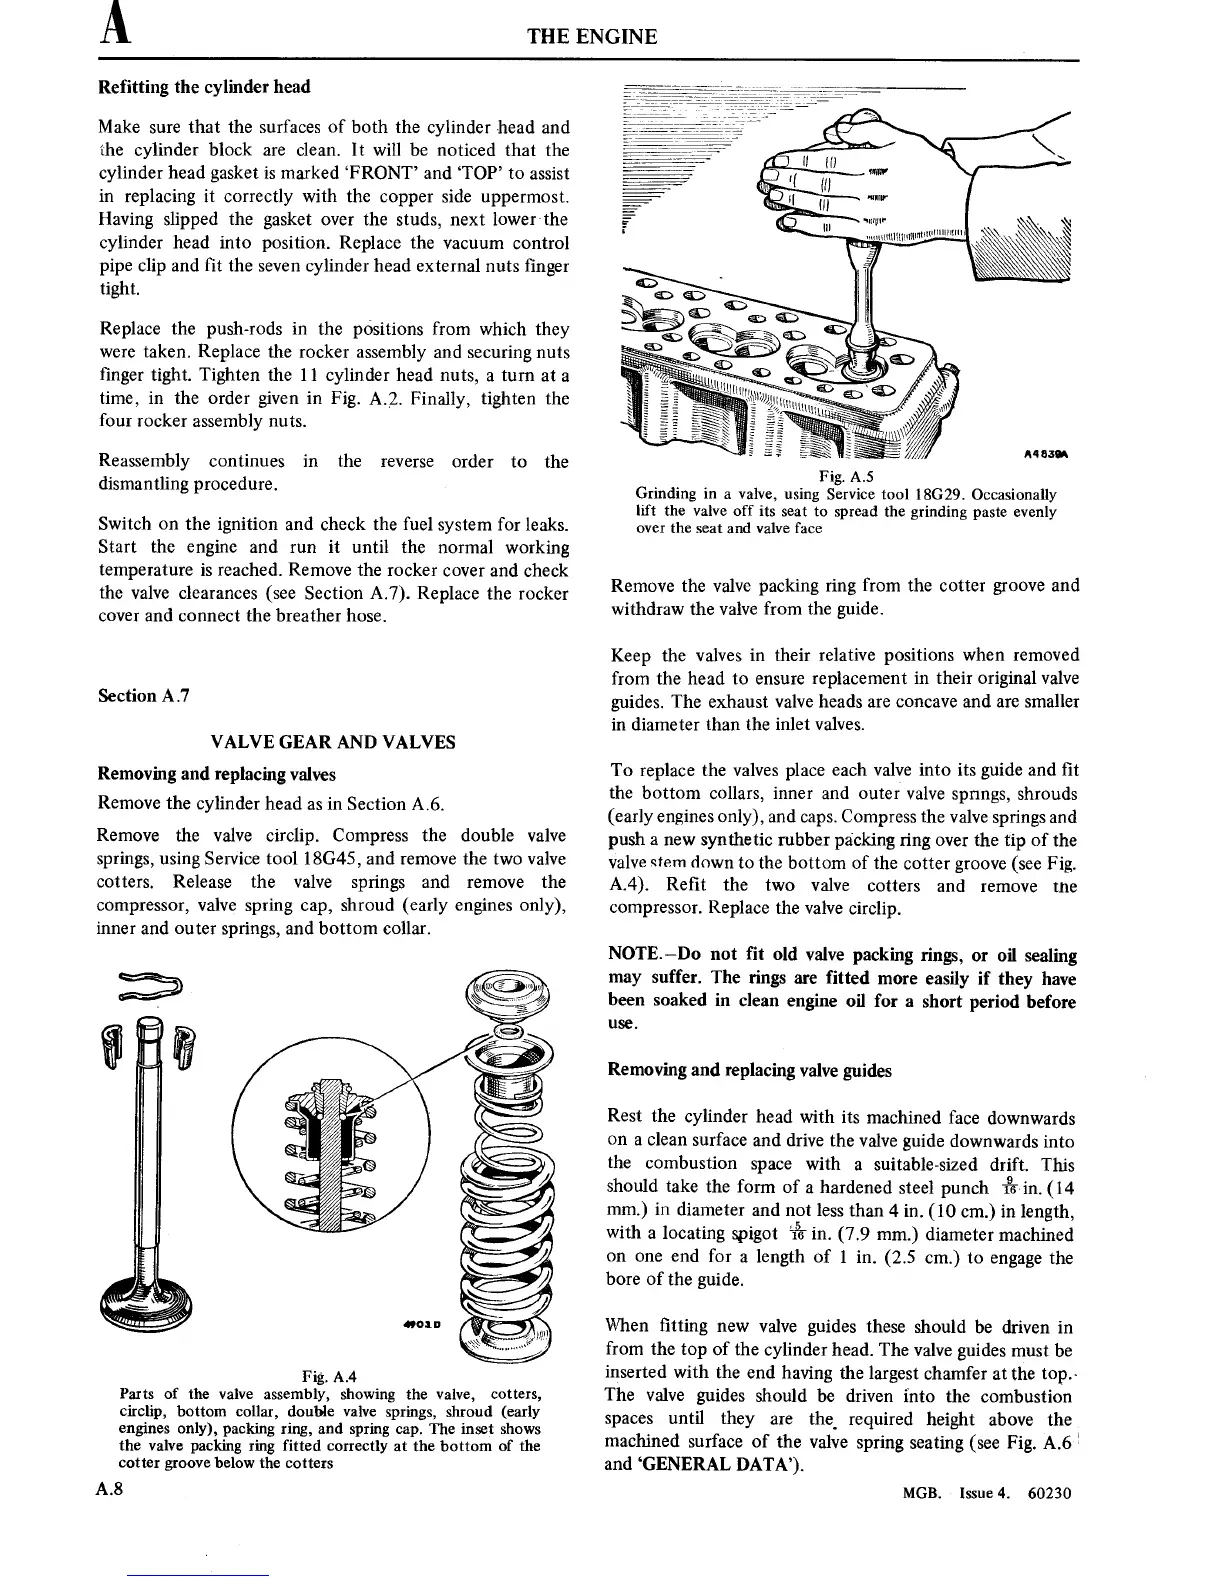
Fig.
A.5
Grinding
in
a
valve,
using Service
tool
18G29.
Occasionally
lift
the valve off
its
seat to
spread the
grinding
paste
evenly
over
the
seat
and
valve
face
Remove
the valve packing
ring
from the
cotter
groove
and
withdraw the valve
from the guide.
Keep the valves
in
their
relative
positions
when
removed
from the head
to
ensure
replacement
in
their original valve
guides. The
exhaust
valve
heads
are concave
and
are
smaller
in
diameter than the inlet
valves.
To
replace the valves place
each valve
into its
guide and ■t
the bottom
collars,
inner
and
outer
valve
springs,
shrouds
(early
engines
only),
and
caps.
Compress
the
valve
springs
and
push
a
new
synthetic
rubber packing
ring
over
the
tip
of
the
valve
stem
down
to
the bottom
of
the
cotter
groove
(see
Fig.
A.4).
Re■t the
two
valve
cotters
and
remove
the
compressor.
Replace
the valve
circlip.
NOTE—Do
not
fit
old valve
packing
rings,
or
oil sealing
may
suffer.
The
rings
are
fitted
more
easily if
they have
been soaked
in
clean
engine oil for
a
short
period before
use.
Removing and
replacing
valve guides
Rest the
cylinder
head
with
its
machined face
downwards
on
a
clean surface
and
drive the
valve guide
downwards
into
the
combustion
space
with
a
suitable-sized drift.
This
should
take the form
of
a
hardened
steel punch
T96
in.
(14
mm.)
in
diameter
and
not
less than
4
in.
(10 cm.)
in
length,
with
a
locating
spigot
%
in.
(7.9
mm.)
diameter machined
on one
end
for
a
length of
1 in.
(2.5
cm.)
to
engage
the
bore of the
guide.
When ■tting
new
valve
guides these
should be driven
in
from the
top
of the
cylinder head.
The
valve guides
must
be
inserted with the
end having
the largest chamfer
at
the
top.~
The
valve
guides should
be driven
into
the
combustion
spaces
until
they
are
the.
required height
above the
machined
surface
of the
valve
spring
seating
(see
Fig.
A.6r
and
‘GENERAL DATA’).
MGB. Issue4. 60230