Maintenance
314
S3300 Smart Managed Pro Switch
3. Click the Apply button.
The updated configuration is sent to the switch. Configuration changes take effect
immediately
.
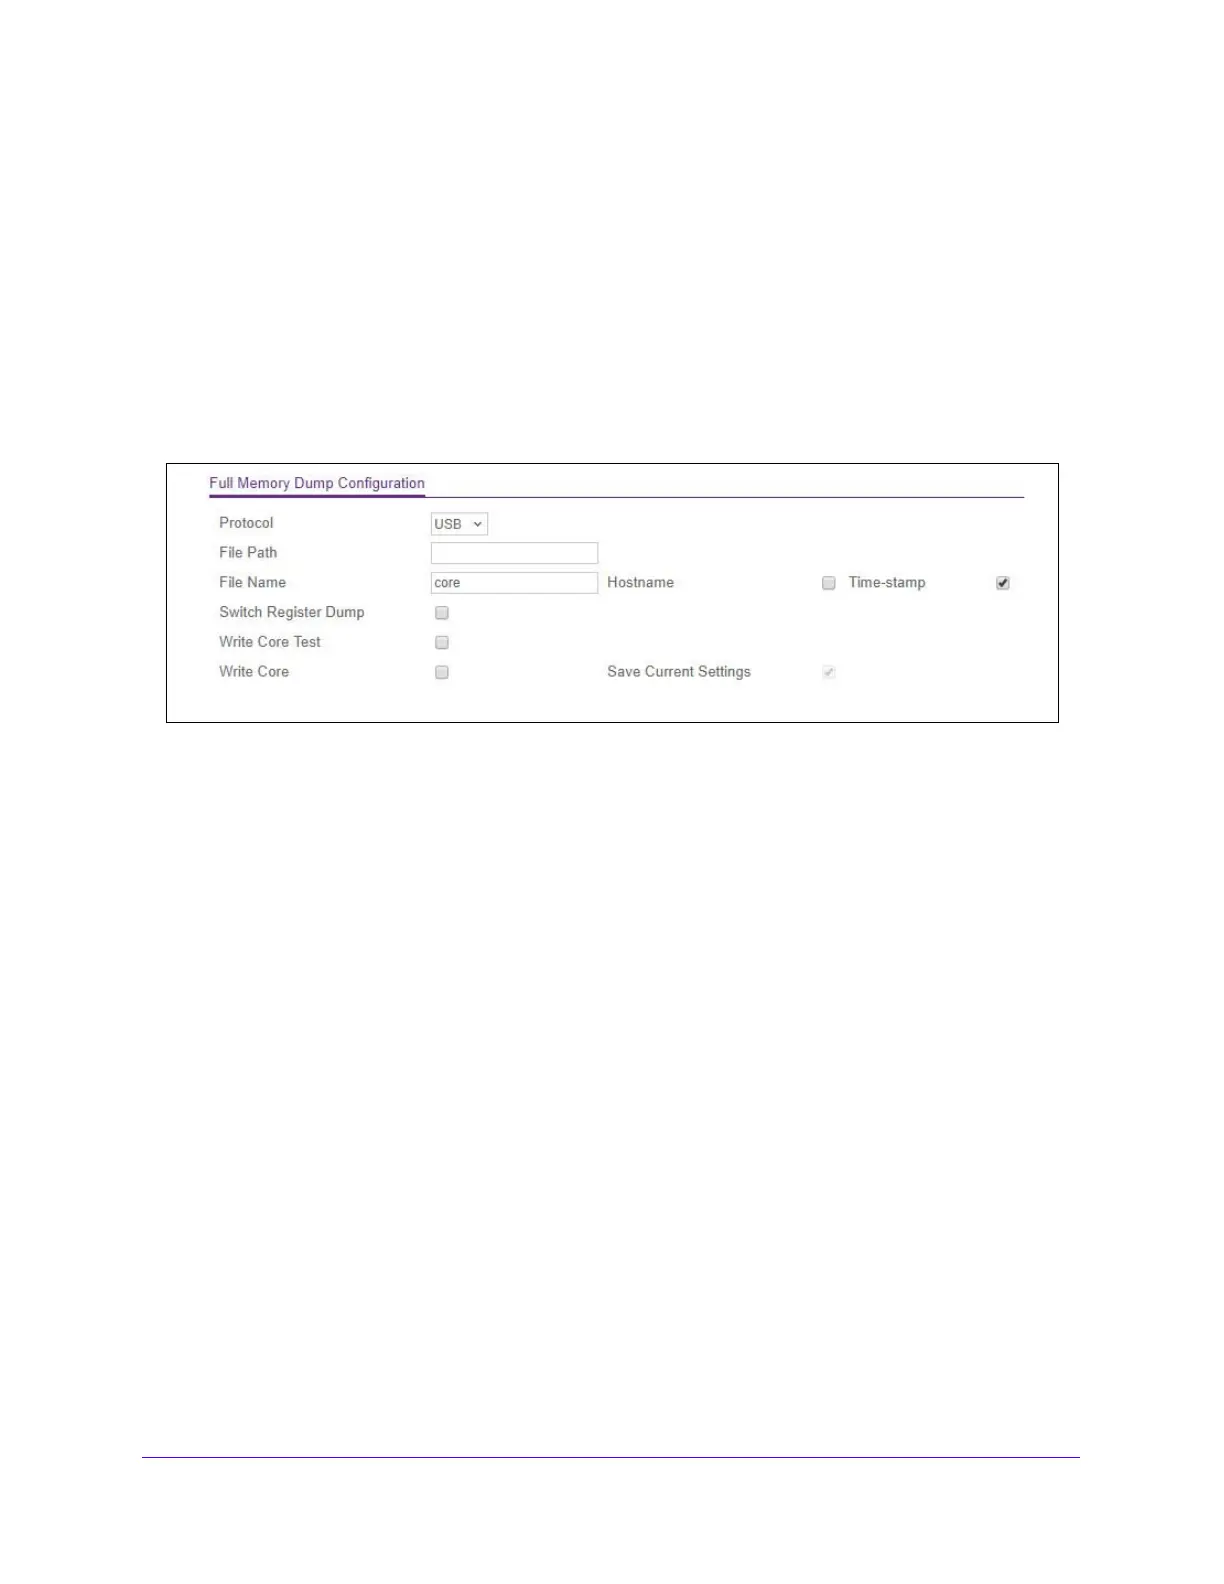
Full Memory Dump
Use this screen to tell the switch to do a full memory dump to help with troubleshooting.
To display the Full Memory Dump screen, click Main
tenance > Troubleshooting > Full
Memory Dump.
Figure 115. Full Memory Dump
1. Specify the Protocol used to store the coredump file. Possible values are:
a. None — Disable coredump.
b. USB — Set USB protocol.
2. S
pecify the File Path to store the coredump file. The file path must consist of -, _, / and
alphanumeric characters. Up to 64 characters can be used. The factory default is ./..
3. In
the File Name field, specify the coredump filename. Up to 15 characters can be used.
The filename must consists of -, _ and alphanumeric characters. The factory default is core.
4. Select the Hostname option to app
end a hostname to the coredump filename.
5. Select the T
ime-stamp option to append a time-stamp to the coredump filename.
6. Select the Switch
Register Dump to dump the switch-chip-register in case of an exception.
7. If
you specified USB as the protocol, the Write Core Test option appears. Select the Write
Core Test option and press Apply to test the core dump setup. In this case, the File Name
value will be used as the destination filename.
8. If
you specified USB as the protocol, the Write Core option appears. Select the Write Core
option and press Apply to create a core dump and store it in the previously configured
external server. Execution of this procedure causes a reload of the device.
9. Select the Sa
ve Current Settings option to save the current configuration settings of the
system.
10. Click the Appl
y button to send the updated configuration to the switch. Configuration
changes take effect immediately.