Section 2 NS Series Functions 2-8 Common Functional Object Functions
2-88
NS Series Programming Manual
N
N
N
o
o
o
t
t
t
e
e
e
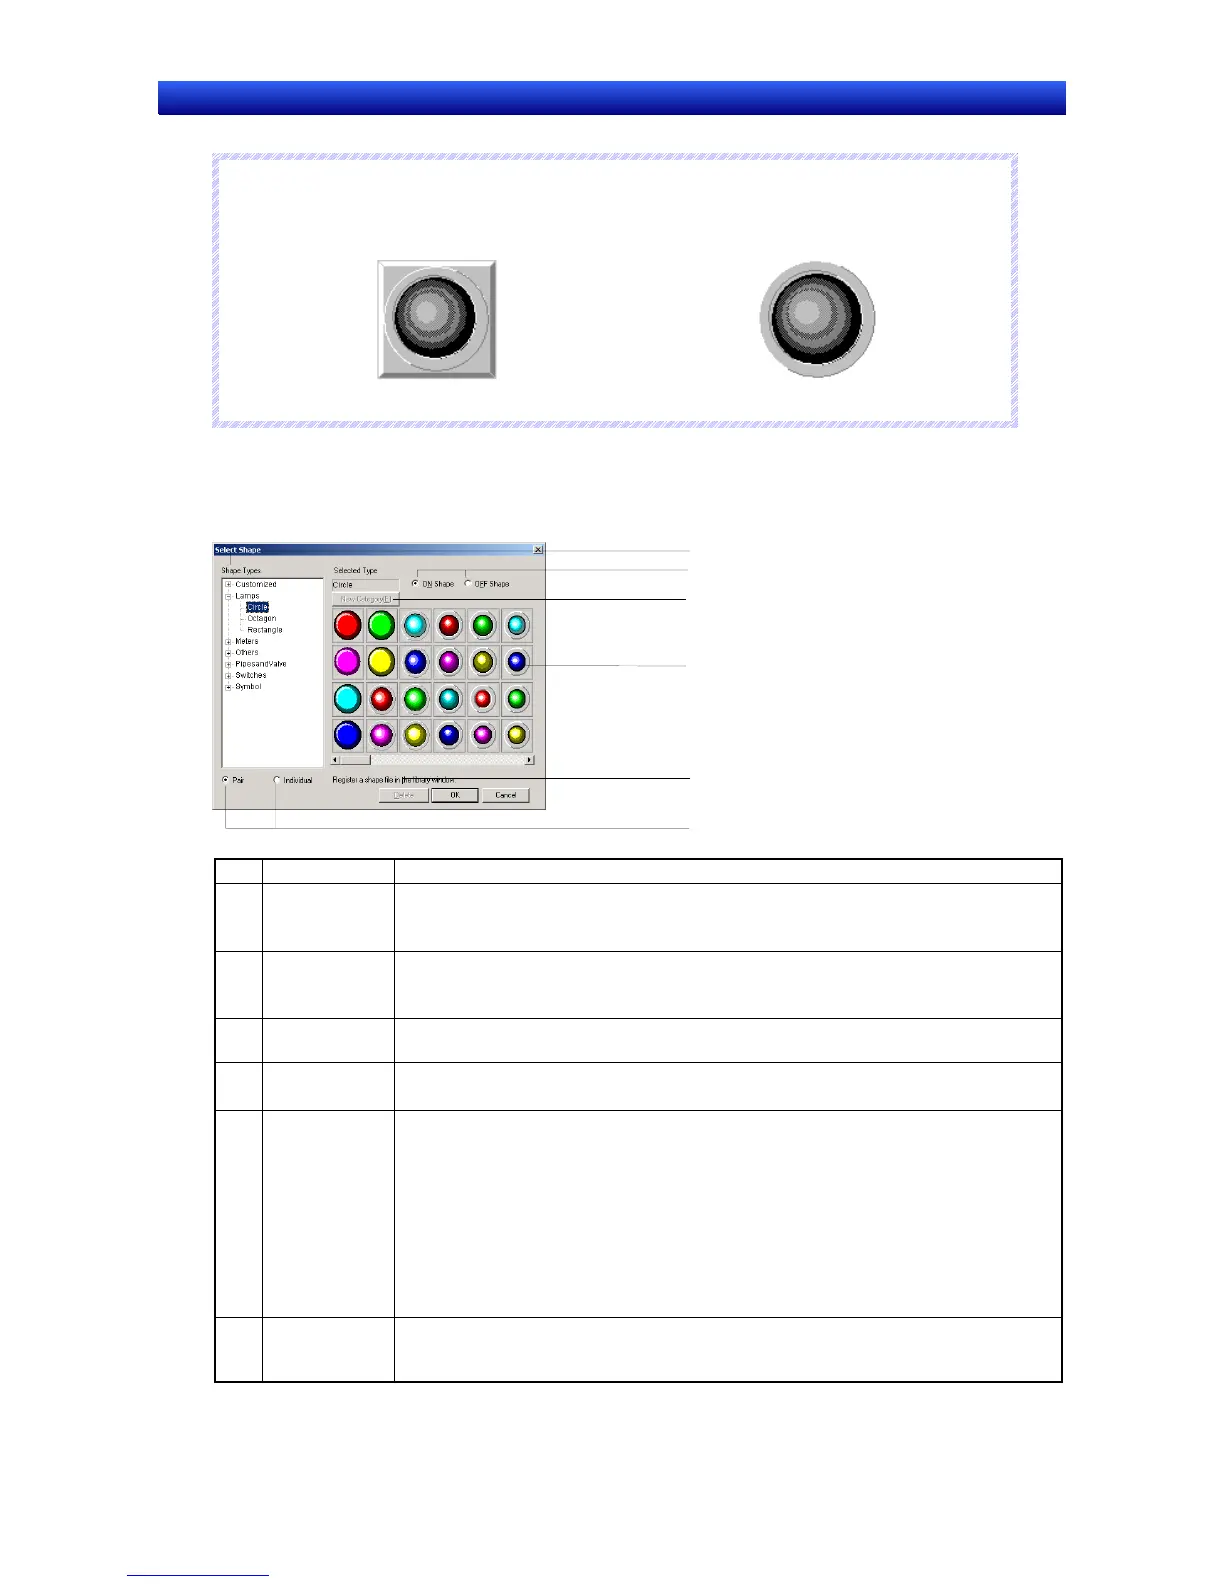
The frame and background within the frame will be transparent if both frame and border are set to
OFF on the Frame Tab Page.
♦
Frame and border set to ON.
Frame and border set to OFF.
Selecting Shape
Select the shape to be displayed in the Select Shape Dialog Box. Click the shape type to be displayed
as the functional object and click the OK Button to set that selection.
1
2
3
4
5
6
No. Setting Details
1 Shape Types Select the shape type group that will be displayed on the shape selection list.
If the group is selected from the directory tree, the specified group will be displayed on
the shape selection list.
2 Pair/Individual Select this option to automatically set the ON/OFF shapes in pairs. This option will be
disabled (grayed out) for fixed objects for which ON/OFF pairs are not available.
Select Individual to select the ON and OFF shapes individually.
3 ON Shape/
OFF Shape
Switch the display between ON and OFF shapes. This option will be disabled (grayed
out) for shapes for which ON/OFF pairs are not available.
4 Shape selec-
tion list
Displays the shapes that can be selected.
Click the shape to be selected for display.
5 New Category/
Edit Category
Click this button to add a shape type category name to the shape type directory tree or
to change an existing category name. The buttons will be enabled when Customized is
selected in the directory tree.
When the New Category Button is clicked, a New Category Dialog Box will be dis-
played. Input the shape type name and click the OK Button. The new name will appear
under Customized in the directory tree.
Up to 7 categories can be added. When a shape type under Customized is selected,
the button will change to enable changing shape type names. If the Edit Category
Button is clicked, a dialog box will appear to enable changing the name. Input the new
name and click the OK Button.
6 Delete Deletes shapes from under Customized in the directory tree. Select shape to be de-
leted and click the Delete Button. A confirmation dialog box will be displayed. Click the
OK Button to delete.

 Loading...


