Administrator’s Guide for the Polycom RealPresence Group Series Troubleshooting
Polycom, Inc. 168
If you prefer, you can have the system prepare the SD card by rewriting the data with zeroes and
reformatting the card, thereby eliminating any traces of old data. Be aware that this step adds about 20
minutes to the beginning of the factory restore process, when all you will see is a blank screen. You will
notice, however, that the LED indicator shows a fast blink of blue and amber lights during this process. The
lights blink normally during the rest of the restore process.
To reset the system to its factory partition software using a USB device:
1 Copy the build package (.tar file) and the sw_keys.txt file to the root directory of a USB device.
2 (Optional) Create a text file named zeroize.txt on the root directory of the USB device, then edit
the file by entering the word TRUE in all capital letters.
If the zeroize.txt file contains the word FALSE, or if the file is not in the root directory of the USB
device, the system uses the standard method of erasing data from the SD card.
3 Power down the system and plug the USB device into your system.
4 While holding the restore button, press the power button once.
5 Keep holding the restore button for 10 more seconds, then release it.
The software version of the update file on the USB device is displayed in the web interface.
6 Click Start Update to begin the factory restore.
After the SD card is prepared, the system displays the Polycom startup screen and the usual software
update screens on HDMI monitors. Other types of monitors will be blank. Do not power off the system during
the factory restore process. The system restarts automatically when the process is complete.
Deleting Files
You can remove customer data and configuration information from the system for security purposes.
To perform a logical delete of the system files:
1 For RealPresence Group 300, 500, and 700 systems, power off the system by holding down the
Power sensor for 3 to 5 seconds. For RealPresence Group 550 systems, power off the system using
the power switch.
2 Unplug all network connections.
3 Perform a factory restore.
4 Wait for the system to start up and display the setup wizard.
5 Power off the system.
Performing a Factory Restore on the Polycom Touch
Control
If the Polycom Touch Control is not functioning correctly or you have forgotten the Administration password,
you can use the restore button to reset the device. This operation completely erases the device’s settings
and reinstalls the software.
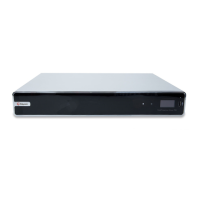
The restore button is on the underside of the Polycom Touch Control, as shown in the following figure.
 Loading...

