Section 07: TRANSMISSION
PA1562
14
excess grease from the exterior of the clutch
disc hub. It is very important that no
excess grease is left on the exterior of
the clutch hub or clutch disk!
• Install two temporary pilot studs (7/16-14, 3”
long), placing them on the same diameter,
180
o
apart. These are used to aid in the
alignment of the clutch pressure plate.
• Verify that the pilot bearing is seated
properly in the flywheel. Insert a clutch
alignment tool (SAE 2” DIA, 10 Spline)
through the clutch disc and into the pilot
bearing. PLEASE NOTE: the direction
matters – the large side of the hub should
face the clutch pressure plate. The clutch
disc hub should be marked “flywheel side” –
this side should face the flywheel.
• Use the clutch alignment tool to keep the
clutch disc in the proper position and align
the clutch cover with the two studs. Push the
cover in place in the direction of the flywheel
and start installing the clutch bolts. Use
Lock-Tite for each bolt. Install, but do not
torque, the 10 bolts. Remove the two pilot
studs and in their place install the remaining
2 bolts.
• When the bolts are hand tight, be sure that
the clutch cover fits into the flywheel
centering ring. Tighten each bolt a little at a
time, in a crisscross pattern, until the
pressure plate cover contacts the flywheel
face. Once the cover has touched the face
of the flywheel, torque the clutch bolts to 55
ft-lbs, again in a crisscross fashion.
• Remove the clutch alignment tool. If the
installation was successful, it should slide
out smoothly.
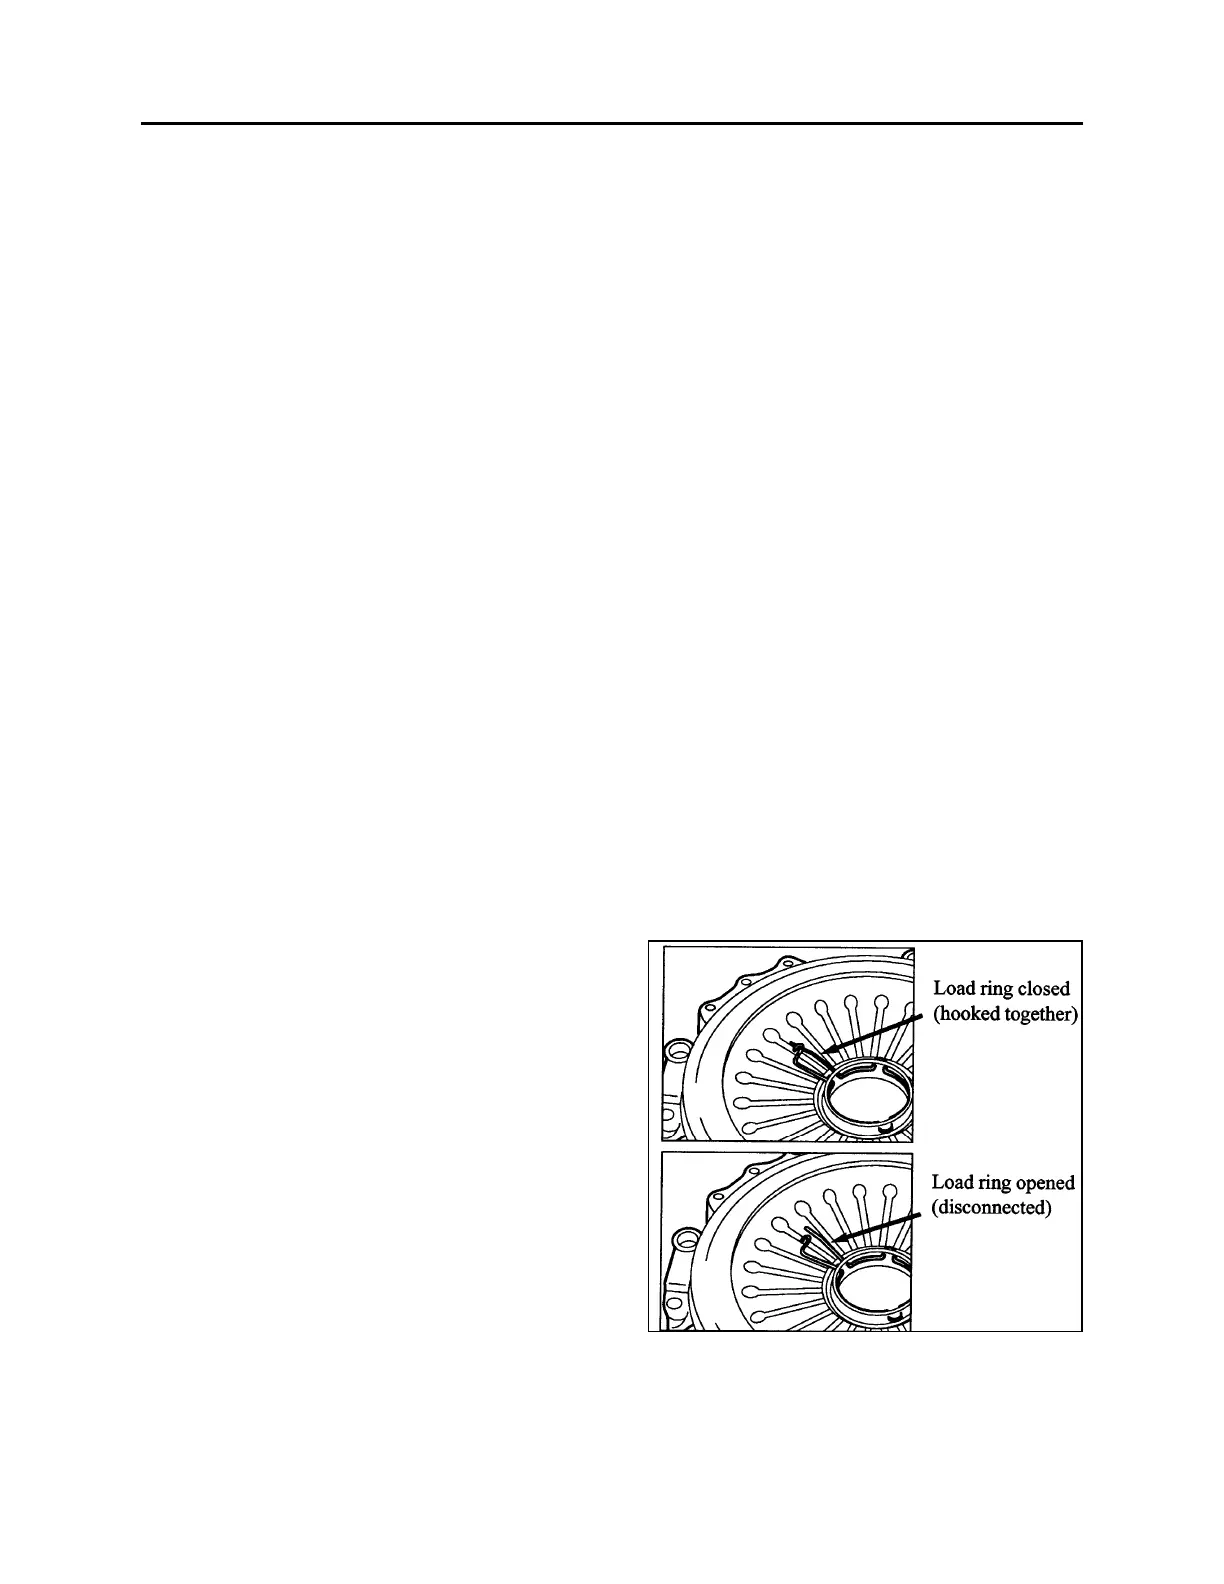
• Ensure that the release bearing retaining
clip (located on the “fingers” of the pressure
plate) is closed. Refer to figure 8.
• Remove the Clutch Inspection Cover from
the bottom of the transmission.
• The transmission should have been shipped
in gear. This will allow the installer to rotate
the output shaft in order to align the input
shaft with the clutch disc hub. If the
transmission is in neutral, a “strap wrench”
(with a rubber or leather strap) can be used
to align the input shaft. Do not use a wrench
of the “chain” variety, as damage to the
input shaft may result. When aligned, push
the transmission towards the engine. Be
sure that the bell housing contacts the
flywheel housing.
Warning!
• Insure that the transmission moves in a
straight line. It can very easily go off center
relative to the clutch disc and pilot bearing.
• Insure that the bell housing interfaces
evenly with the flywheel housing. Even
surface contact should be attained before
tightening bolts.
• Do not try to correct relative position of the
bell housing and flywheel housing by pulling
the transmission into place with the bell
housing bolts. The transmission bell
housing should seat into the flywheel
housing freely.
• When the bell housing and flywheel housing
surfaces and bolt holes are aligned, install
the transmission bolts. Only hardened steel
flat washers should be used, SERRATED
LOCK WASHERS ARE NOT ALLOWED.
Torque the transmission bolts to 55 ft-lbs. in
a crisscross fashion.
• From underneath, push the clutch release
bearing forward (in the direction of flywheel)
using the release fork. Use force to snap the
bearing into the retaining clip located on the
“fingers” of the pressure plate. The installer
should be able to both hear and feel the
bearing seat into place. Refer to figure 8.
FIGURE 8: RELEASE BEARING RETAINING CLIP 07112
• Install the Clutch Actuator inspection cover.
• The clutch/transmission installation is now
complete.