Chapter 3 System Setup 45
2. Run the WinX application. The Camera Detection wizard will automatically run if
this is the first time you have installed a Princeton Instruments WinX application
(WinView/32, WinSpec/32, or WinXTest/32) and a supported camera. Otherwise, if
you installing a new camera type, click on the Launch Camera Detection
Wizard… button on the Controller/CCD tab page to start the wizard.
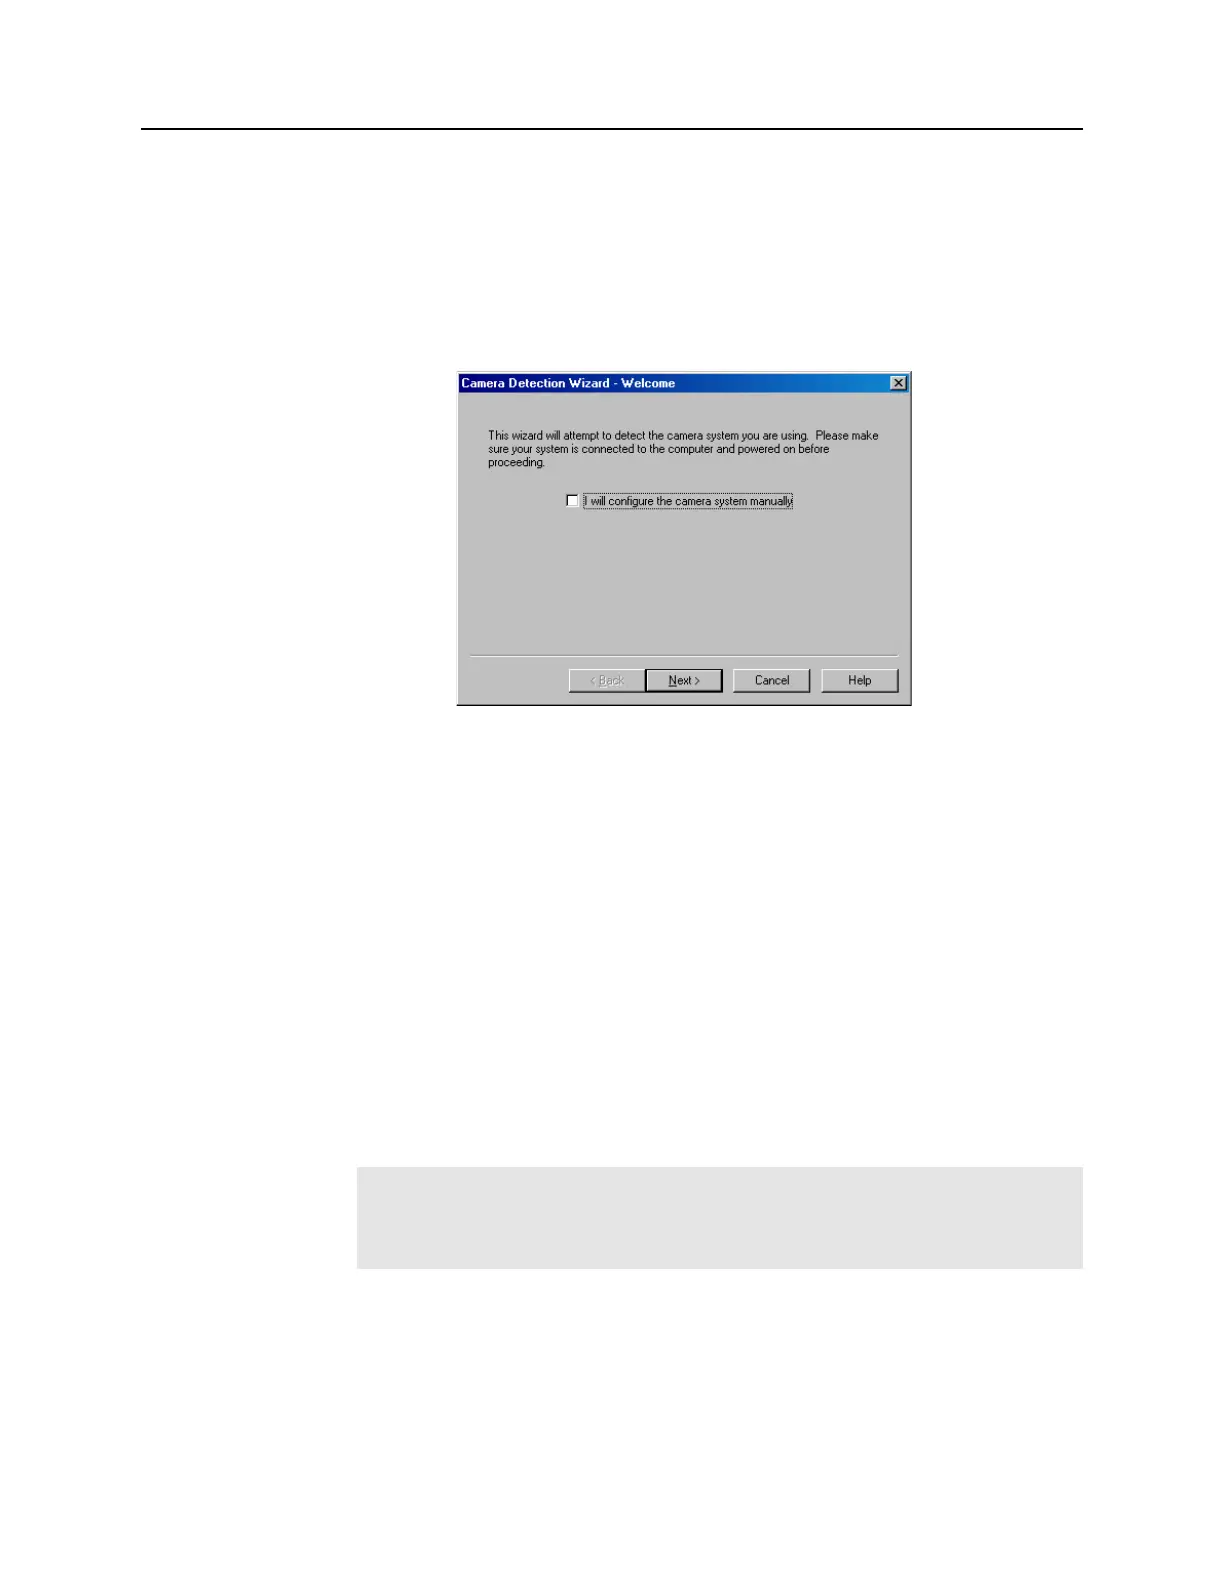
3. On the Welcome dialog (Figure 11), leave the checkbox unselected and click on
Next.
Figure 11. Camera Detection Wizard - Welcome dialog box
4. Follow the instructions on the dialog boxes to perform the initial hardware setup: this
wizard enters default parameters on the Hardware Setup dialog box tab pages and
gives you an opportunity to acquire a test image to confirm the system is working.
WinX Versions before 2.5.19.6
1. Make sure the ST-133 is connected to the camera and the host computer and that it is
turned on.
2. For ST-133s containing a TAXI Interface module, go to Step 5.
3. For ST-133s containing a USB 2.0 Interface module, run RSConfig from the
Windows|Start|Programs|PI Acton menu or from the directory where you
installed the WinX application (WinView/32, WinSpec/32, or WinXTest).
4. When the RSConfig dialog box (Figure 12) appears, you can change the camera
name to one that is more specific or you can keep the default name "Camera1".
When you have finished, click on the Done button.
Note: If the first camera in the list is not the "Princeton Style (USB2)", you will
need to edit the PVCAM.INI file created by RSConfig. See the instructions in
"Demo, High Speed PCI, and PCI(Timer) are Choices on Hardware
Wizard:Interface dialog (Versions 2.5.19.0 and earlier)", page 172.