Chapter 7 Gated Operation with a PTG 95
Experiment as Master Clock
The following procedure uses the experiment as the master clock and therefore refers to
connections as shown in Figure 42.
1. Switch on the equipment and start the WinX application software (Ver. 2.4 and
higher).
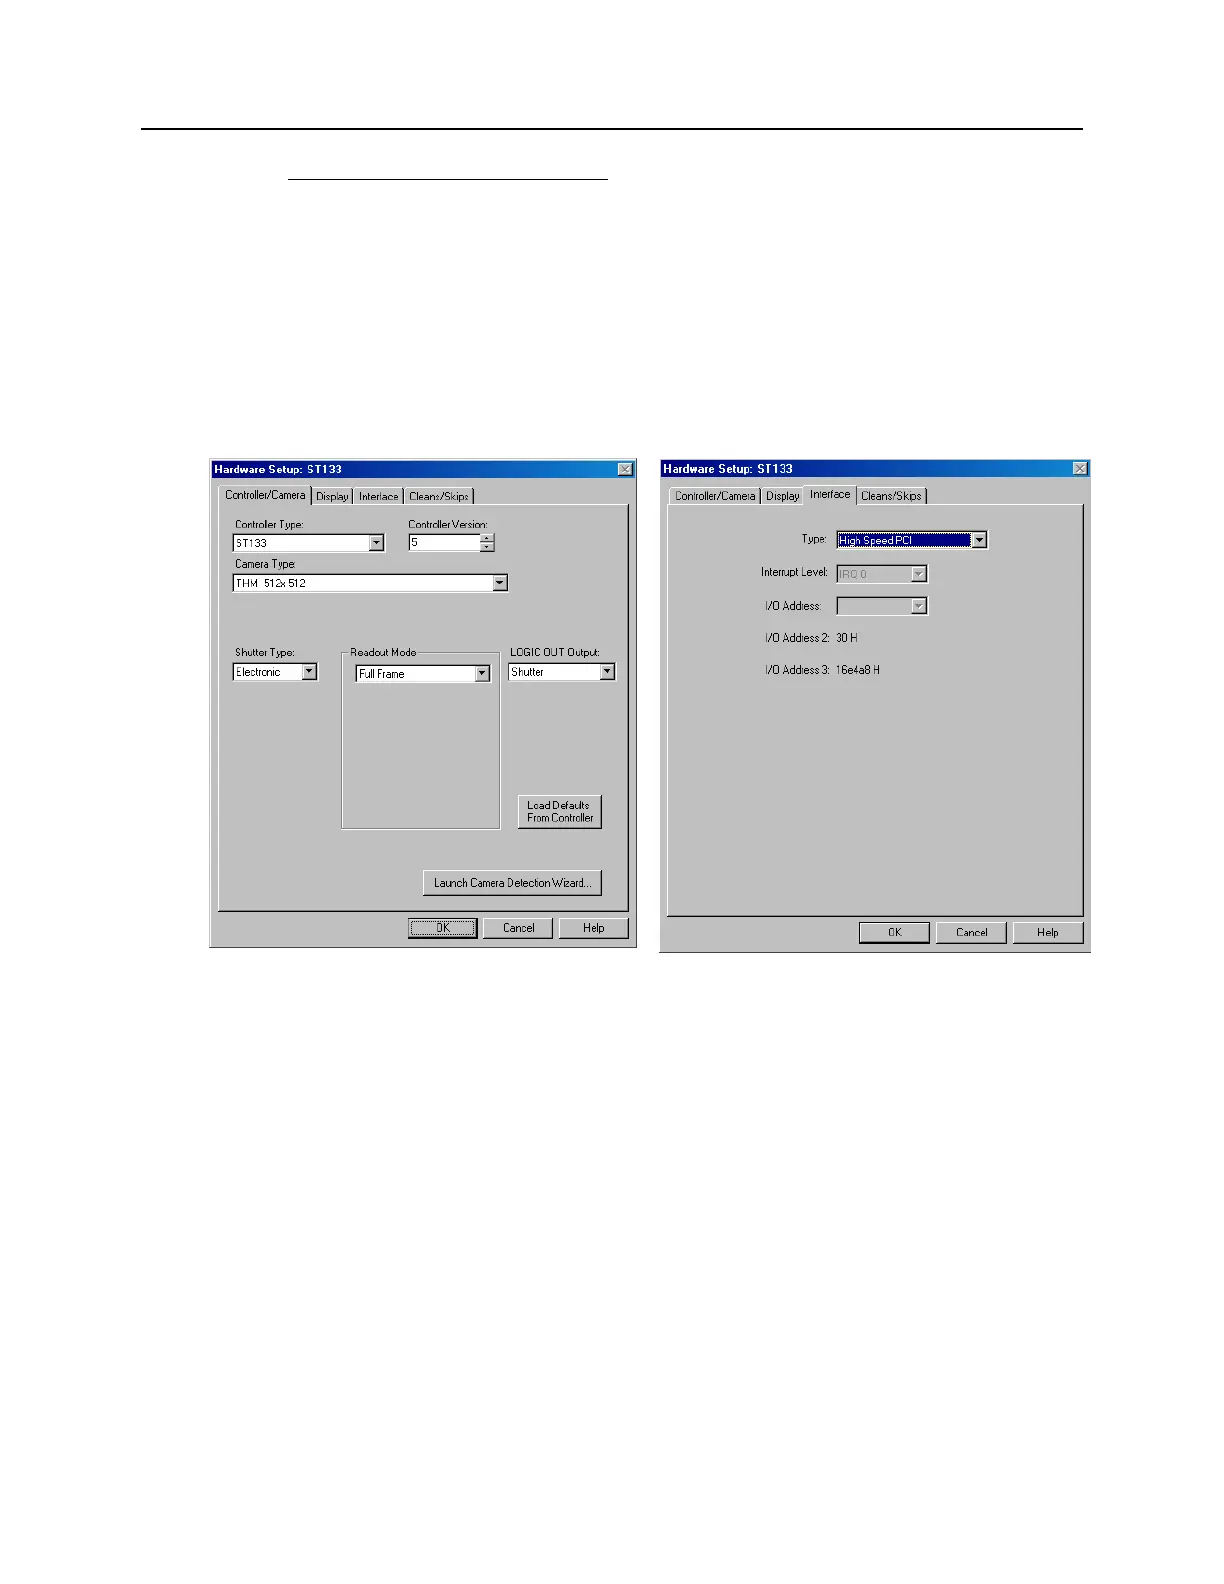
2. Choose the appropriate camera/controller in the Setup|Hardware|Hardware
Setup dialog box. The screen should resemble Figure 43, which shows the setup
for a Thomson 512 x 512 full frame camera.
a. Choose High Speed PCI or PCI (Timer) on the Interface tab page and enter
the I/O Address and the Interrupt Level, if appropriate. See Figure 43.
Figure 43. Hardware Setup: Controller/ Camera and Interface tab pages
b. Click on “Load Default Values” on the Cleans/Skips tab page.
c. Set the detector temperature by selecting "Detector Temperature" on the
Setup menu, entering the Target Temperature information, clicking on "Set
Temp" and then clicking on "OK". You may want to refer to the
WinView/32 or WinSpec/32 manual, as appropriate.
3. If you have a spectrograph, set the spectrograph properties by using the menu
items on the "Spectrograph" menu (WinSpec/32 only). If the spectrograph you
will be using has not been installed, first click on "Install/Remove Spectrograph"
and do so before setting the properties. Figure 44 shows the WinSpec/32
sequence for an Action 300I spectrograph.