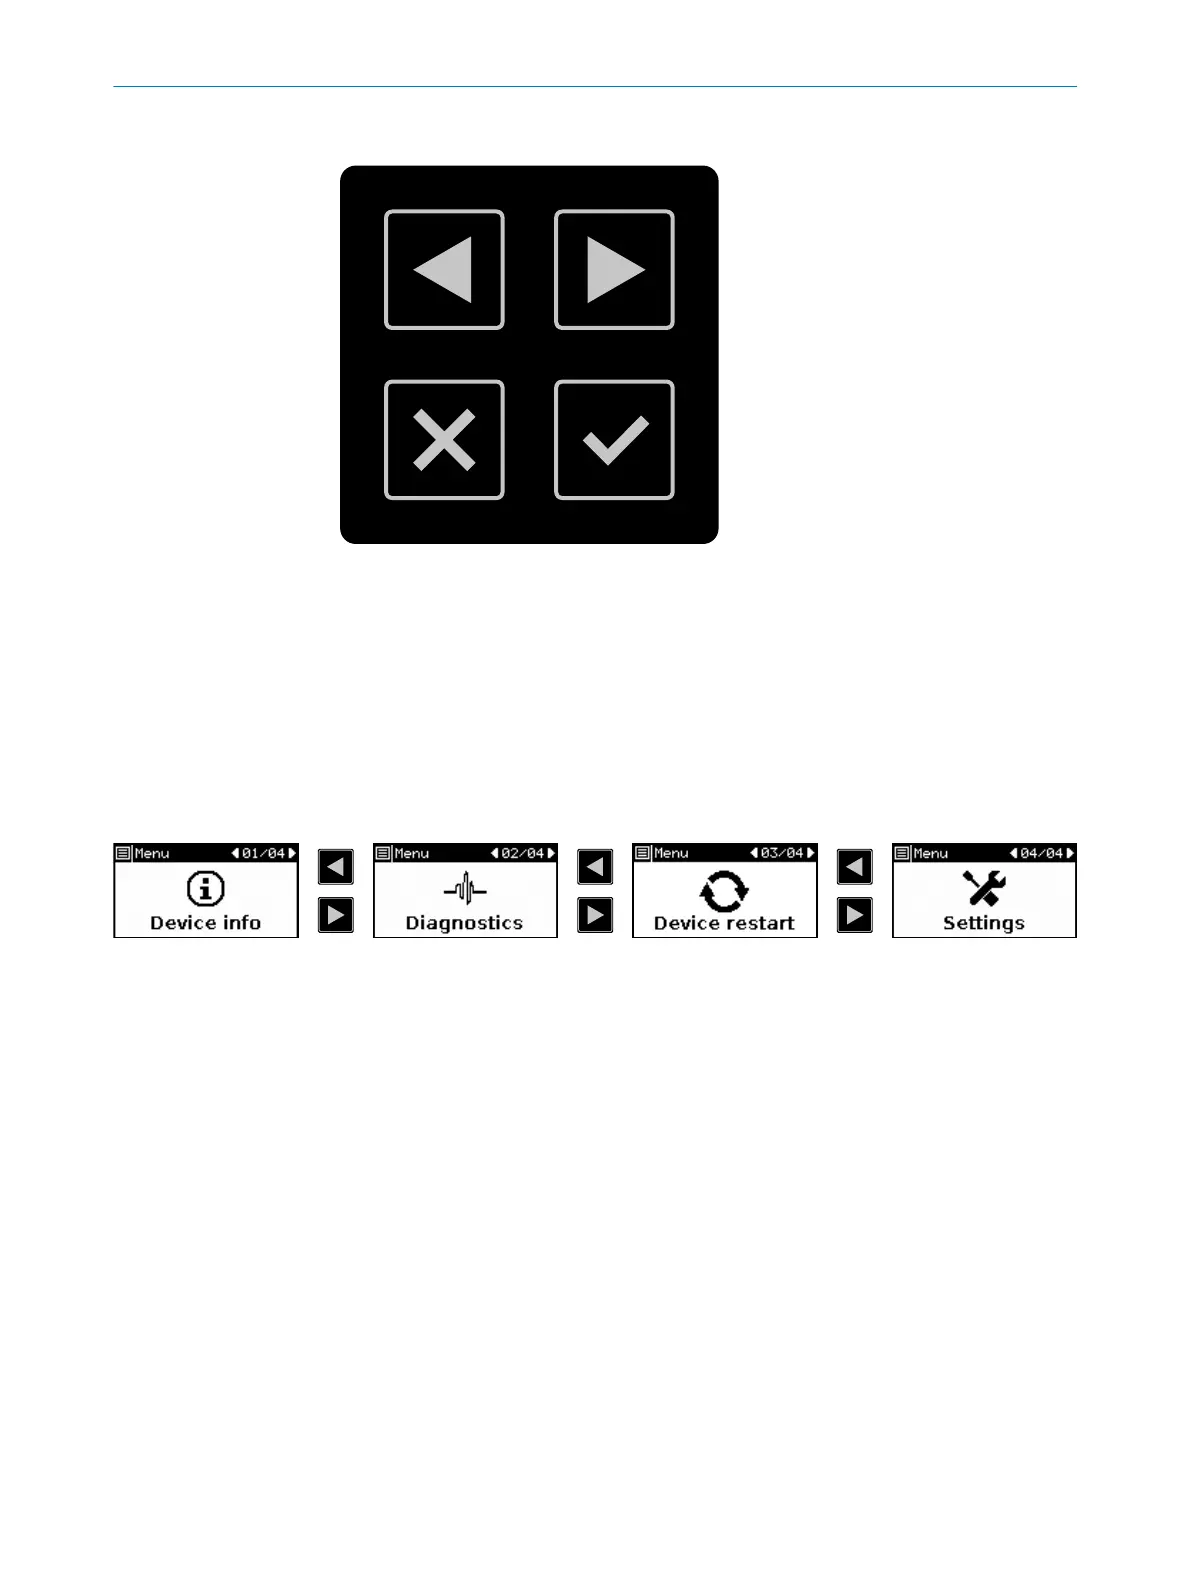
Buttons
Figure 85: Pushbuttons on the device
1, 2
You can use the arrow buttons to change between various displays and menu items.
3
You can use the back button to change to the previous display or a higher-level menu
it
em.
4
You can use the OK button to show details for current information or confirm a menu
point. Press the OK button twice to call up the menu.
If you do not press any pushbuttons for a time, the display changes back to the status
dis
play.
Menu
Figure 86: Menu
T
he menu offers access to the main areas of device information, diagnostics, device
restart and settings.
b Press the OK pushbutton 4 twice in succession to call up the menu.
b Change to the desired menu point using the arrow buttons 1, 2.
b Confirm the desired menu point using the OK button 4.
b
Use the same pushbuttons to navigate through the sub-menus.
b Press the back button 3 to return to the higher-level menu point.
b Press the back button 3 multiple times to return to the status display. If you do
not press any pushbuttons for a time, the display likewise changes back to the sta‐
tus display.
Device information
Y
ou will find information about the following subjects in the device information area:
•
Hardware: for example type code, part numbers, serial numbers, firmware ver‐
sions, functional scope of device
•
Configuration: for example device name, application name, checksum, date of last
configuration, functional scope of the configuration
•
Network: e.g. MAC address, IP address, sub-network
•
Data output: e.g., status, target IP address
TROUBLESHOOTING 11
8021913/15ZW/2019-11-14 | SICK O P E R A T I N G I N S T R U C T I O N S | microScan3 – EFI-pro
141
Subject to change without notice