5.3.3 Mounting using mounting kit 1
If you are not able to drill through the mounting surface from behind, you can use the
mount
ing kit 1 to mount the safety laser scanner. Mounting kit 1 makes it possible to
replace the safety laser scanner easily.
The mounting kit is available as mounting kit 1a without protection for the optics cover
and as mounting kit 1b with protection for the optics cover, see "Accessories",
page 170.
Tool required:
•
TX20 Torx wrench
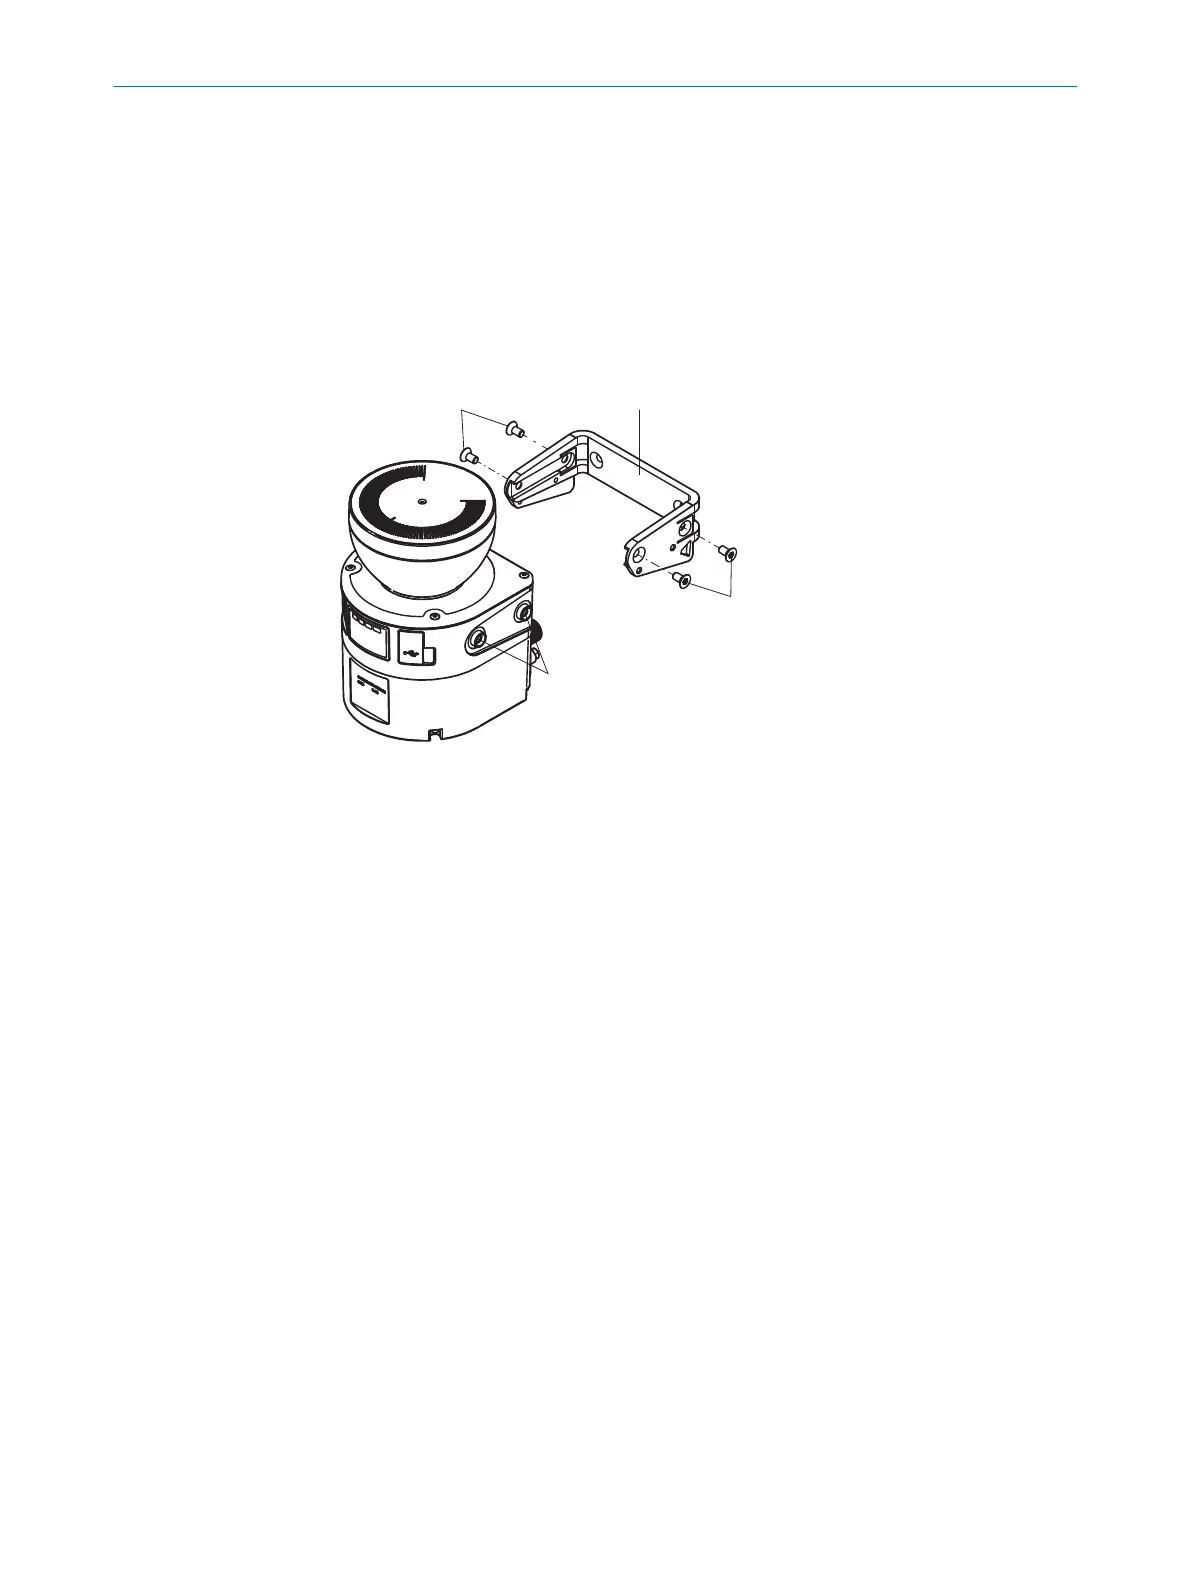
Figure 49: Mounting using mounting kit 1a
1
Mounting bracket
2
Screws for mounting bracket
3
Threaded holes for mounting bracket
1. Make sure that the mounting bracket is oriented correctly. See the symbol on the
mount
ing bracket.
2. Mount the mounting bracket on the mounting surface.
3. Push the safety laser scanner onto the mounted mounting bracket.
4. Use all 4 supplied M5 screws to fix the safety laser scanner on the mounting
bracket.
5. Tighten the M5 screws. Tightening torque: 4.5 Nm ± 5.0 Nm.
5.3.4 Mounting using mounting kit 2
You can use mounting kit 2 to align the safety laser scanner in 2 planes (rotation
ar
ound the transverse axis and around the depth axis). The maximum alignment angle
is ±5° in each plane. You will also need mounting kit 1a or 1b for mounting using
mounting kit 2.
Mounting kit 2 consists of 2 parts: holding plate and alignment bracket.
The mounting kit is available as mounting kit 2a with shallower depth and as mounting
kit 2b with greater depth. Mounting kit 2b is recommended when the system plug is
installed on the rear side of the safety laser scanner and the angled plug connector is
used.
5 MOUN
TING
68
O P E R A T I N G I N S T R U C T I O N S | microScan3 – EFI-pro 8021913/15ZW/2019-11-14 | SICK
Subject to change without notice