Introduction / General Information Battery Pack
9
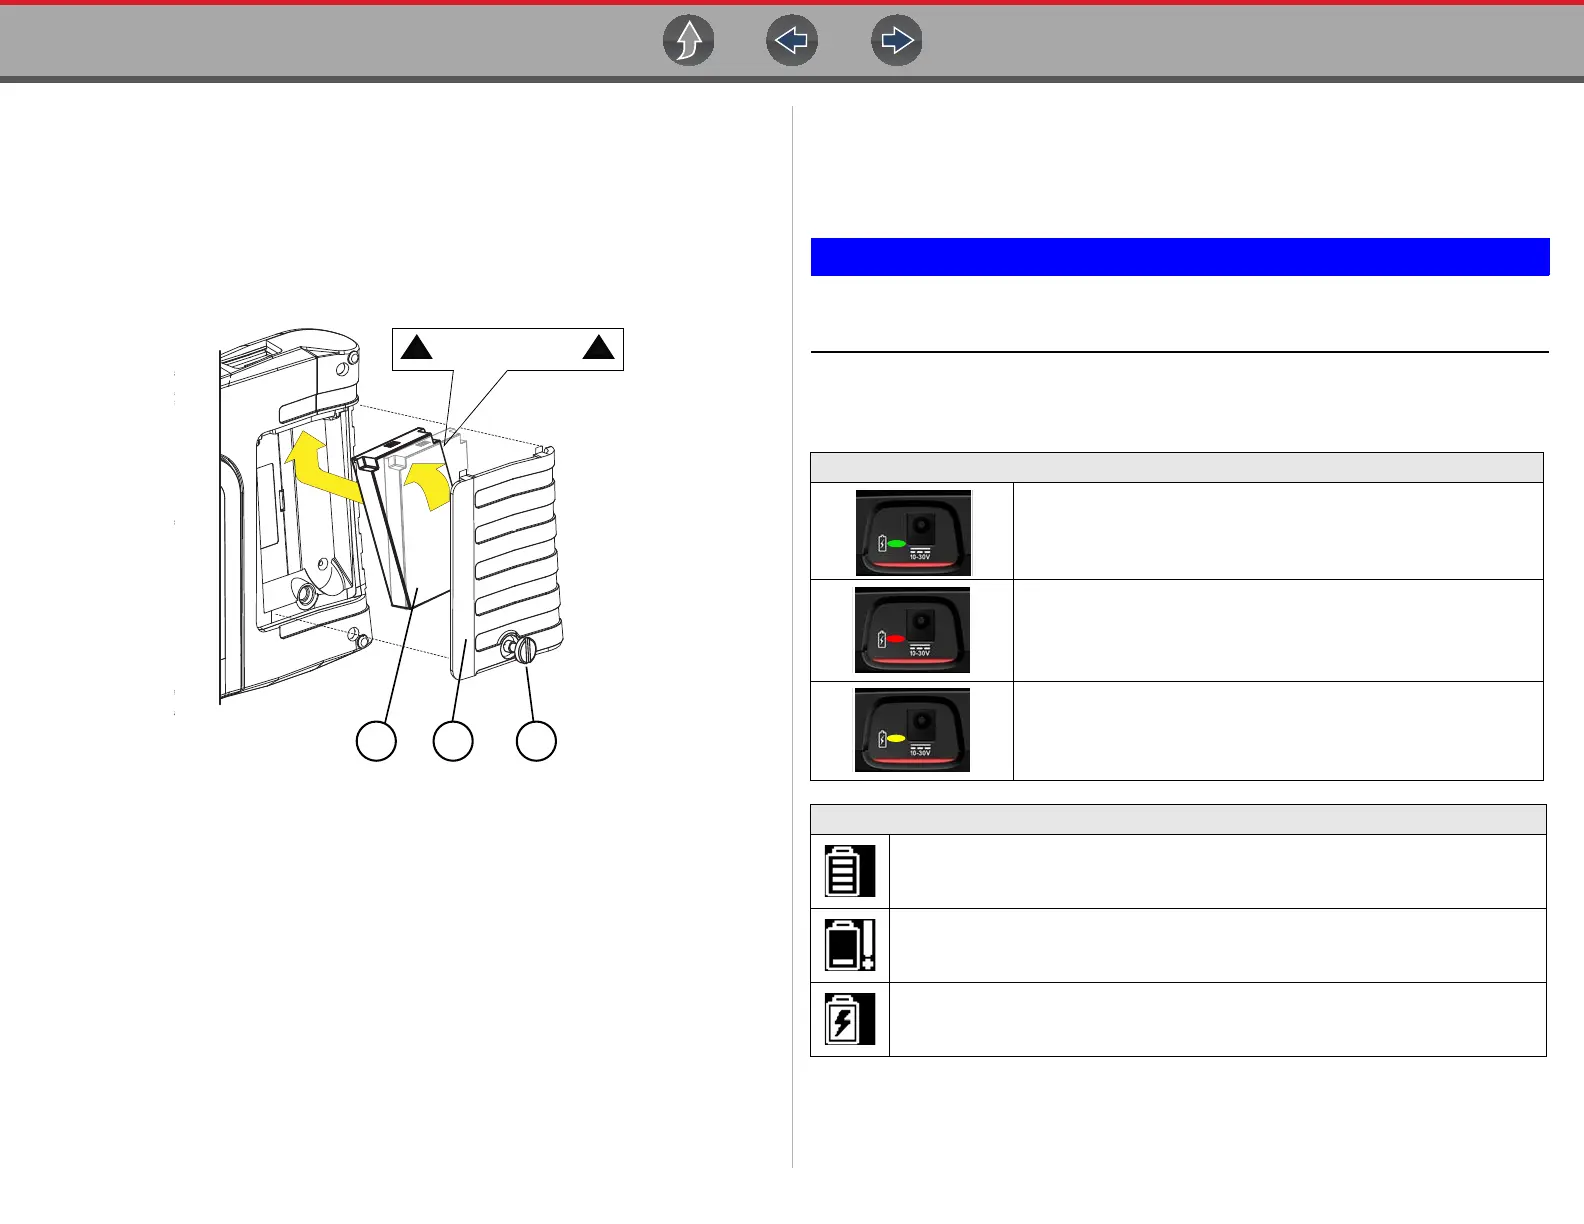
z INSTALLATION (Figure 1-5)
1. Position the battery pack as shown below with the arrows facing up.
2. Tilt the top of the battery in to align the tabs, then down to install into place.
3. Install the battery pack cover, in the opposite manner as removal, aligning the
tabs and tilting down and in, into place.
4. Tighten the battery cover screw. Do not overtighten the screw!
1— Battery Pack
2— Cover
3— Cover Screw
Figure 1-5
1.12.3 Charging
The diagnostic tool can be powered from the internal rechargeable battery pack. A
fully charged battery pack provides sufficient power for about 3 hours of continuous
operation. For battery pack removal and installation instructions see, Removal /
Installation on page 8.
Battery charging occurs whenever the data cable is connected to a vehicle DLC.
Battery charging also occurs when the AC power supply is connected to a live AC
power source, and connected to the diagnostic tool. Use the supplied AC power
supply to charge the battery pack.
Insert the end of the AC power supply cable into the diagnostic too power supply jack,
then connect the AC power supply to an approved AC power source.
Only use the supplied AC power supply. Never connect the power supply
to the diagnostic tool when the tool is communicating with a vehicle.
The Battery Status Indicator LED (located next to the power supply jack) indicates
battery status.
Battery Status LED (Top of Tool)
Green - Fully charged / power supplied by the AC power
supply.
Red - Charging
Amber - Fault Mode, battery temperature above 104°F/
40°C. Allow the tool and battery to cool down before
continuing operation.
Battery Charge Status Indicator (Title Bar)
Full Battery Charge Level - Indicates power is being supplied by the internal
battery pack. Horizontal bars diminish as the battery discharges.
Low Battery Charge Level - Indicates the internal battery pack is low and needs
to be recharged immediately. A warning message will also display on the screen
when the battery gets low.
External Power Connected - Indicates power is being supplied through the data
cable connection to a vehicle or by the AC Power Supply and charging the
battery pack.

 Loading...


