IV-10
HYDRAULIC UNITSHST PUMP
DISASSEMBLY AND ASSEMBLY
General Cautions
• Carry out disassembly and assembly operations
in a clean place and provide clean containers to
place the disassembled parts in.
• Before disassembly, clean around the ports and
remove the paint from each joint using a wire
brush.
• Clean all disassembled parts in cleaning solvent.
Use a lint free cloth, or air dry the parts.
• Make match marks on each part so that they will
be assembled in the same positions when as-
sembled.
• Replace all seals with new ones each time the
hydraulic units is disassembled.
• Check each part to make sure there is no abnormal
wear or seizing and use sandpaper, etc. to remove
any burrs, sharp edges, etc.
• Do not turn adjusting screws if not required.
• Apply hydraulic oil to sliding surfaces and apply
a thin coating of grease to seals when assembling
them.
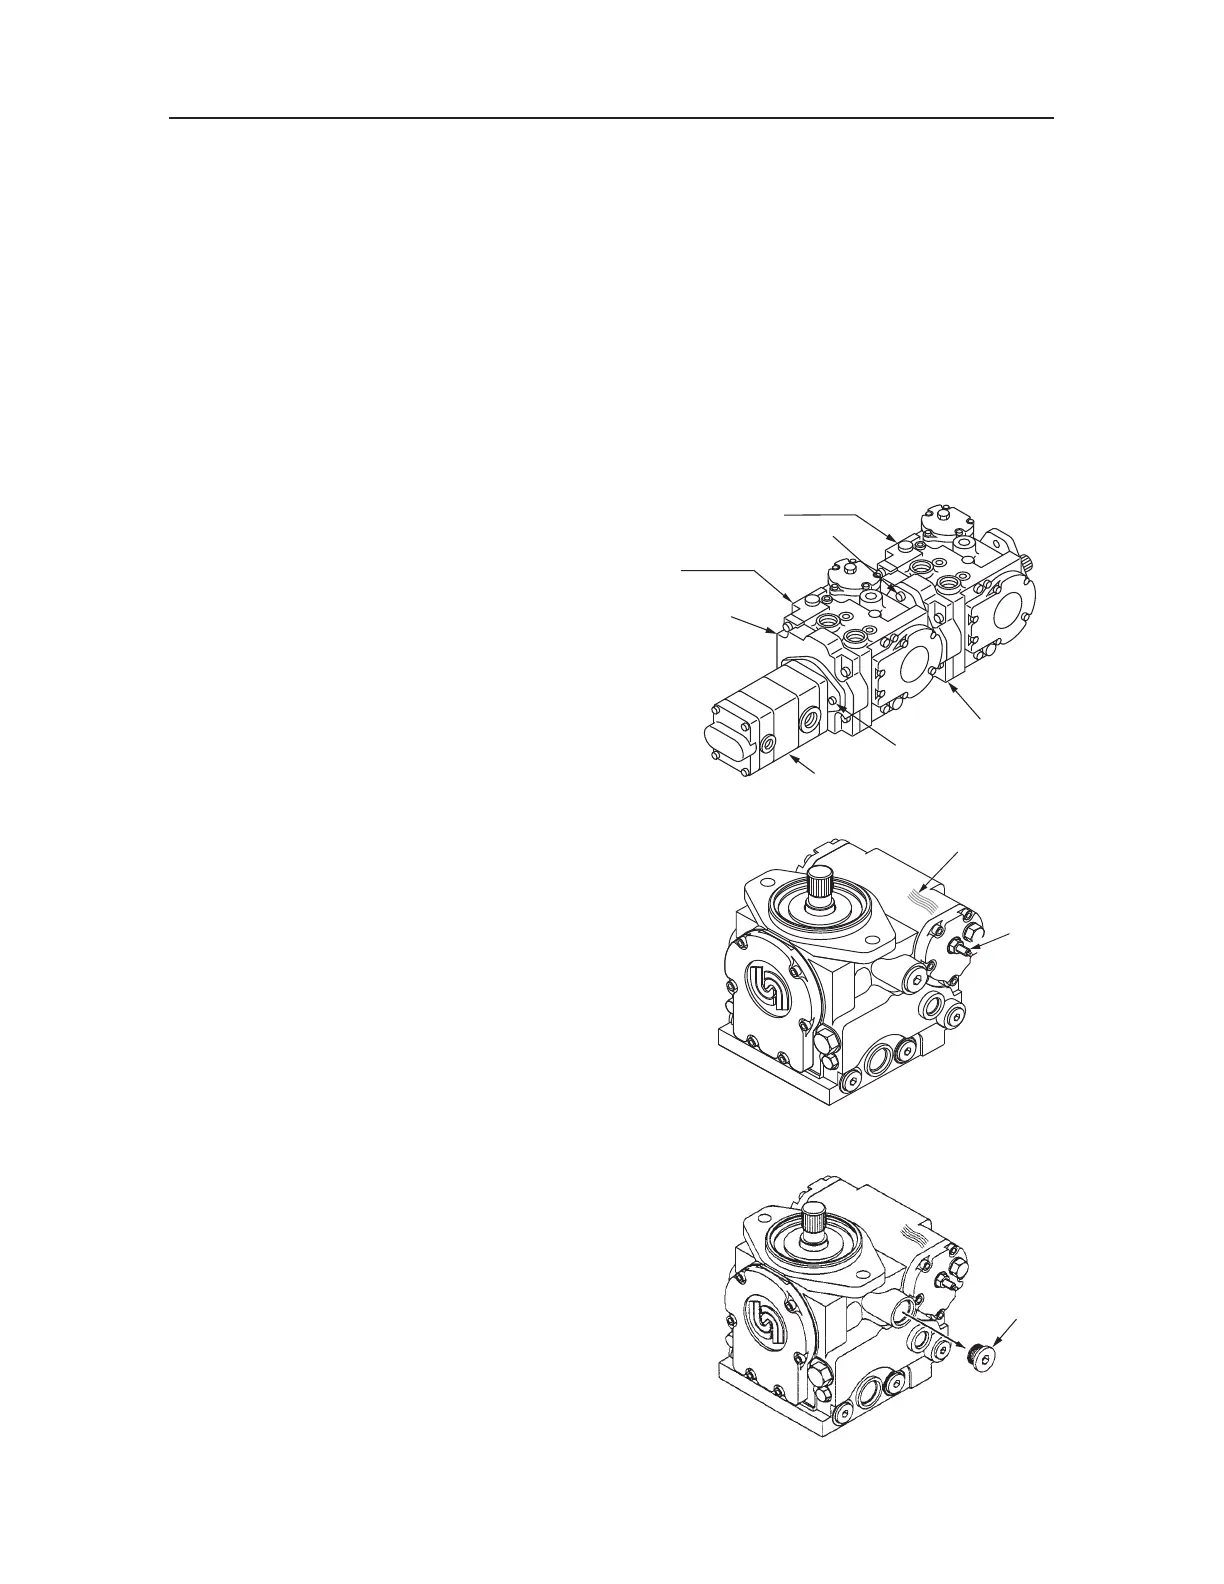
Disassembly
Pump
1. Disassemble the pumps P1 and P2, and the gear
pump.
• Before starting, make match marks on the
components to be disassembled for accurate
later reassembling.
a. Remove the two cap screws (25), and remove
the gear pump (2) from the A pad adapter
(3). Then remove the O-ring from the A pad
adapter (3).
b. Remove the two bolts (4) to separate the
hydraulic pumps P1 and P2 from each other.
Then remove the O-ring from the B pad
adapter (1).
c. Attach the directional marker on the hous
-
ing.
• The directional marker should be attached
on the side from which the tie bolt (16) for
neutral adjustment projects.
2. Remove the drain plug (5).
S3F305E
Pump P1
Pump P2
1
2
4
3
25
S3F306E
16
Mark
 Loading...