Configuring DHCP Service Configuration Examples
User Guide 423
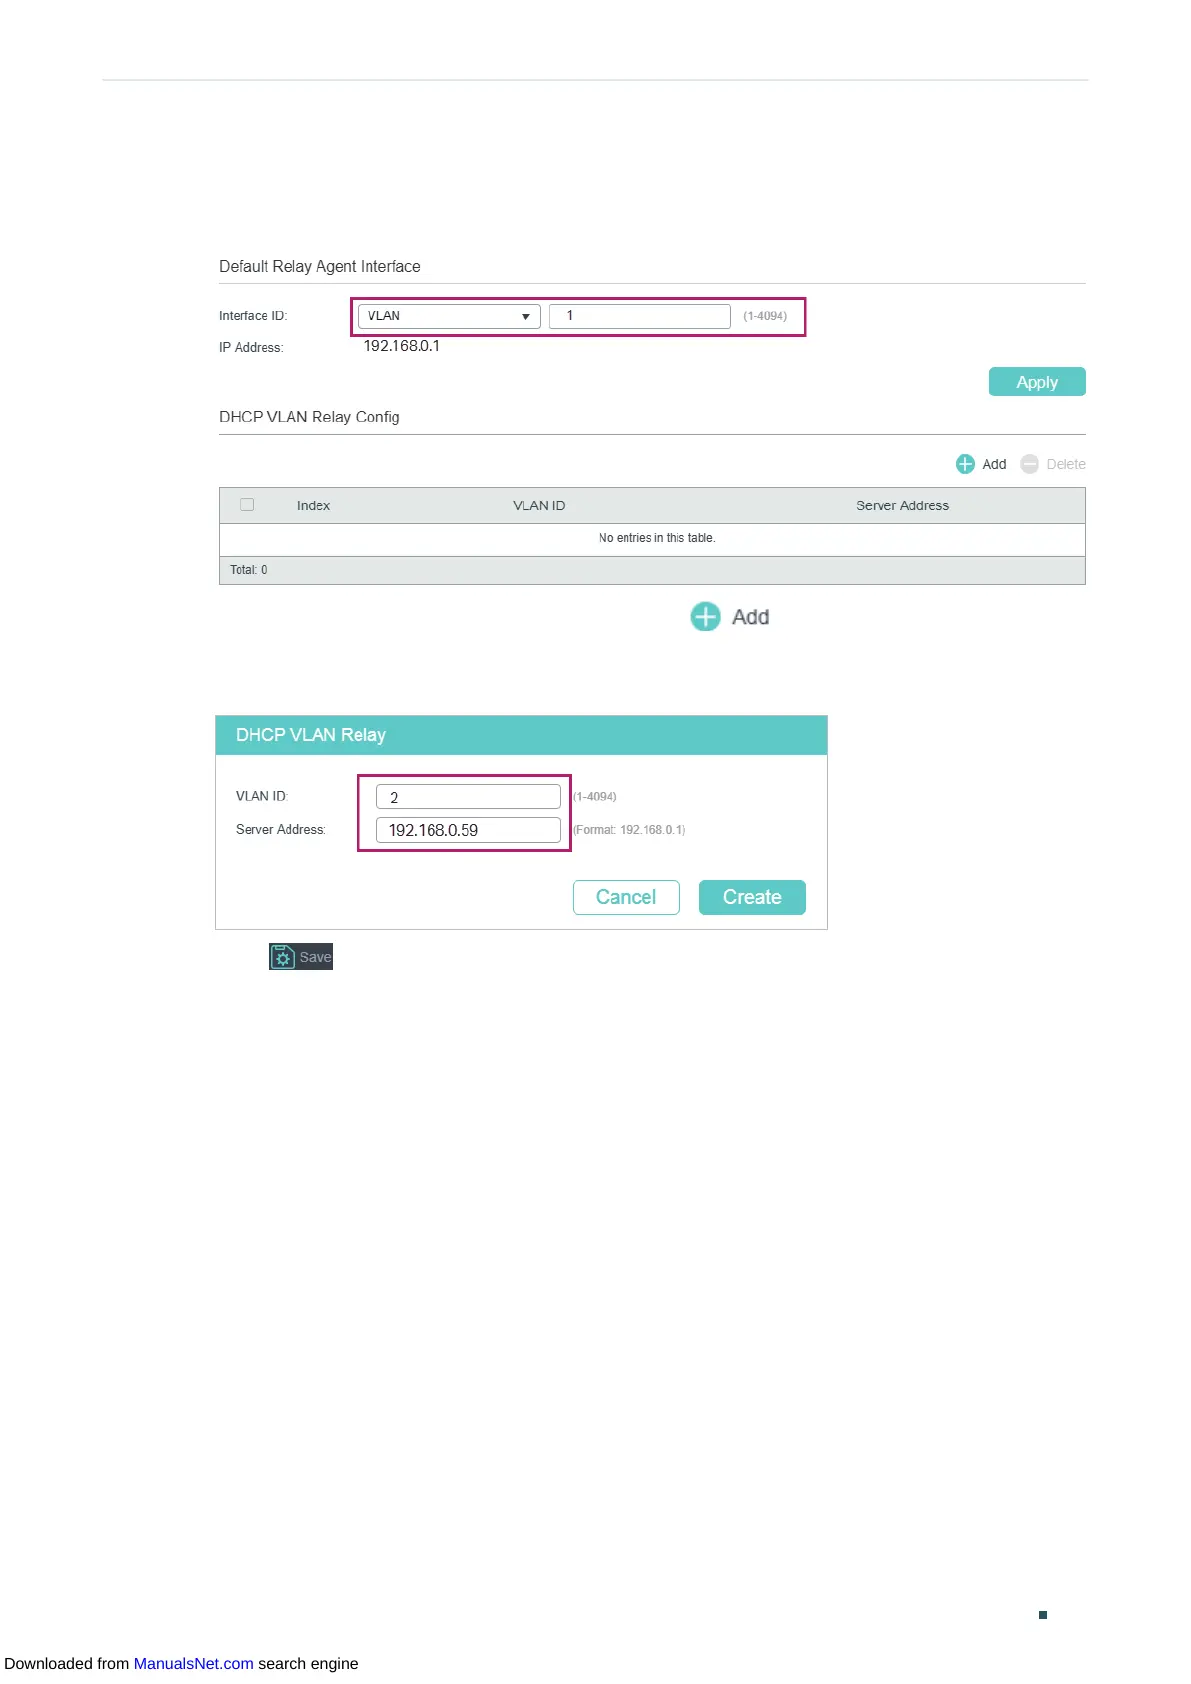
management VLAN (by default, it is VLAN 1) as the default relay agent interface. Then
click Apply.
Figure 4-13 Configure the Management VLAN as the Default Relay Agent Interface
4) In the DHCP VLAN Relay Config section, click to load the configuration page.
Specify the VLAN ID as 2, and the Server Address as 192.168.0.59. Click Create.
Figure 4-14 Specify a DHCP server for the VLAN
5) Click to save the settings.
Using the CLI
Follow these steps to configure DHCP relay and enable Option82 in DHCP Relay on
SwitchA:
1) Enable DHCP Relay.
Switch#configure
Switch(config)#service dhcp relay
2) Enable Option82 for port 1/0/1 and port 1/0/2. Set Option82 policy as Replace. You
can configure other parameters according to your needs. In this example, the Format is
set as Normal, and Circuit ID Customization and Remote ID Customization as Disabled.
Switch#(config)#interface range gigabitEthernet 1/0/1-2
Switch(config-if)#ip dhcp relay information option
Switch(config-if)#ip dhcp relay information strategy replace
Switch(config-if)#ip dhcp relay information format normal
Downloaded from ManualsNet.com search engine
 Loading...