User Guide 824
Configuring System Logs System Logs Configurations
2.1 Using the GUI
2.1.1 Configuring the Local Logs
Choose the menu MAINTENANCE > Logs > Local Logs to load the following page.
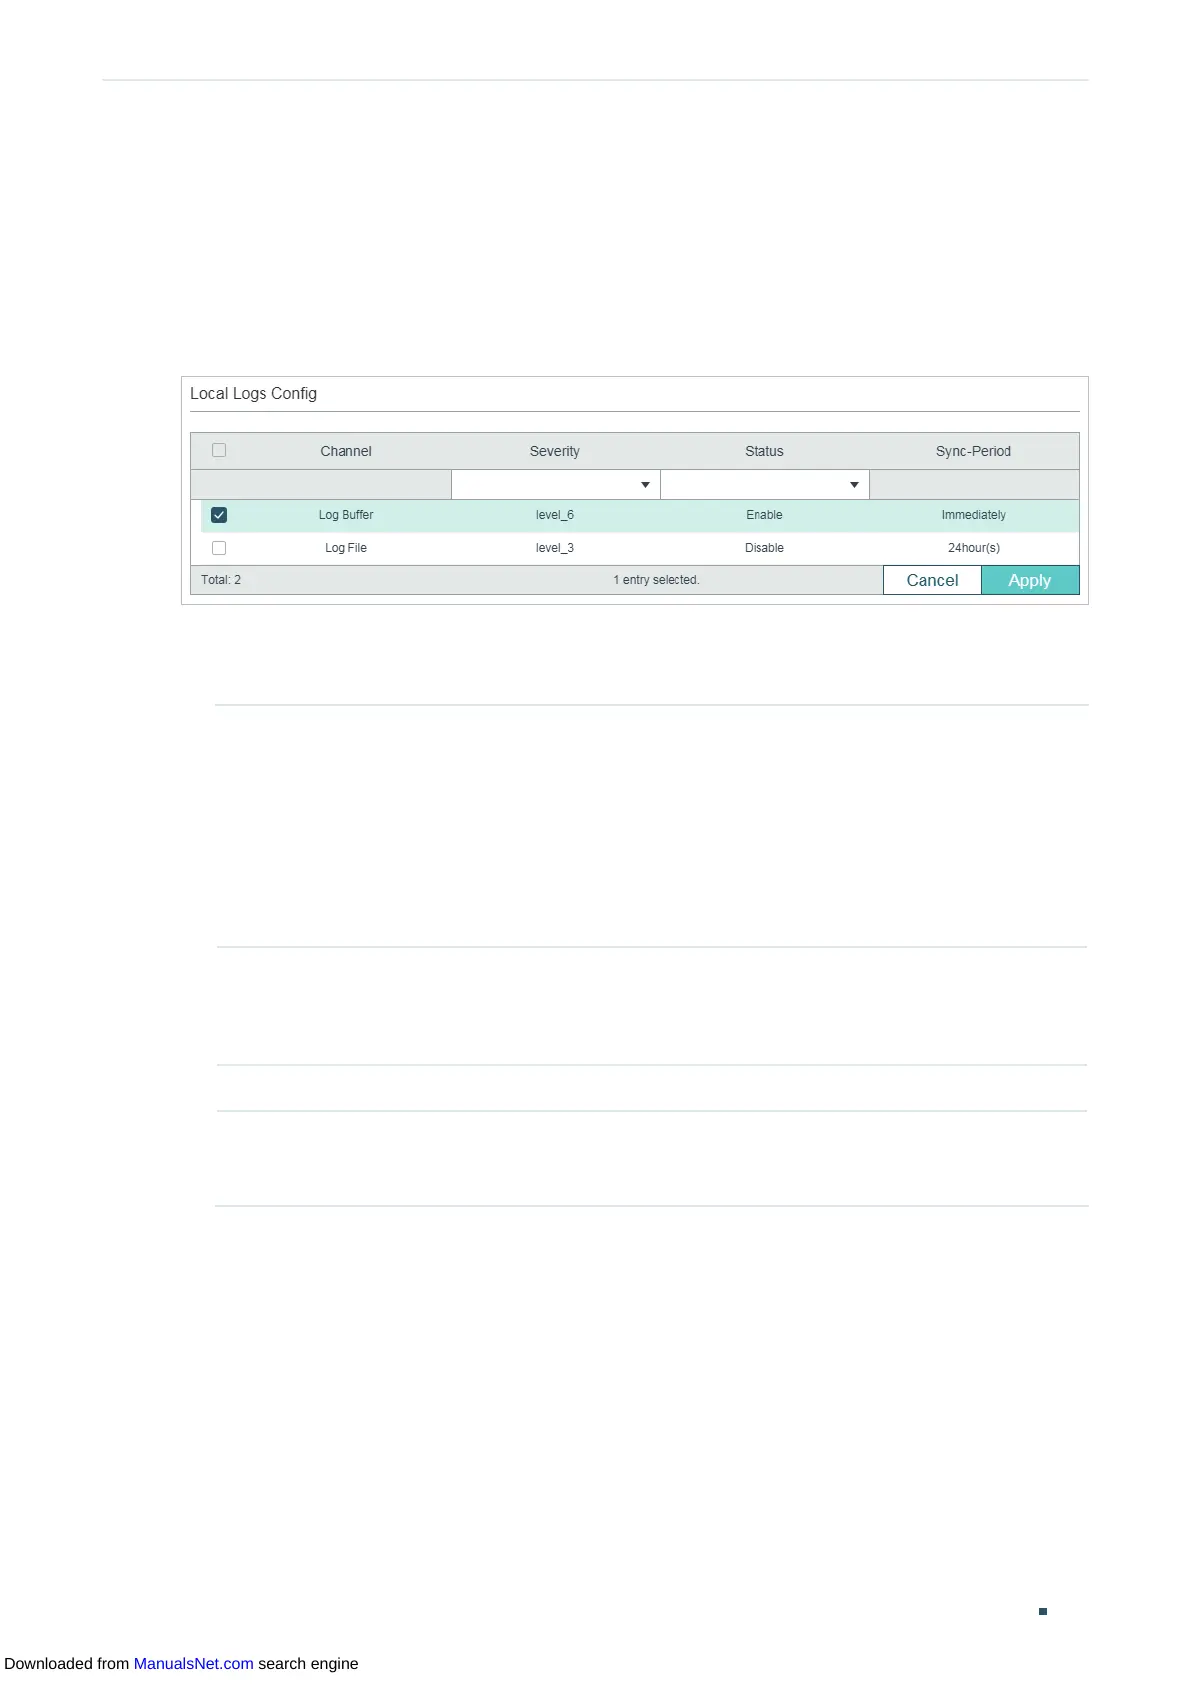
Figure 2-1 Configuring the Local Logs
Follow these steps to configure the local logs:
1) Select your desired channel and configure the corresponding severity and status.
Channel Local logs includes 2 channels: log buffer and log file.
Log buffer indicates the RAM for saving system logs. The channel is enabled by
default. Information in the log buffer is displayed on the
MAINTENANCE > Logs >
Logs Table page. It will be lost when the switch is restarted.
Log file indicates the flash sector for saving system logs. Information in the
log file will not be lost after the switch is restarted and can be exported on the
MAINTENANCE > Logs > Back Up Logs page.
Severity Specify the severity level of the log messages that are saved to the selected
channel. Only log messages with a severity level value that is the same or lower
than this will be saved. There are eight severity levels marked from 0 to 7. A lower
value indicates a higher severity.
Status Enable or disable the channel.
Sync-Periodic By default, the log information is saved in the log buffer immediately, and
synchronized to the log file every 24 hours. If necessary, you can modify the log
synchronization frequency using the CLI.
2) Click Apply.
2.1.2 Configuring the Remote Logs
You can configure up to four hosts to receive the switch’s system logs. These hosts are
called Log Servers. The switch will forward the log message to the servers once a log
Downloaded from ManualsNet.com search engine
 Loading...