Configuration Example
User Guide 803
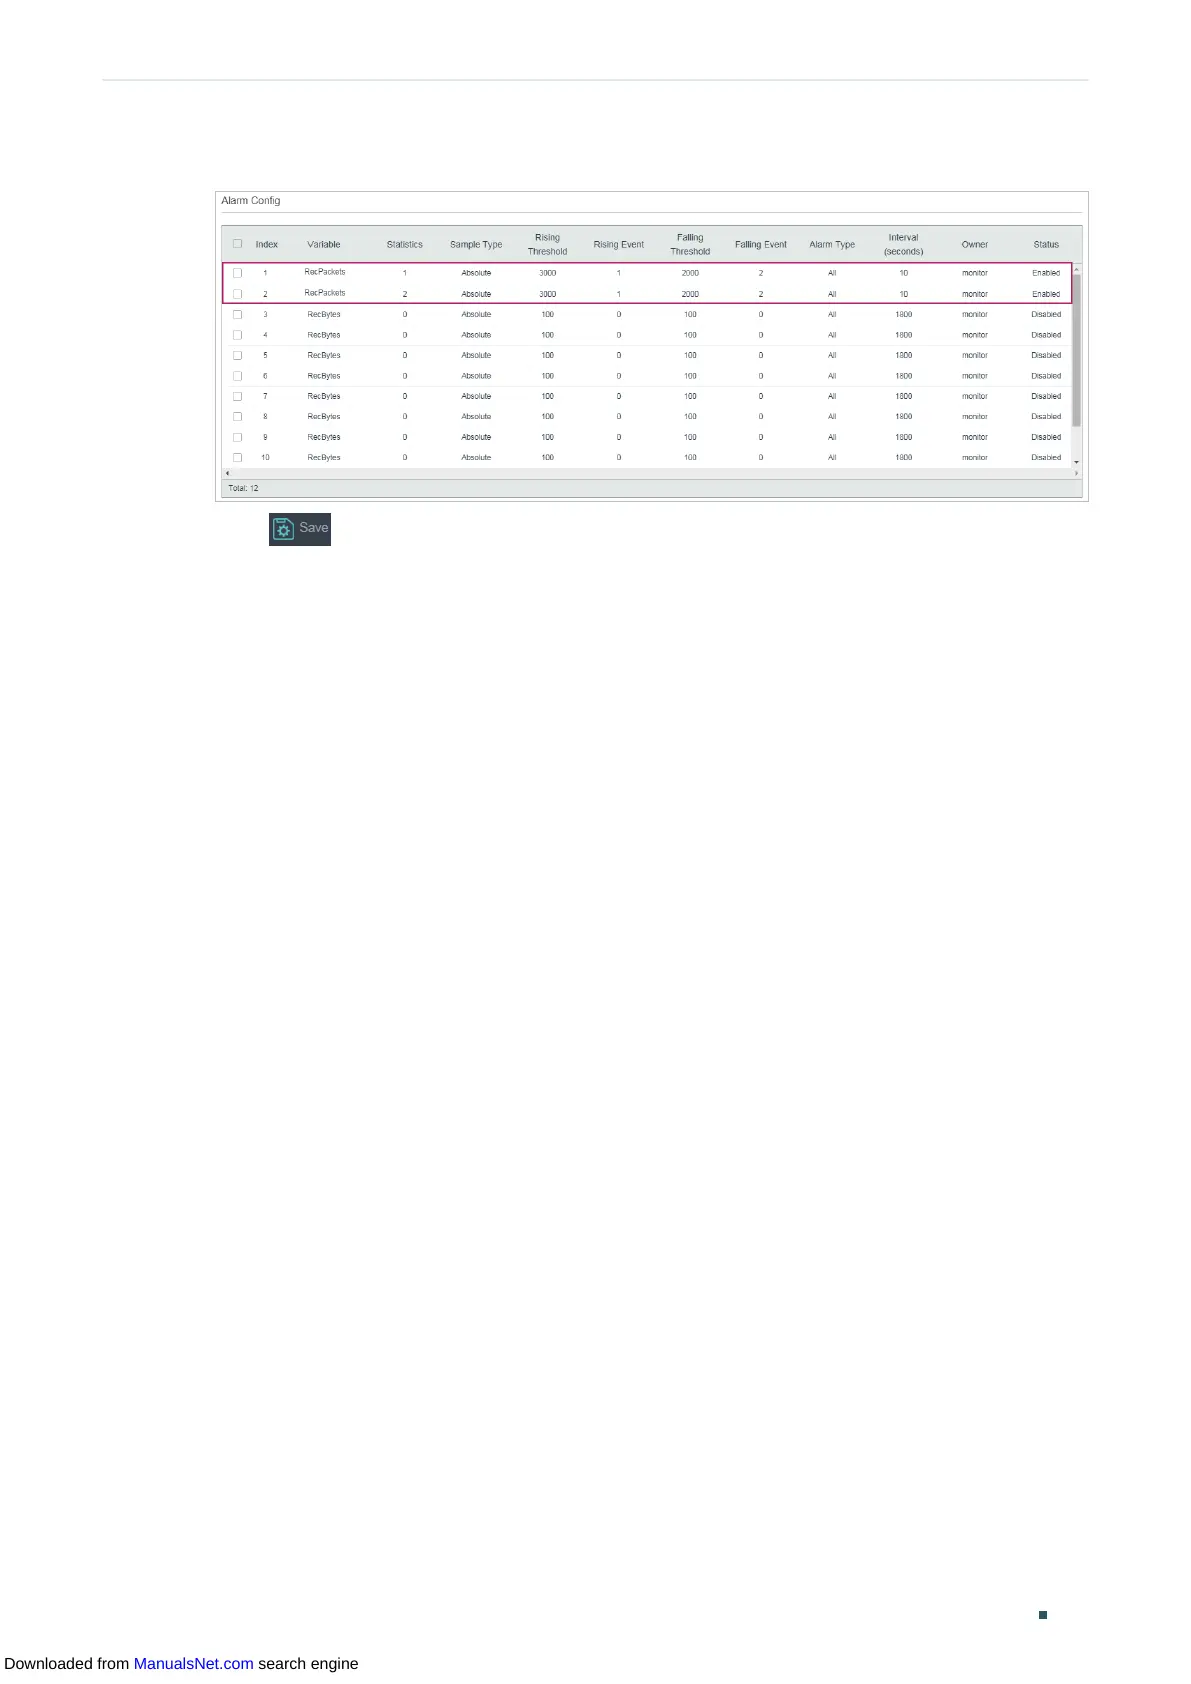
Figure 6-12 Configuring the Alarm Entries
5) Click to save settings.
6.4 Using the CLI
■ Configuring Storm Control on ports
Configure the Storm Control on the required ports of Switch A. For detailed
configuration, refer to
Configuring QoS
.
■ Configuring SNMP
1) Enable SNMP and specify the remote engine ID.
Switch_A#configure
Switch_A(config)#snmp-server
Switch_A(config)#snmp-server engineID remote 123456789a
2) Create a view with the name View; set the MIB Object ID as 1 (which represents all
functions), and the view type as Include.
Switch_A(config)#snmp-server view View 1 include
3) Create a group of SNMPv3 with the name of nms-monitor. Enable Auth Mode and
Privacy Mode, and set both the Read and Notify views as View.
Switch_A(config)#snmp-server group nms-monitor smode v3 slev authPriv read View
notify View
4) Create an SNMP user named admin. Set the user as a remote user and configure the
security model and security level based on the group. Set the Auth Mode as SHA
algorithm, password as 1234, the Privacy Mode as DES, and password as 1234.
Switch_A(config)#snmp-server user admin remote nms-monitor smode v3 slev authPriv
cmode SHA cpwd 1234 emode DES epwd 1234
5) To configure Notification, specify the IP address of the NMS host and UDP port. Set the
User, Security Model and Security Level according to configurations of the SNMP User.
Downloaded from ManualsNet.com search engine
 Loading...