User Guide 428
Configuring DHCP Service Configuration Examples
4.3.3 Configuring the DHCP Relay Switch
Using the GUI
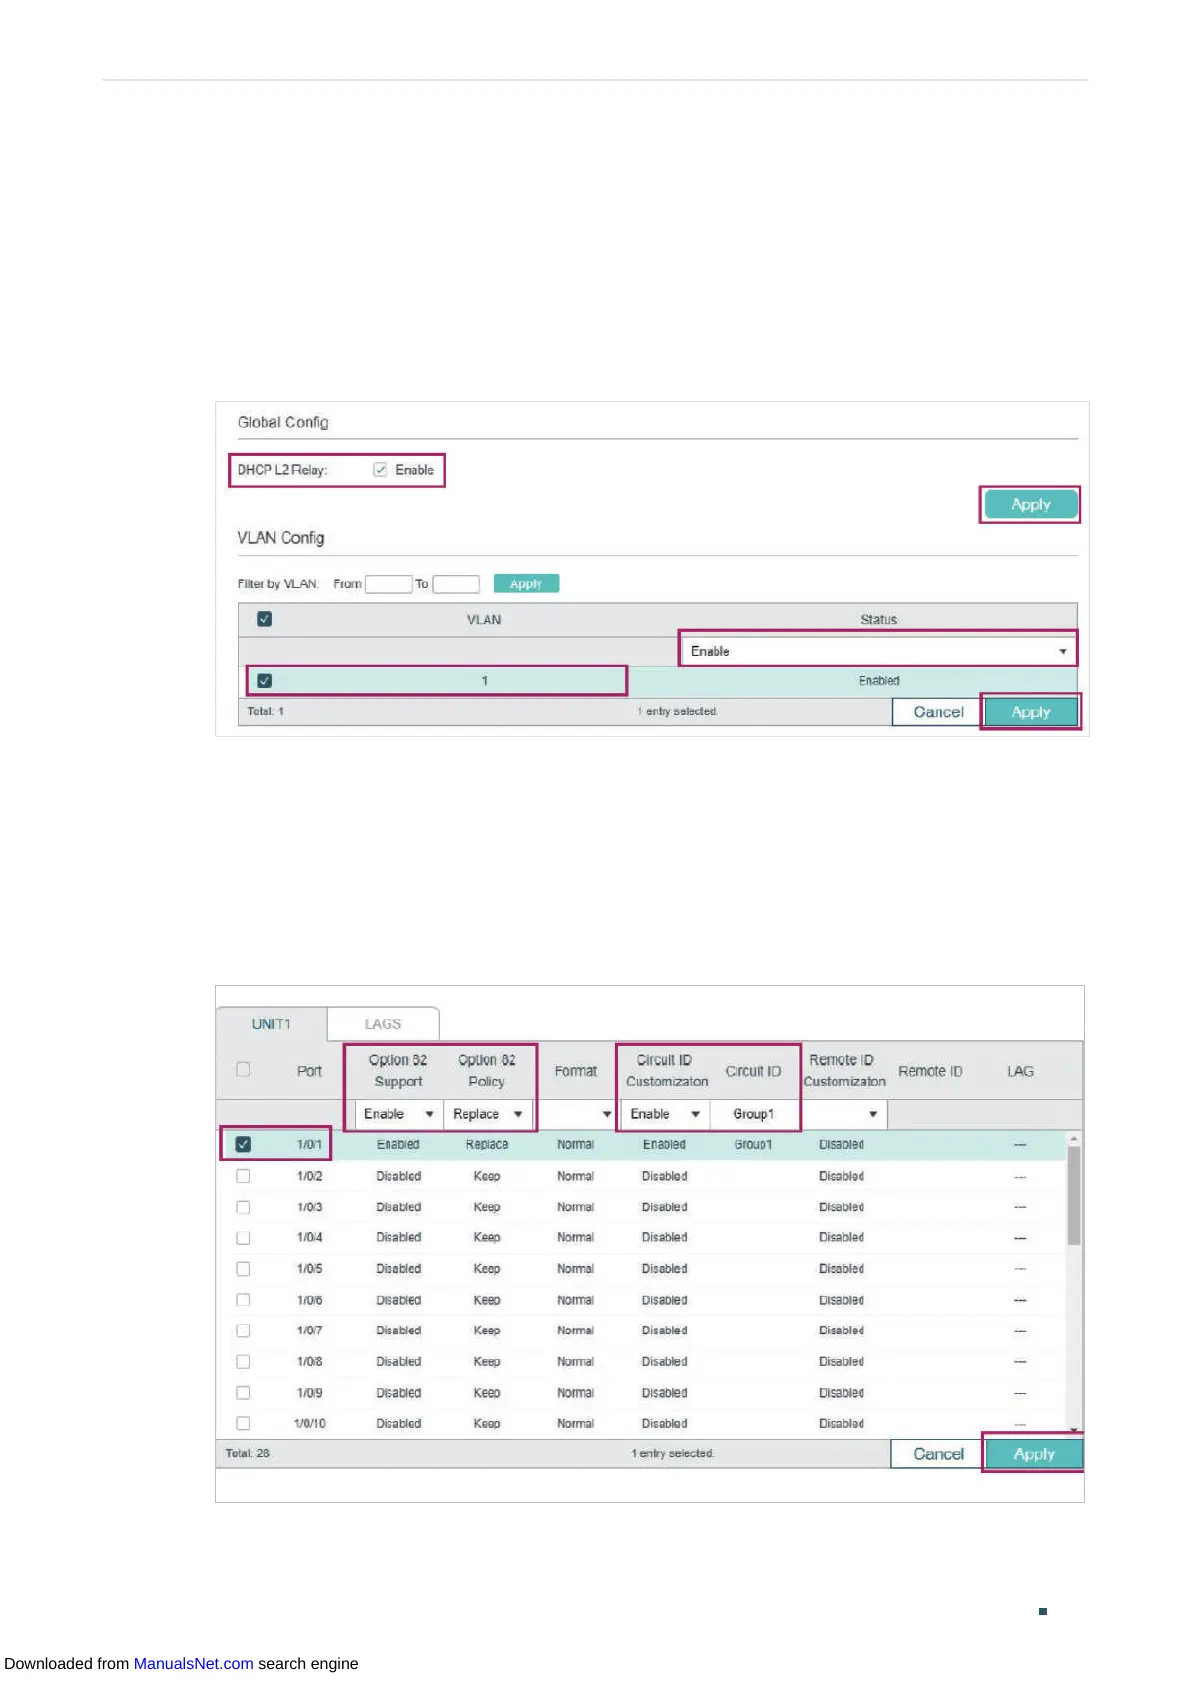
1) Choose the menu L3 FEATURES > DHCP Service > DHCP L2 Relay > Global Config to
load the following page. In the Global Config section, enable DHCP L2 Relay globally
and click Apply. Enable DHCP L2 Relay on VLAN 1 and click Apply.
Figure 4-16 Enabling DHCP L2 Relay
2) Choose the menu L3 FEATURES > DHCP Service > DHCP L2 Relay > Port Config
to load the following page. Select port 1/0/1, enable Option82 Support and select
Option82 Policy as Replace. You can configure other parameters according to your
needs. In this example, keep Format as Normal and Remote ID Customization as
Disabled. Enable Circuit ID Customization and specify the Circuit ID as Group1. Click
Apply.
Figure 4-17 Configuring Port 1/0/1
Downloaded from ManualsNet.com search engine
 Loading...