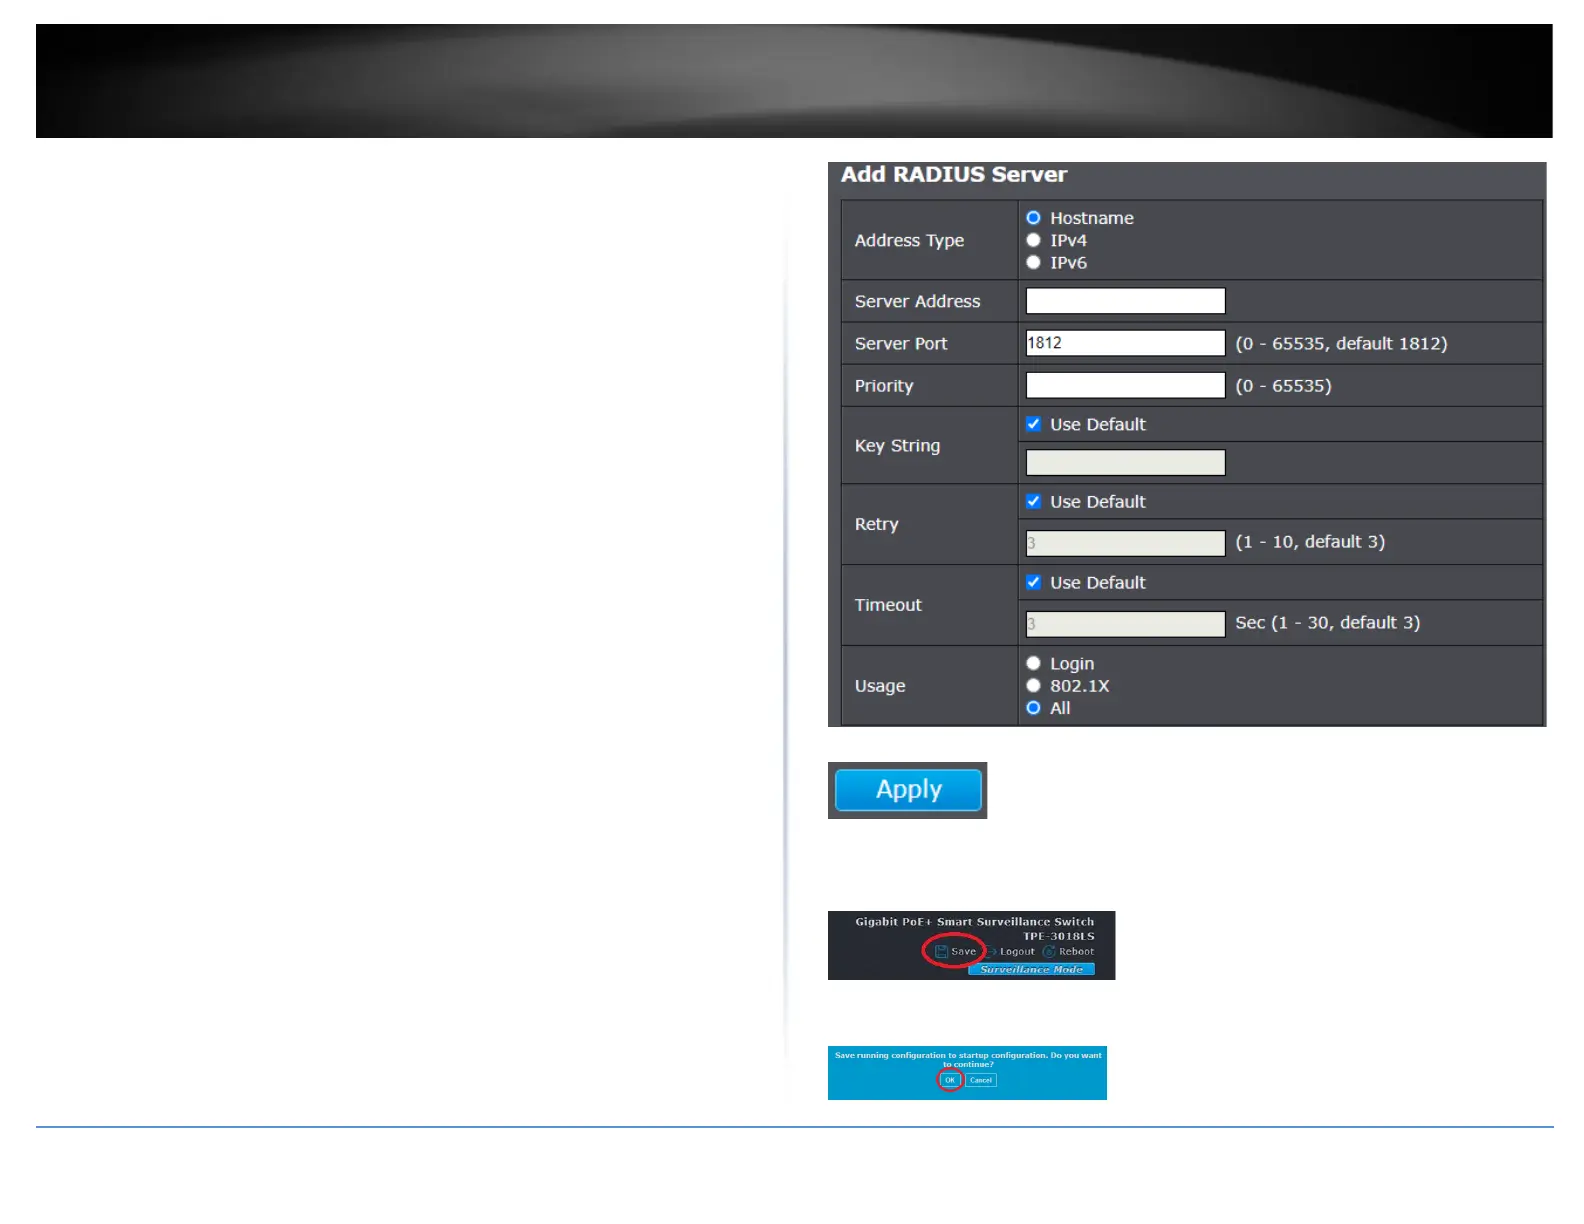
• Timeout – By default, the Use Default setting is checked to use the timeout
interval specified in the global settings. If the timeout interval for a specified
RADIUS server, uncheck the Use Default option and enter the timeout interval
in the field provided.
• Usage – Select the authentication type to use for RADIUS clients.
o Login – Only use basic user and password authentication from the
switch local user database.
Note: Local authentication users must be specified under the
Management > Users with the User Privilege.
o 802.1X – Only use the user credentials specified in the externally
connected RADIUS server(s).
o All – Use either Login or 802.1X to authenticate users access to the
switch.
• NAS ID - This parameter assigns an 802.1x identifier to the switch that applies
to all ports. The NAS ID can be up to sixteen characters. Valid characters are 0
to 9, a to z, and A to Z. Spaces are allowed. Specifying an NAS ID is optional.
• Port Access Control - This parameter enables or disables Port Access Control.
Select one of the following choices from the pulldown menu:
o Enable: The Port Access Control feature is activated.
o Disable: The Port Access Control feature is de-activated.
• Authentication Method - This parameter indicates the authentication method
used by the switch. Select one of the following choices:
o RADIUS: This parameter configures port security for remote
authentication. After completing steps, you must configure the
“RADIUS Client” section.
o Local: This parameter configures port security for local authentication.
After completing steps, you must configure the parameters for “Dial-in
User— Local Authentication” section.
o TACACS+: This parameter configures port security for terminal
authentication. After completing steps, you must configure the
“TACACS+ Settings” section.
4. Click Apply.
5. In the top right, click Save to save the configuration settings to NV-RAM/startup
configuration.
6. Click OK.
 Loading...