E-map Management
ONVIF > E-Map Management
This section will allow users to upload images of floorplans where IP camera can be
placed on as a visual reference to the IP cameras physical locations.
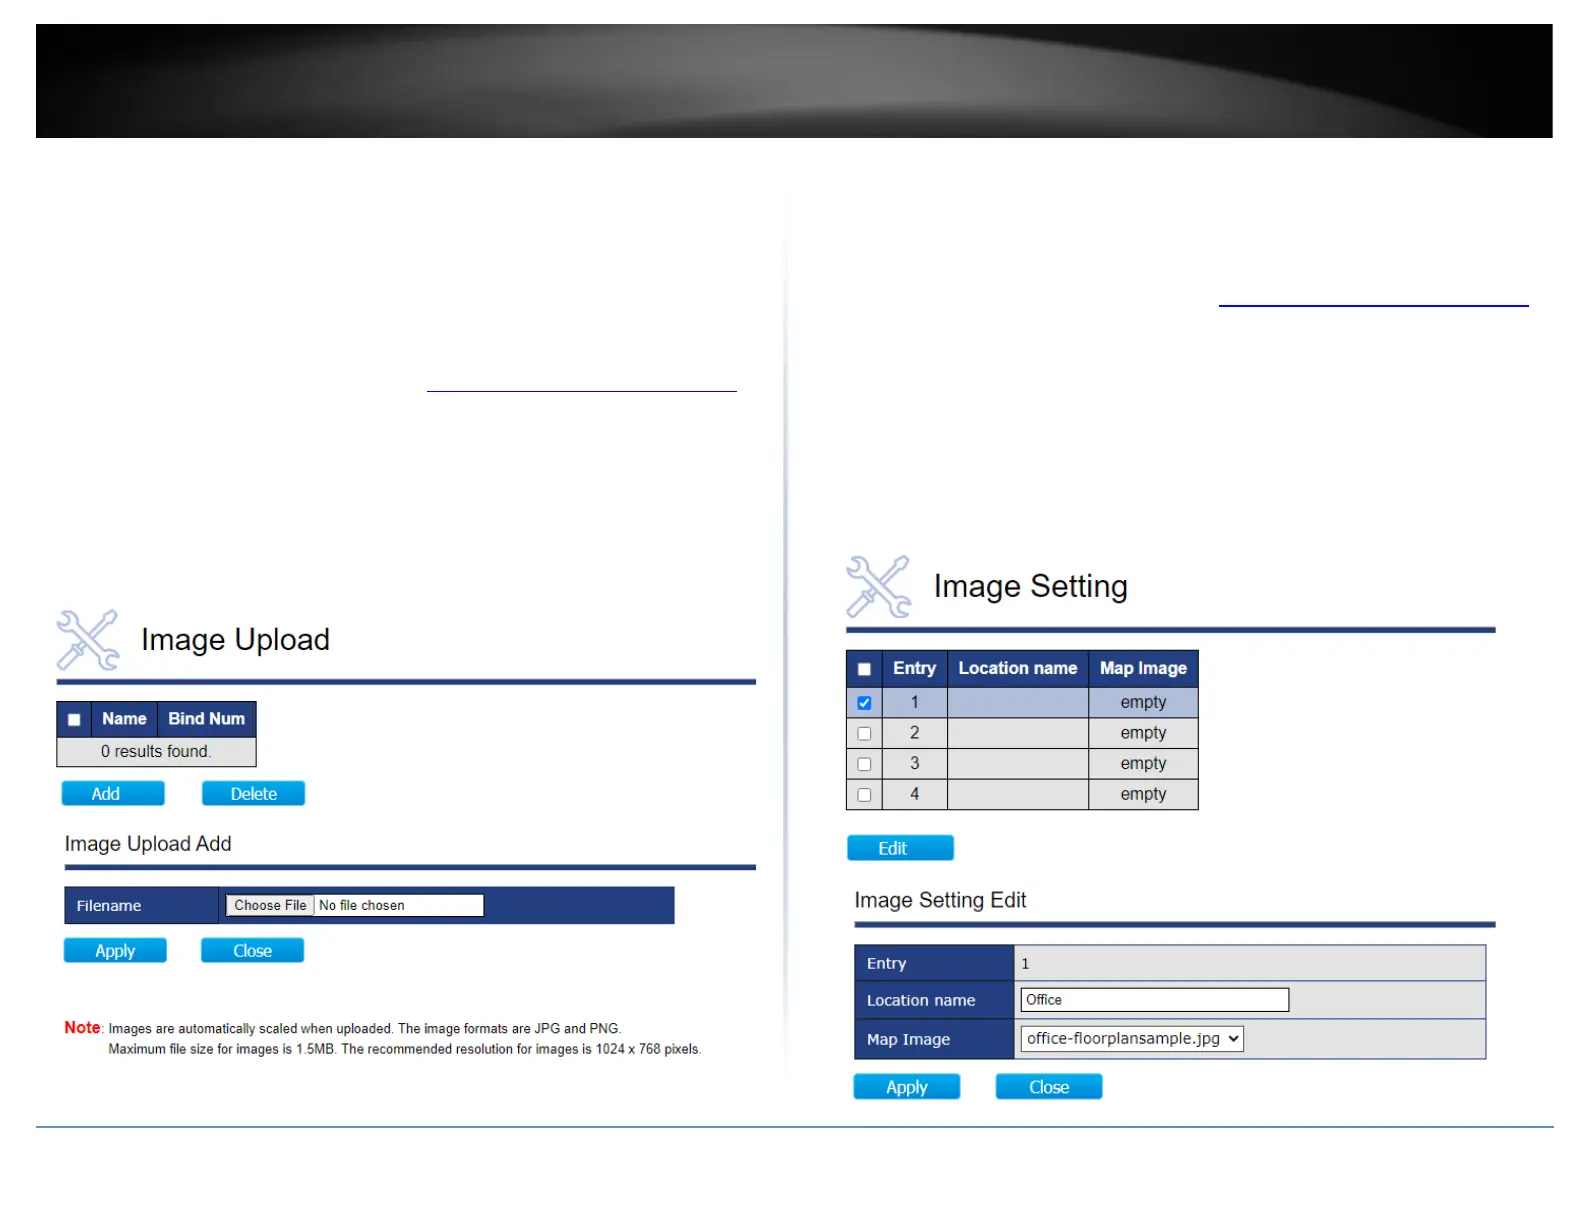
Uploading E-Map Floorplan Images
ONVIF > E-Map Management > Image Upload
1. Log into your switch management page (see “Access your switch management page”
on page 11).
2. Click on ONVIF, click on E-Map Management, and click on Image Upload.
3. Click Add to upload a new floor plan image. Click Browse or Choose File and navigate
to the location of the floorplan image to upload from your local drive, then click Apply
to start the upload.
4. The file name of the image will be displayed after it has been successfully uploaded.
Binding E-Map Images with Location Name
ONVIF > E-Map Management > Image Settings
This section will allow users to set a location to a specific map image.
1. Log into your switch management page (see “Access your switch management page”
on page 11).
2. Click on ONVIF, click on E-Map Management, and click on Image Settings.
3. Select an entry and click Edit.
• Location Name: Enter a location name for the image.
• Map Image: Click the drop-down list to select an uploaded floorplan image to
assign. Click Apply.