SNMP
You can manage a switch by viewing and configuring the management information base
(MIB) objects on the device with the Simple Network Management Program (SNMP).
This section describes how to configure SNMP. A Group Name, IP address of the switch
and at least one community string is the minimum required to manage the switch using
SNMP.
Configure the SNMP View Table
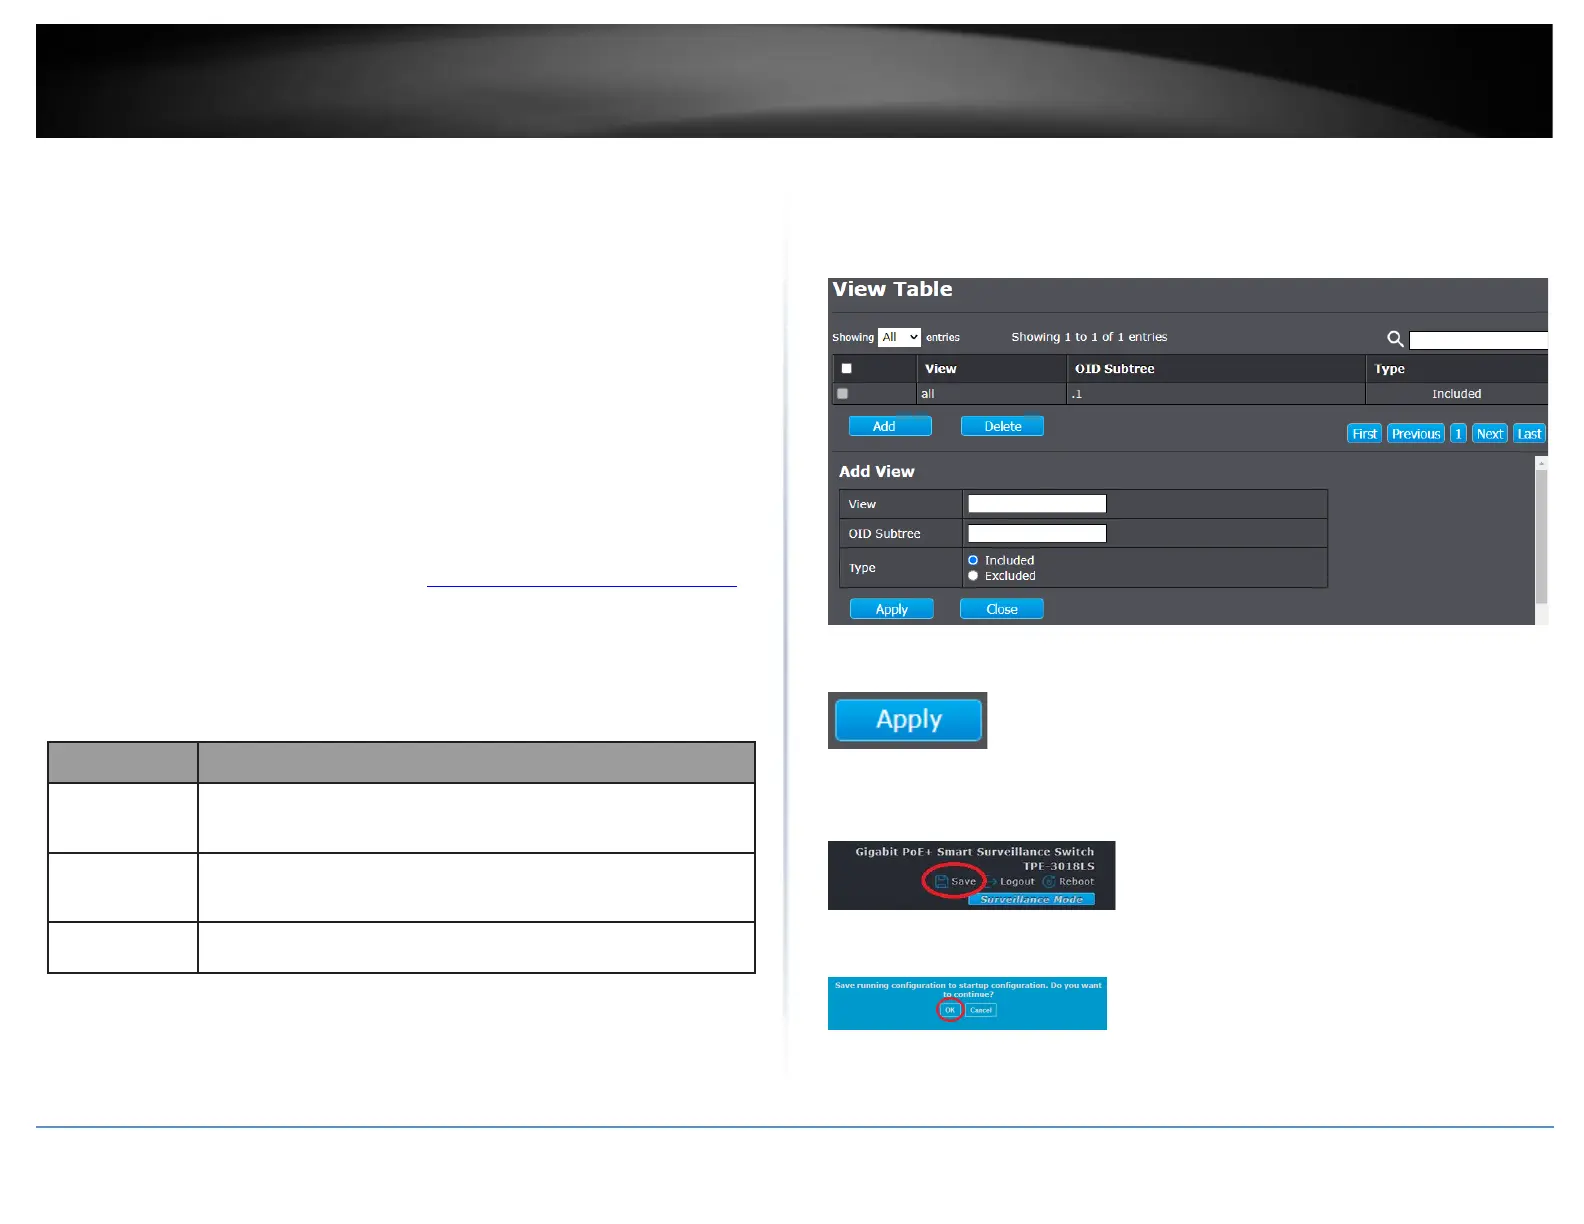
Management > SNMP > View Table
The SNMP View table specifies the MIB object access criteria for each View Name. If the
View Name is not specified on this page, then it has access to all MIB objects. You can
specify specific areas of the MIB that can be accessed or denied based on the entries in
this table. You can create and delete entries in the View table.
1. Log into your switch management page (see “Access your switch management page”
on page 11).
2. Click on Management, click on SNMP, and click on View.
3. Click Add to add a new SNMP view table. Review the settings.
• Enter the Subtree OID.
• Select the View Type.
o Included: This selection allows the specified MIB object to be included
in the view.
o Excluded: This selection blocks the view of the specified MIB object.
4. Click Apply.
5. In the top right, click Save to save the configuration settings to NV-RAM/startup
configuration.
6. Click OK.