Replacement
NOTE: Pour the Developer Material evenly over the
full length of the augers.
1. (Figure 4): Install the Developer Material and
record the batch number in the Machine Log.
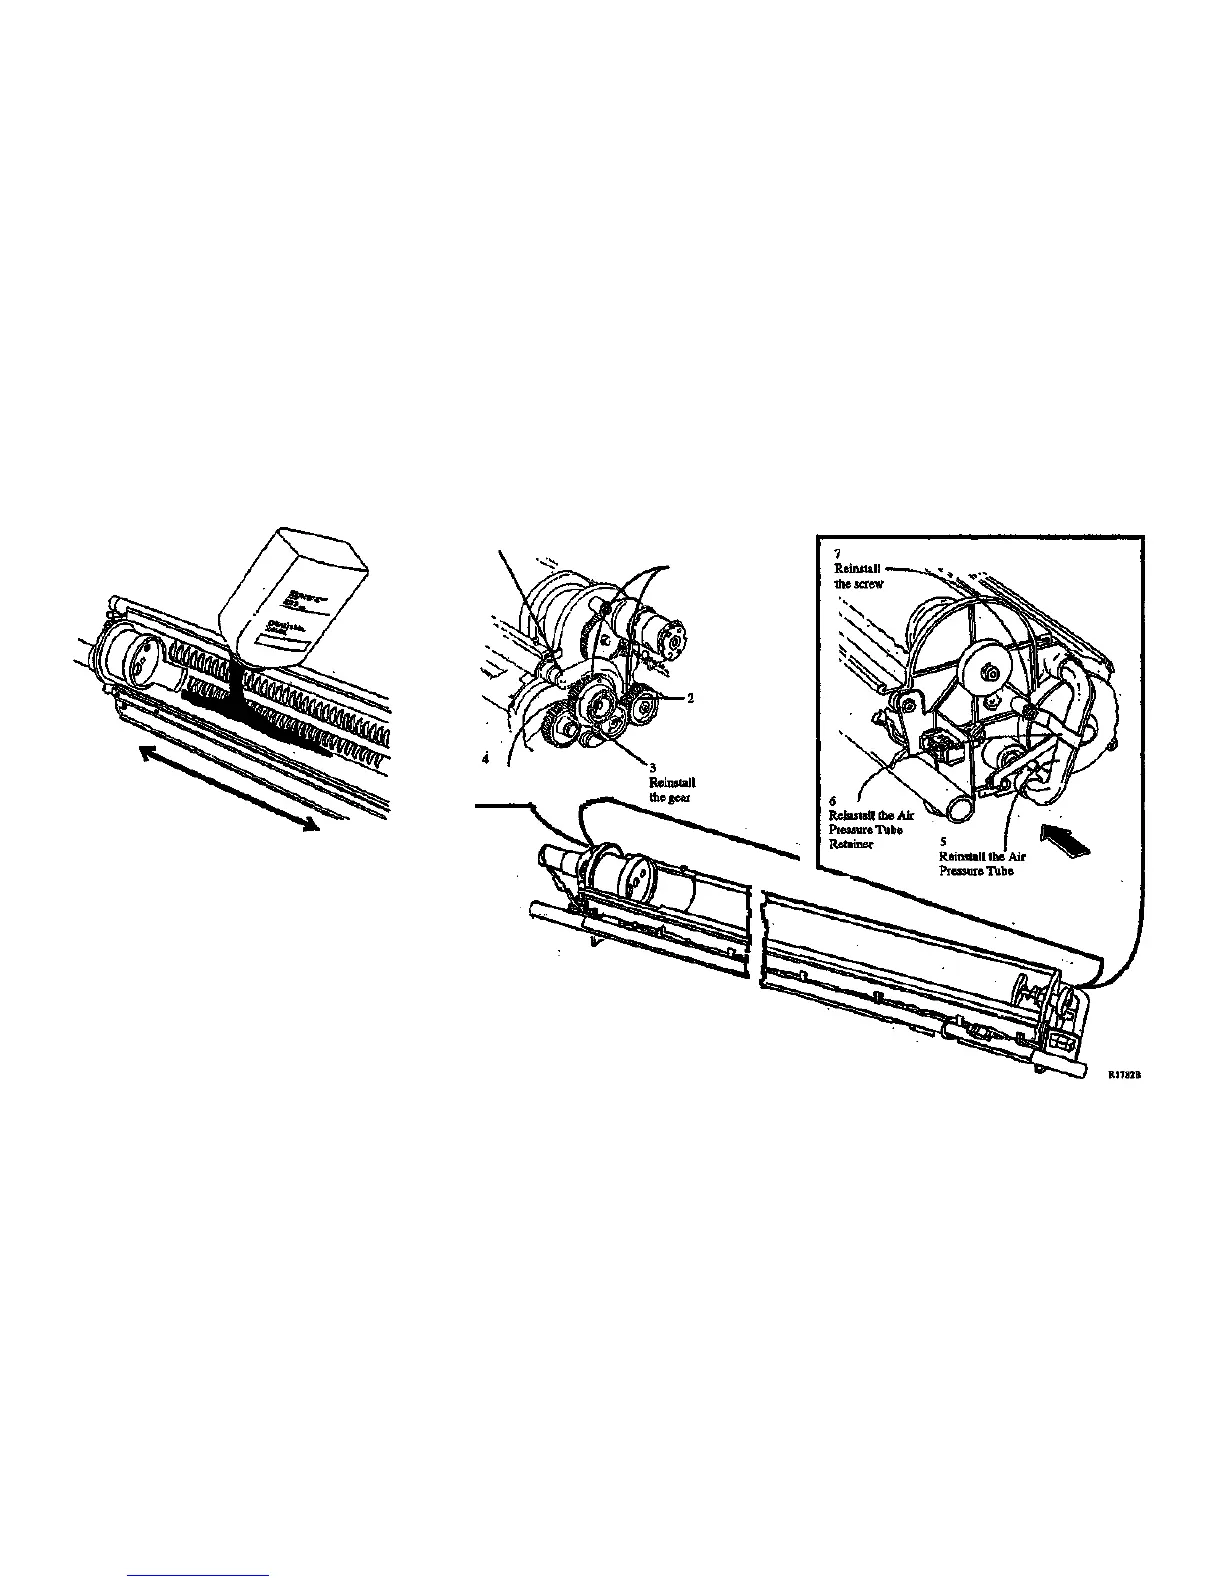
NOTE: The gears must be reinstalled with the
flanges as shown to ensure that all the gears are
secured.
2. (Figure 5): Reinstall the Air Pressure Tubes.
Reinstall the Air
Pressure Tube
Flanges
Reinstall the gear
1
Pour the Developer
Material evenly from end
to end and across the
augers R1627B
Figure 4. Installing the Developer Material
CAUTION
Do not rotate the Auger Gears individually more
than the slight amount required for removal or to
mesh the teeth during reinstallation. If the factory
setting of the augers is changed during the
procedure, perform the adjustment procedure,
Augers (ADJ 9.6).
Reinstall the gear and
the Grip Ring
Figure 5. Reinstalling the Air Pressure Tubes
8830
1/98
4-61
REP 9.7
 Loading...


