February 2013
4-283
ColorQube® 9303 Family
REP 75.10
Repairs/Adjustments
Figure 3 Tray assembly rear view
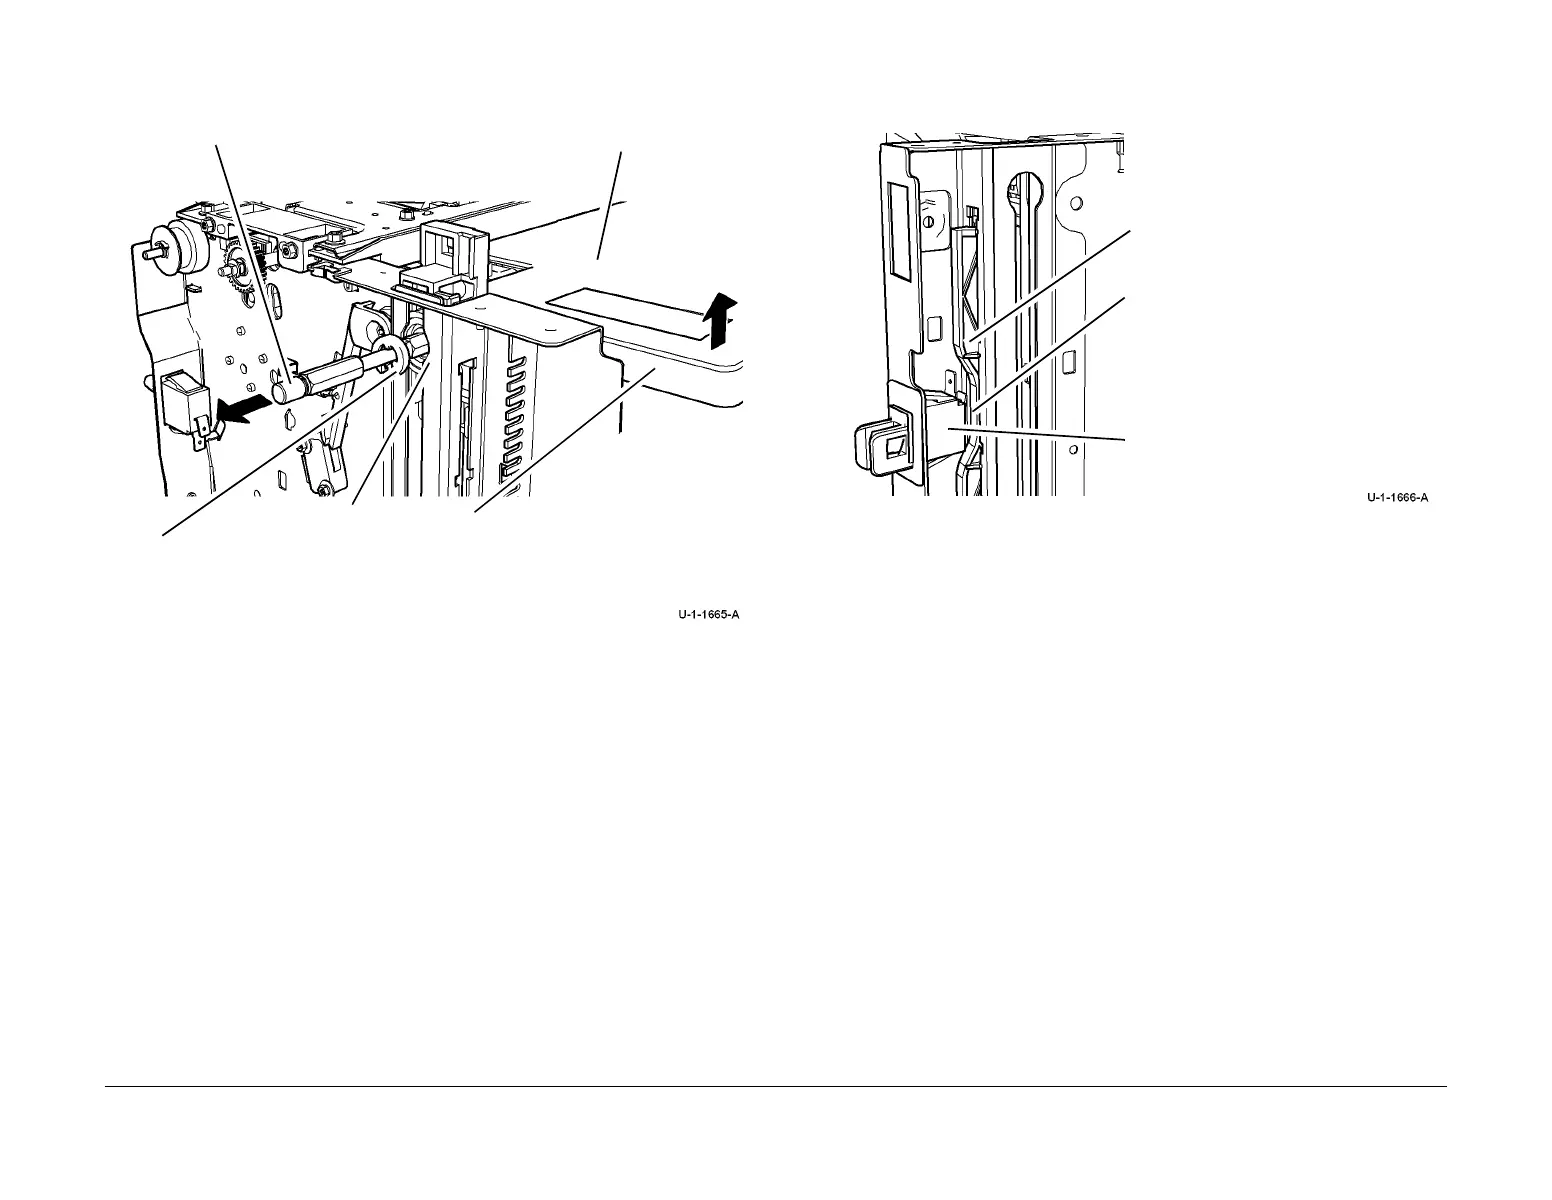
12. Remove the front and rear drive gears, PL 75.68 Item 28.
13. Remove the front elevator rack, PL 75.68 Item 14. Slide the rack upwards within the
frame then lift the rack away from the tray 5 module.
NOTE: Only the front elevator rack has a clearance cut-out to accommodate the tray 5
door switch, Figure 4.
Figure 4 Front elevator rack
14. Remove the rear elevator rack, PL 75.68 Item 13. Slide the rear elevator rack upwards
within the frame, then lift the rack away from the tray 5 module.
1
Raise the tray assembly until the rear tra
level drive gear clip and the elevator
motor shaft are in alignment with the
access slot of the frame.
2
Remove the rear tray level drive gear clip.
4
Remove the tray assembly from
the tray 5 module.
3
Remove the elevator motor shaft.
Access slot
1
Ensure the cut-out of the front elevator
rack is orientated towards the tray 5 door
switch.
Front elevator rack
Tray 5 door switch

 Loading...


