February 2013
4-62
ColorQube® 9303 Family
REP 10.2
Repairs/Adjustments
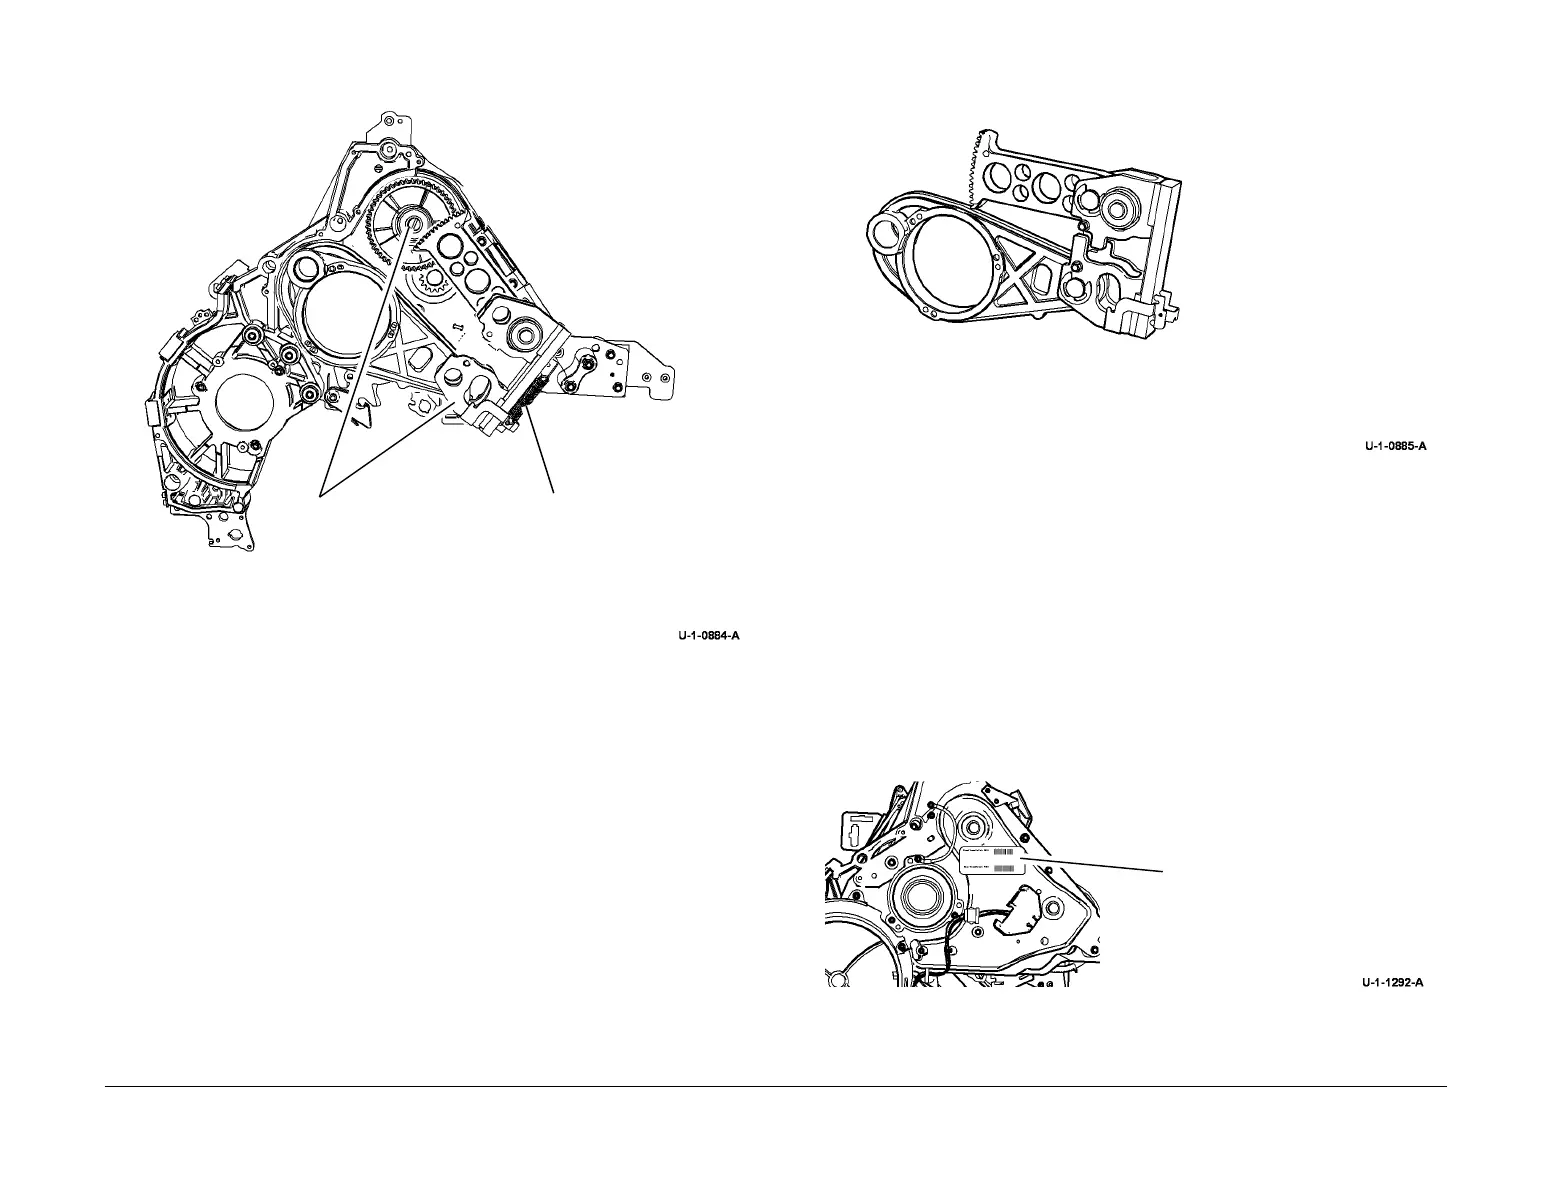
6. Remove the transfix linkage and gear, Figure 4.
Figure 4 Transfix linkage removal
7. The removed transfix linkage is shown in Figure 5.
Figure 5 Transfix linkage
Replacement
1. Replacement is the reverse of the removal procedure.
2. Before installing the new transfix linkage, use the transfix roller retaining screws to pre -
tap the three transfix roller retaining holes in the linkage. This will prevent metal shavings
from falling down into the machine during transfix roller installation.
3. Ensure that the arm is in the correct position relative to the gear.
4. Ensure that the spring is re-installed.
5. Ensure that the ground lead between the top transfix roller screw and the front drum
frame is reconnected.
6. Cross out the old calibration value on the calibration label, Figure 6.
7. Write the new linkage calibration value on the calibration label, Figure 6.
Figure 6 Calibration label
8. Perform dC978 Transfix Calibration Values and load the correct values for the new link-
age.
1
Remove the retract
spring.
2
Remove the transfix
linkage and gear.
Calibration label for front and
rear transfix values

 Loading...


