February 2013
4-104
ColorQube® 9303 Family
REP 12.5-110
Repairs/Adjustments
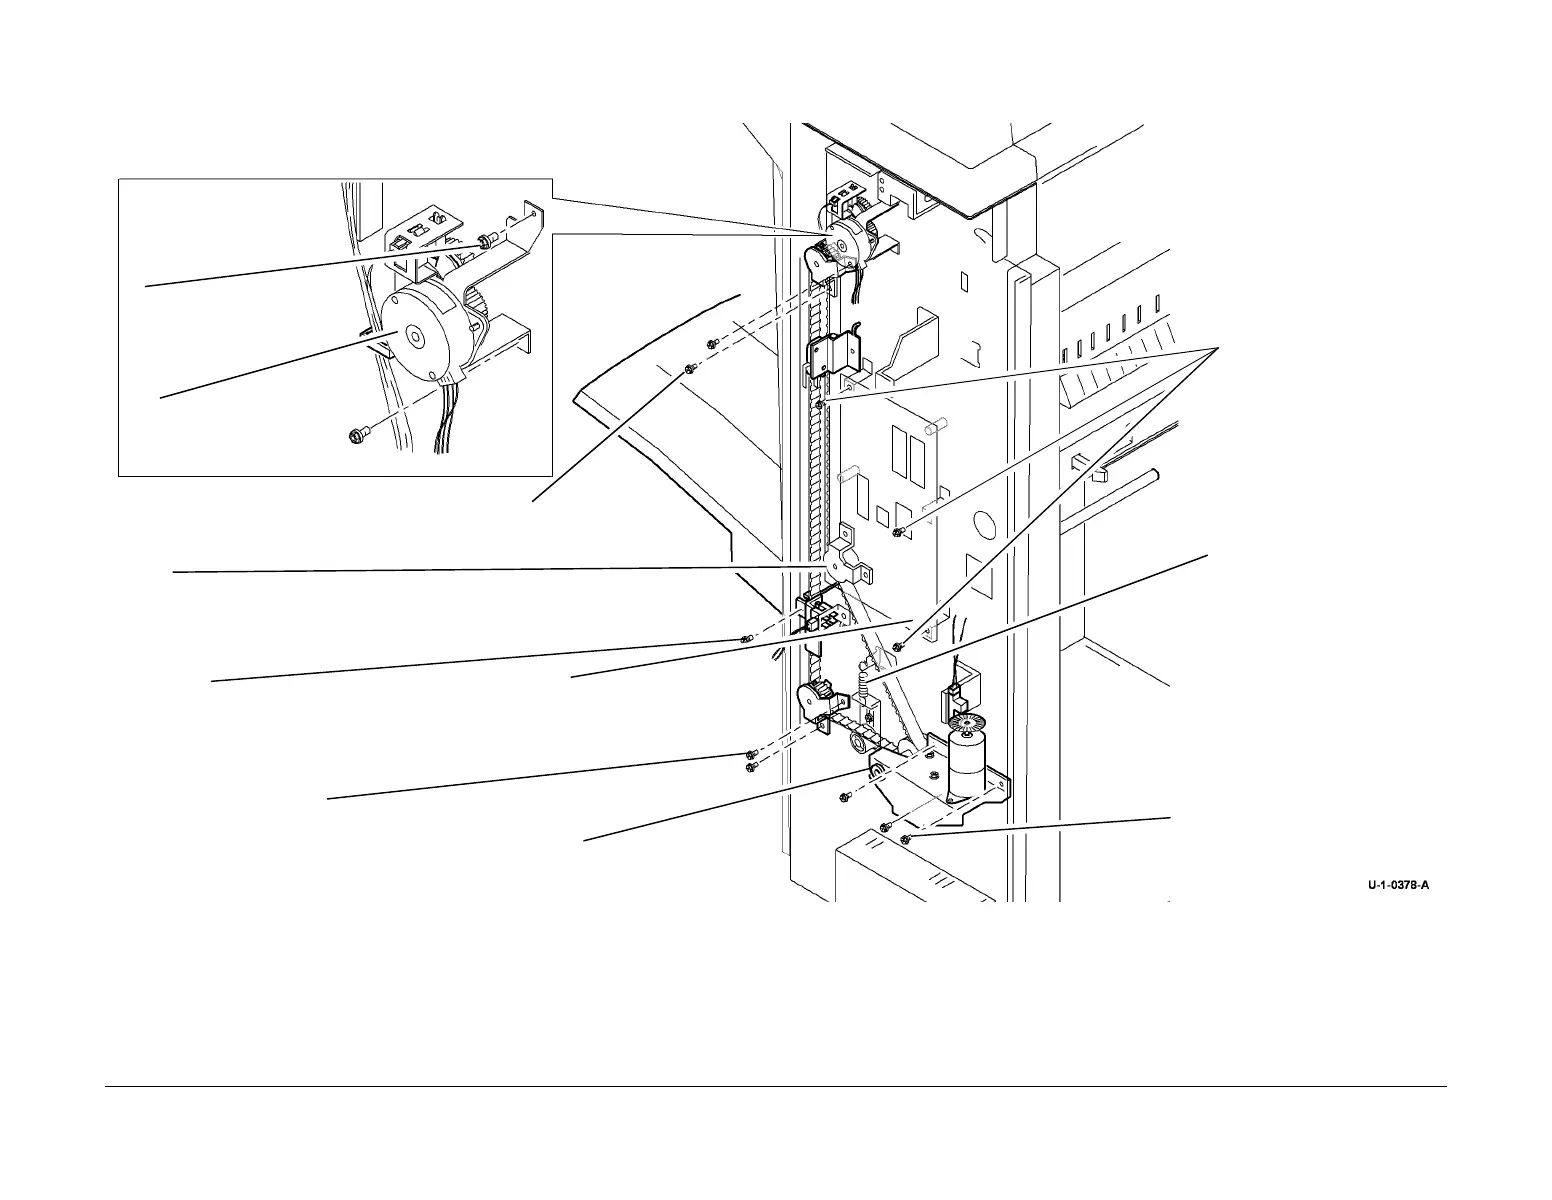
2. Remove the bin 1 drive belt (rear) Figure 1. NOTE: Keep all of the components removed as a set. The set of rear frame components
are different from the front frame set.
Figure 1 Bin 1 drive belt (rear)
9
Remove 2 screws and
upper pulley.
2
Remove E-clip and bearing.
6
Remove 3 screws and
release the lower and middle
PWB standoffs, leaving the
PWB attached by only the top
standoff.
12
Remove 2 screws, lower
pulley and drive belt.
1
Disconnect PJ318.
3
Remove 3 screws, remove
bracket with Bin 1 elevator
motor.
4
Fully lower bin 1.
11
Remove screw and
remove the belt clamp.
5
Release the tensioner spring.
10
Disconnect PJ316 and release the belt
from behind the PWB and drive pulley.
7
Remove 2 screws
8
Move motor assembly to
the right

 Loading...


