67C3K11 5-50
1
2
3
4
5
6
7
8
9
CAUTION:
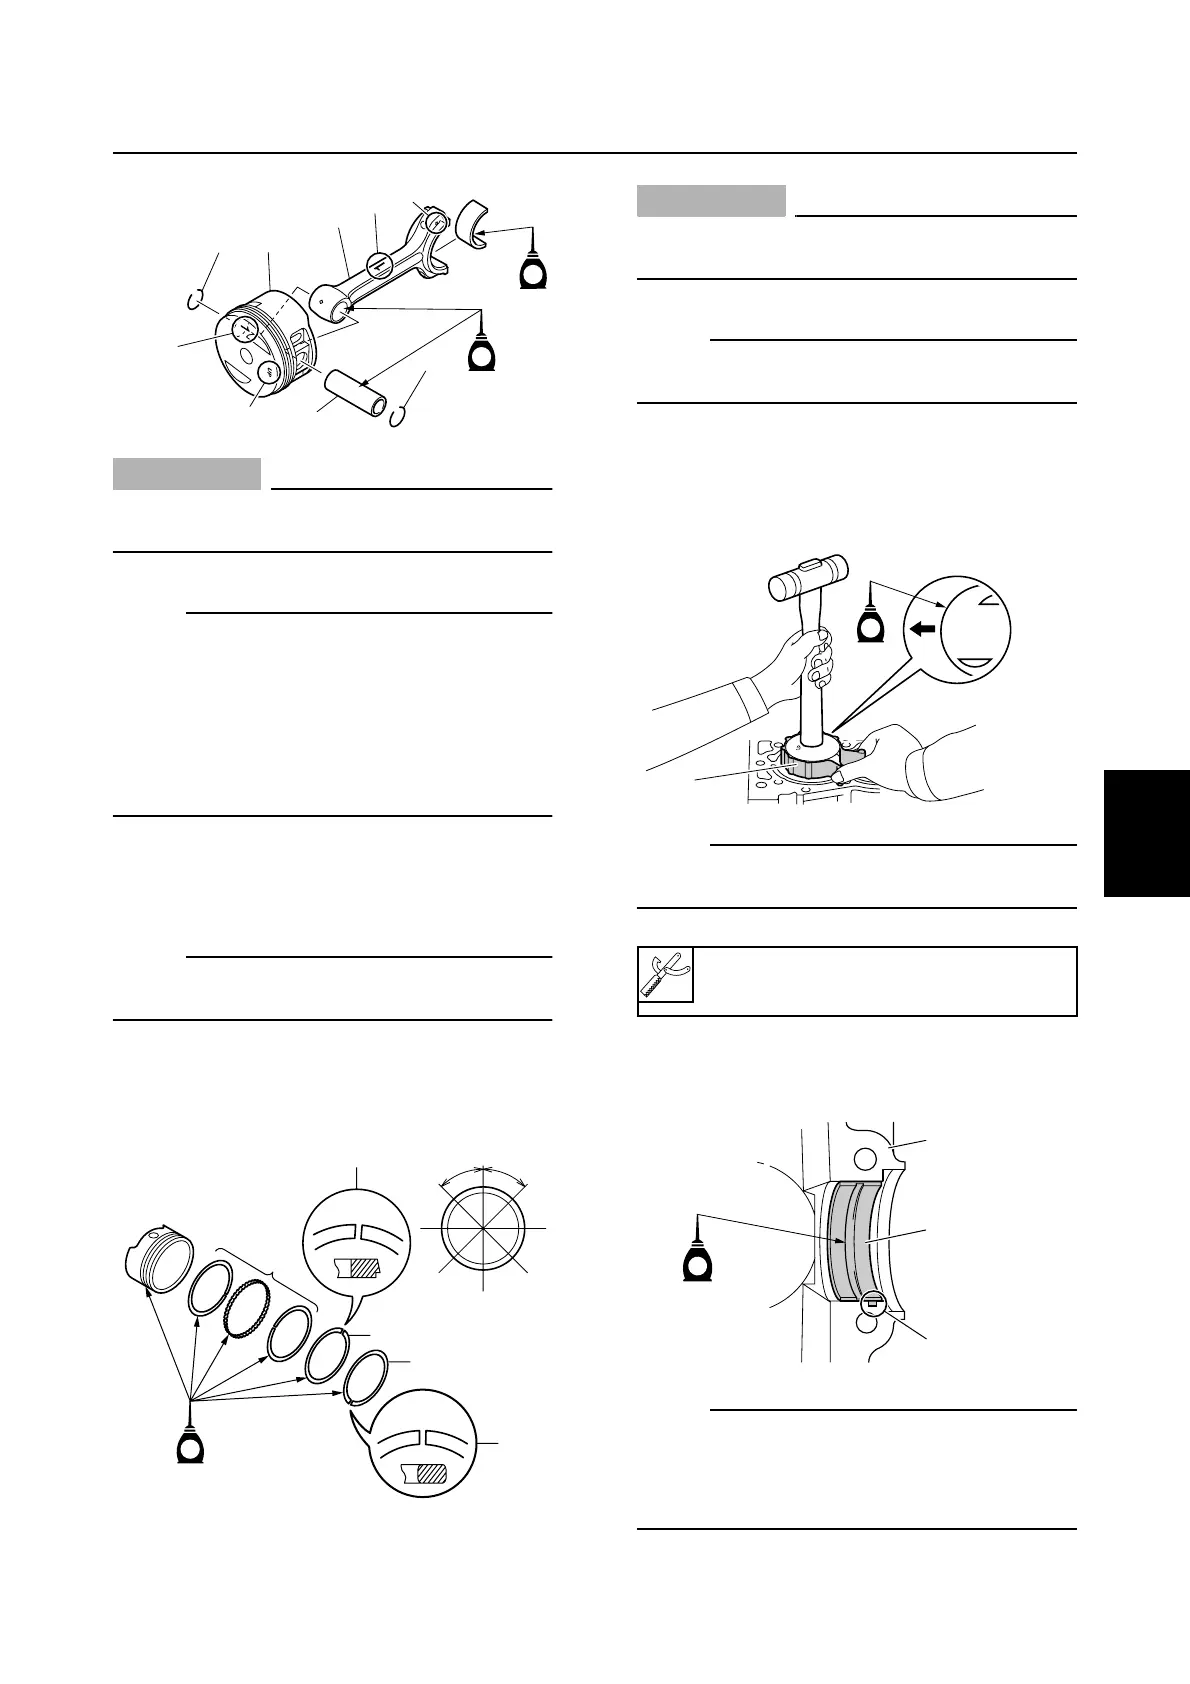
Do not reuse the piston pin clips 4,
always replace them with new ones.
NOTE:
• Before assembly, make sure that the identi-
fication numbers a made on the piston and
connecting rod 2 during removal are the
same.
• Face the projection b on the connecting
rod 2 in the same direction as the “UP”
mark c on the piston crown.
2. Install the oil ring 5, 2nd ring 6, and top
ring 7 onto each piston.
NOTE:
Make sure that the “T” marks d of the 2nd
ring 6 and the top ring 7 are facing upward.
3. Offset the piston ring end gaps as
shown.
CAUTION:
Do not scratch the pistons or break the
piston rings.
NOTE:
After installing the piston rings, check that
they move smoothly.
4. Install the piston with the “UP” mark on
the piston crown facing towards the fly-
wheel magnet.
NOTE:
Apply engine oil to the side of each piston
and the piston rings before installation.
5. Install half of the main bearings 9 into
the cylinder block 0.
NOTE:
• Install the main bearings 9 in their original
positions.
• Insert the projection e of each bearing into
the slots in the cylinder block 0.
S67C5148
4
2
1
3
a
4
a
c
b
E
E
S67C5149
T
UP
#1,#4
#2
#5
#3
45˚ 45˚
T
UP
#1
#2
#5
#4
#3
E
5
6
7
d
d
Piston slider 8: 90890-06529
S67C5151
E
8
S67C5173
E
0
9
e
Cylinder block
 Loading...