POWR
Power unit
5-51 67C3K11
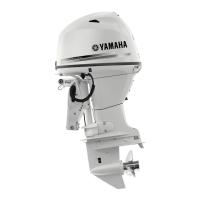
6. Install the oil seals A and B onto the
crankshaft C as shown, and then install
the crankshaft into the cylinder block.
NOTE:
Apply engine oil to the inside of each oil seal
before installation.
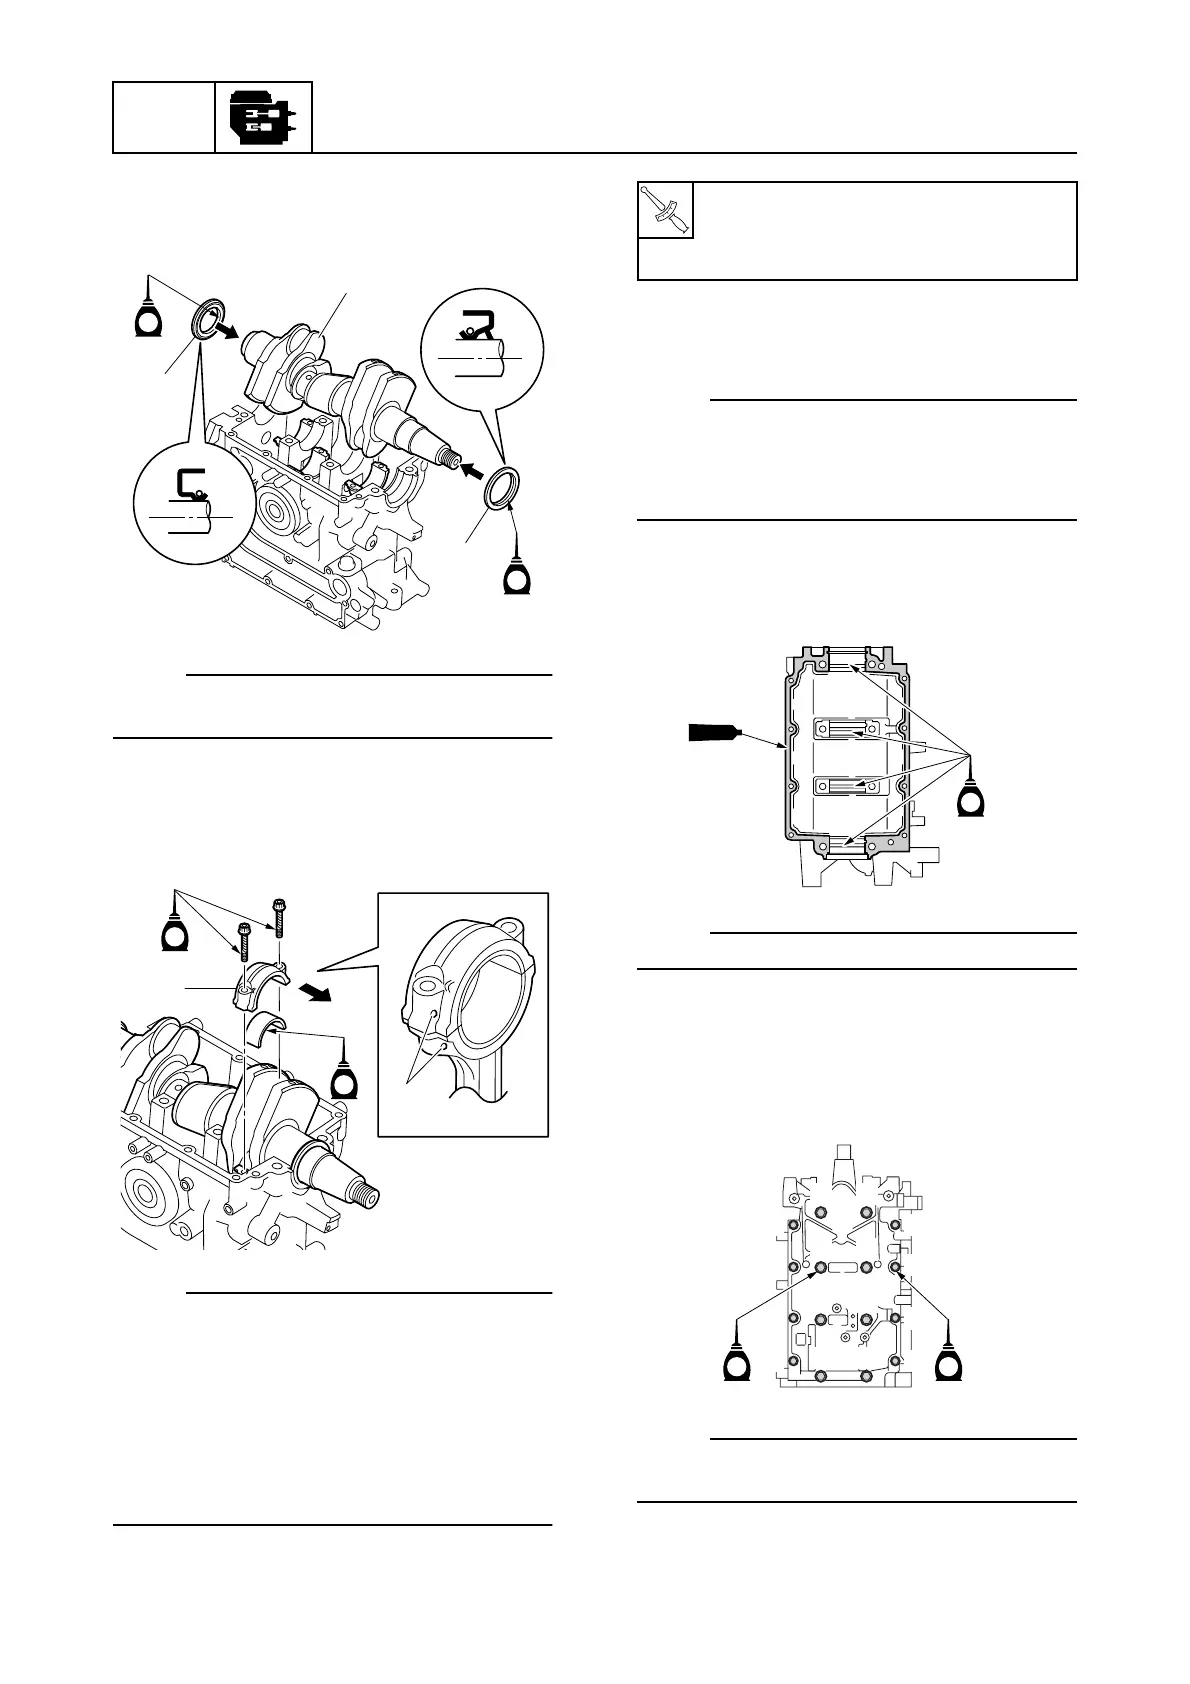
7. Install the connecting rod caps D to the
connecting rods, and then tighten the
bolts to the specified torques in 2 stages.
NOTE:
• Make sure that the projections f on the
connecting rod cap D face towards the fly-
wheel magnet end È of the crankshaft.
• Apply engine oil to the connecting rod cap
bolts before installation.
• After tightening the connecting rod cap
bolts, check that the crankshaft rotates
smoothly.
8. Install the remaining half of the main
bearings into the crankcase.
NOTE:
• Install the main bearings in their original
positions.
• Insert the projection of each bearing into
the slots in the crankcase.
9. Apply sealant to the mating surface of
the crankcase.
NOTE:
Do not get any sealant on the main bearings.
10. Install the crankcase onto the cylinder
block, and then tighten the crankcase
bolts to the specified torques in 2 stages
and in the sequence shown.
NOTE:
Apply engine oil to the threads of the crank-
case bolts before installation.
S67C5153
B
A
E
E
C
S67C5154
E
E
D
È
f
T
R
.
.
Connecting rod cap bolt:
1st: 6 N·m (0.6 kgf·m, 4.4 ft·lb)
2nd: 17 N·m (1.7 kgf·m, 12.5 ft·lb)
S67C5155
E
518
S67C5145
12
34
56
78
90
AB
CD
EF
EE
 Loading...