n
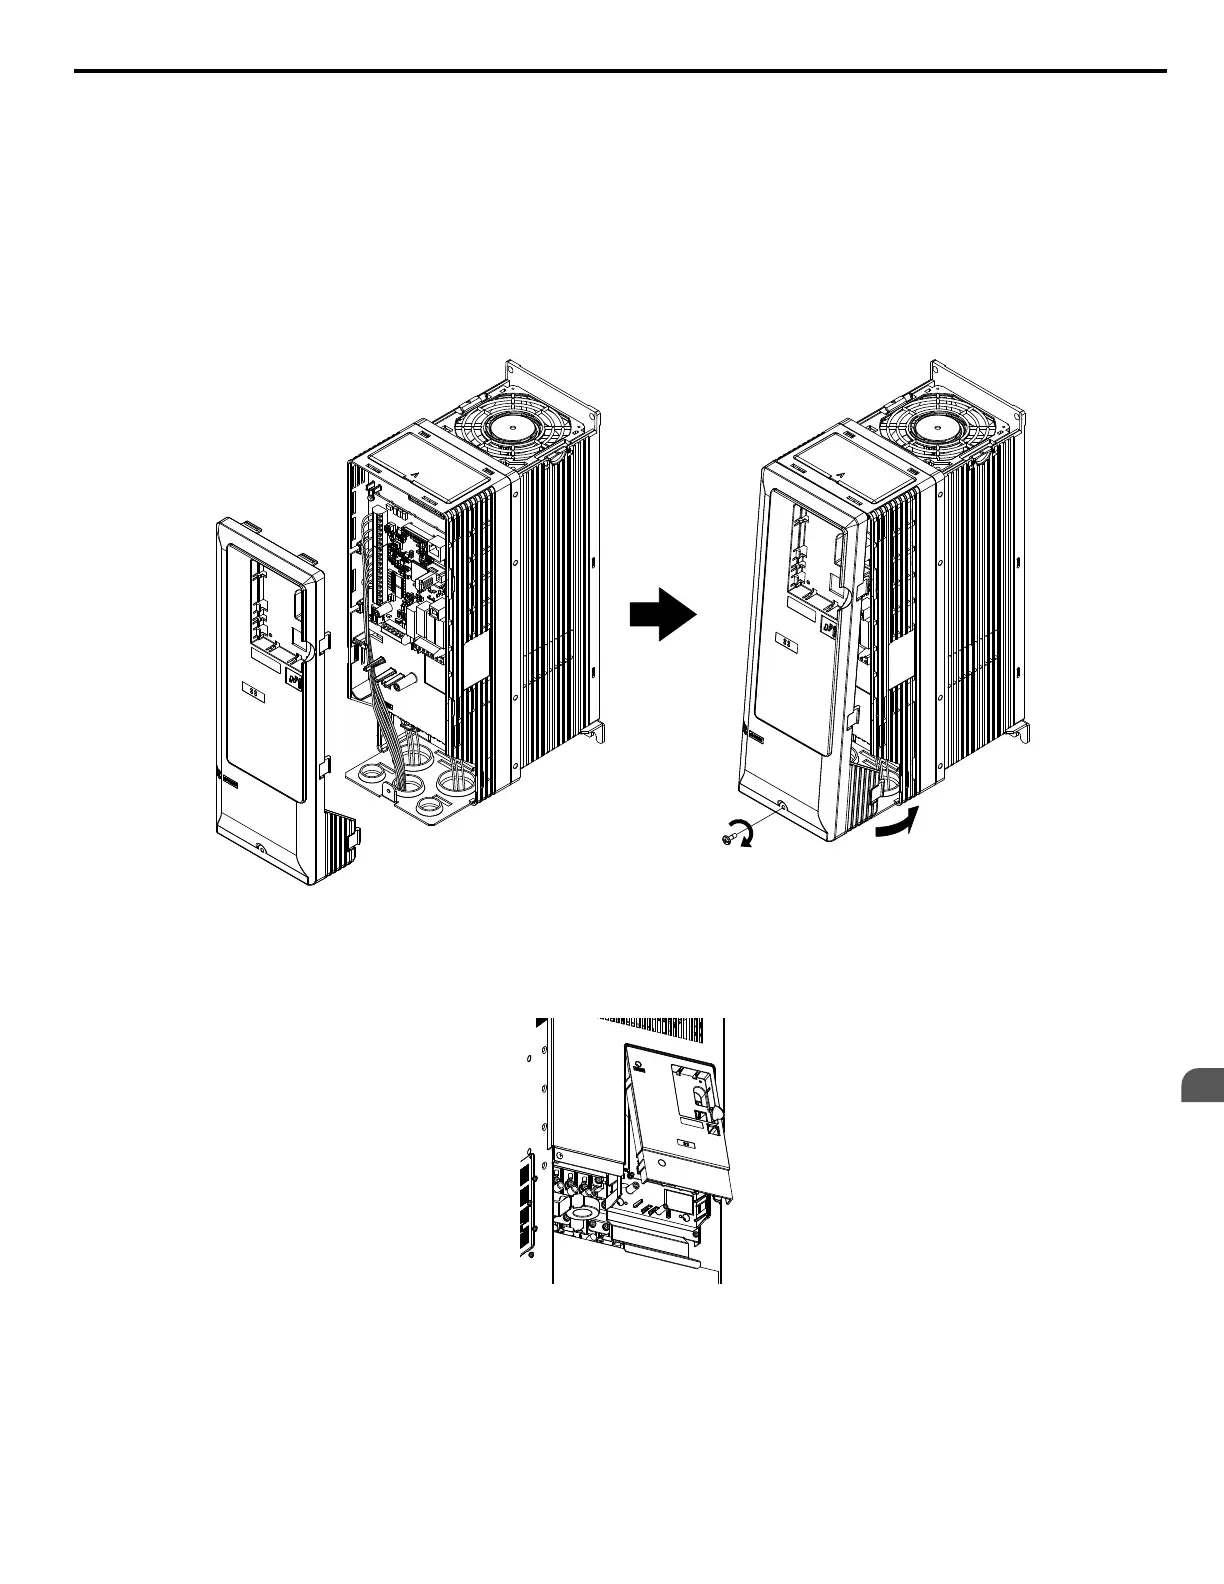
Reattaching the Front Cover
Drive Models 2A0011 to 2A0114 and 4A0005 to 4A0096
Reverse the instructions given in Removing the Front Cover (2A0011 to 2A0059, 4A0005 to 4A0040, and 4A0052
oo
B) on
page 73 and Removing the Front Cover (2A0075 to 2A0114, 4A0052
oo
A, and 4A0065 to 4A0096) on page 74 to reattach
the front cover. Pinch inwards on the hooks found on each side of the front cover while guiding it back into the drive. Make
sure it clicks firmly into place.
Power lines and signal wiring should pass through the opening provided. Refer to Wiring the Main Circuit Terminal on
page 90 and Wiring the Control Circuit Terminal on page 95 for details on wiring.
Reattach the front cover after completing the wiring to the drive and other devices.
Figure 3.22 Reattach the Front Cover 2A0011 to 2A0114 and 4A0005 to 4A0096)
Drive Models 2A0143 to 2A0396 and 4A0124 to 4A0590
1.
Slide the front cover so the hooks on the top connect to the drive.
Figure 3.23 Reattach the Front Cover (2A0143 to 2A0396 and 4A0124 to 4A0590)
2.
After connecting the hooks to the drive, press firmly on the cover to lock it into place.
3.6 HOA Keypad and Front Cover
YASKAWA ELECTRIC TOEP C710616 45F YASKAWA AC Drive – Z1000 User Manual
77
3
Electrical Installation
 Loading...