Initial Startup • 9
125
08424705001 (01) 2017-04 USA • Accu-Chek Inform II Operator’s Manual Version 6
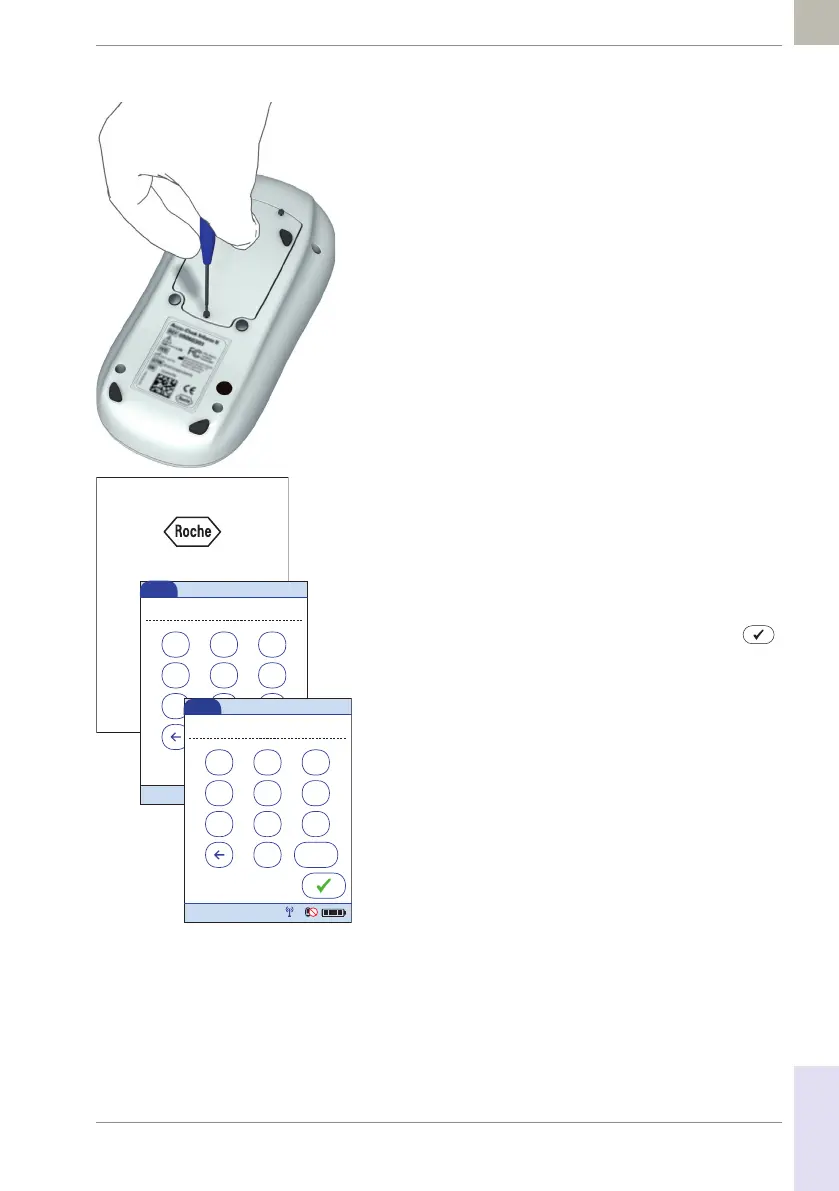
5 Close the battery compartment with the cover.
Make sure that the plug connector wires do not get
pinched between meter and cover.
6 Tighten all three screws until snug (do not over-
tighten).
After inserting a new battery pack, the meter powers on
automatically.
■ The Roche logo is displayed. If the meter does not
power on automatically, the battery pack may be
nearly empty. Place the meter in a base unit for a
minimum of 15 minutes, then remove the meter and
try to power it on. If it powers on, the battery pack
is charging properly.
■ Within a short period of time, the start screen
should appear.
■ If the meter has been without power for too long, a
message may appear informing you that the date
and time settings have been lost due to power loss.
■ The screens for entering the date and the time
appear.
7 Enter the date and time. After you have entered the
correct information, confirm each screen with .
■ Unless your QC configuration is Always OK (see
page 137), the meter will now be in QC Lockout due
to the manually entered date/time.
8 Synchronize the meter’s date/time with the date/
time of your facility via base unit or, if working wire-
lessly, wait at least ten minutes for the next WLAN
synchronization before performing any further
tests.
After installing a new battery pack, the meter should be
charged for at least 8 hours (e.g., overnight) in the base
unit before testing.
123
456
789
0
Date
03/17/17
12:00 am
03/17/17
123
456
789
AM/PM0
Time
12:00 am
12:48 pm
03/17/17
 Loading...