196 Firmware Version 6.0
SEED MONITOR SETUP
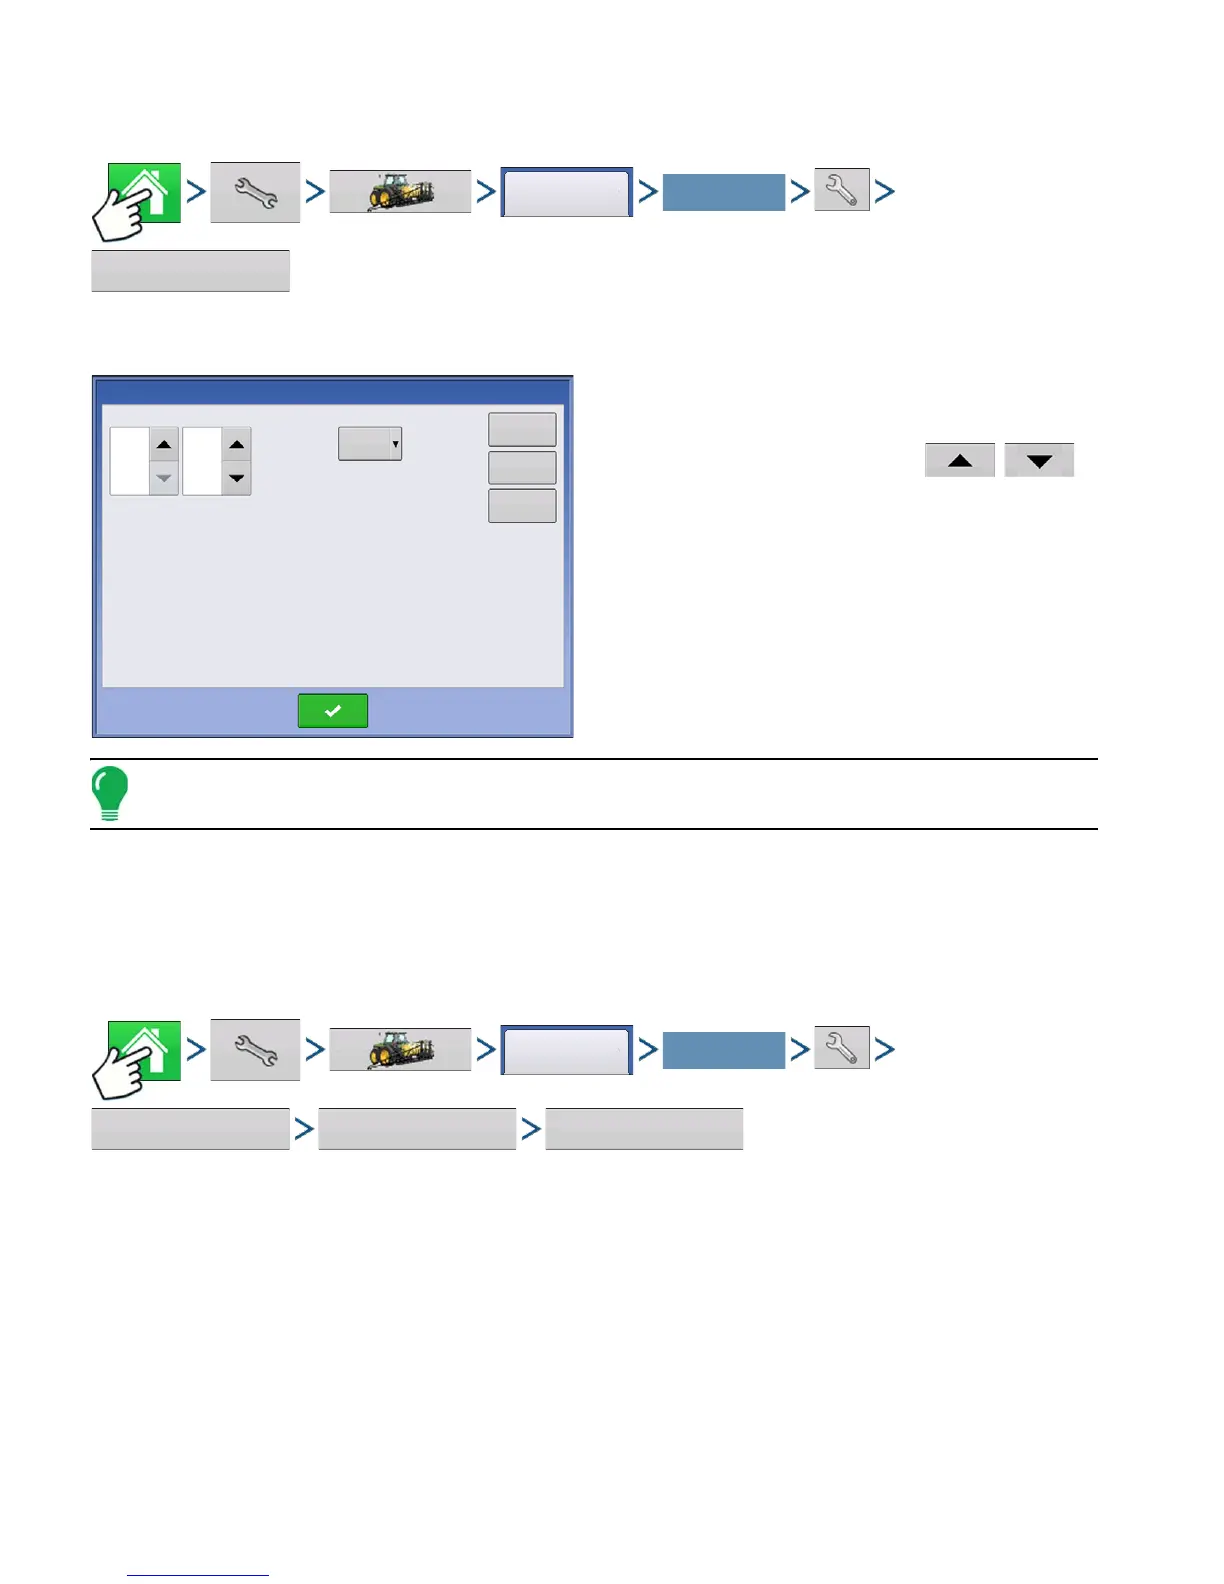
Press: Home button > Setup (wrench) button > Configuration (tractor) button > Configuration tab > your
specific configuration > Setup (wrench) button > Seed Monitor button
• The
Split Rows
and
Standard Rows
settings show
the number of rows found on the planter that the Seed
Tube Monitor Module supports. Use
/
to enter the total number of rows found on the planter.
• The
Speed Source
shows the selected Ground Speed
Source input for the Seed Tube Monitor Module. Press
the
Sensor
to summon the Sensor Configuration
window, which shows which rows are assigned to the
individual pins on the Seed Tube Monitor Module.
Note: Press the Sensor to perform the AutoConfig procedure, which is necessary for a Seed Tube Monitor
Module configuration to become active. Fore more information, see “AutoConfig Procedure” on page 196.
• Press the
Alarms
button to summon the Seed Monitor Alarms screen, which shows each row and the
alarm threshold for that row. For more information, see
“Seed Monitor Alarms” on page 199
.
AutoConfig Procedure
The AutoConfig procedure assigns individual rows to the appropriate pins on the Seed Tube Monitor
Module.
Press: Home button > Setup (wrench) button > Configuration (tractor) button > Configuration tab > your
specific configuration > Setup (wrench) button > Seed Monitor button > Sensor Configuration button >
AutoConfig button
Select Your Specific
Configuration
Seed Monitor
Split Rows
Standard Rows
0
16
Speed Source
GPS
Sensor
Configuration
Alarms
Thresholds
Select Your Specific
Configuration
 Loading...