1100 Series Nano Pump Service Manual 135
Repairing the Pump 3
4 Remove the connector screws from the GPIB, Remote and from the analog
pressure output connector.
5 Remove the board. Place it on an ESD kit.
6 In most cases the RFI spring plate (Radio Frequency Interference spring
plat, prevents radio emissions from the instrument to ambient) remains on
the interface connectors of the board. Carefully remove the spring plate
from the old board and slide onto the new board before installing the new
board in the pump (the RFI spring plate is NOT part of an exchange board).
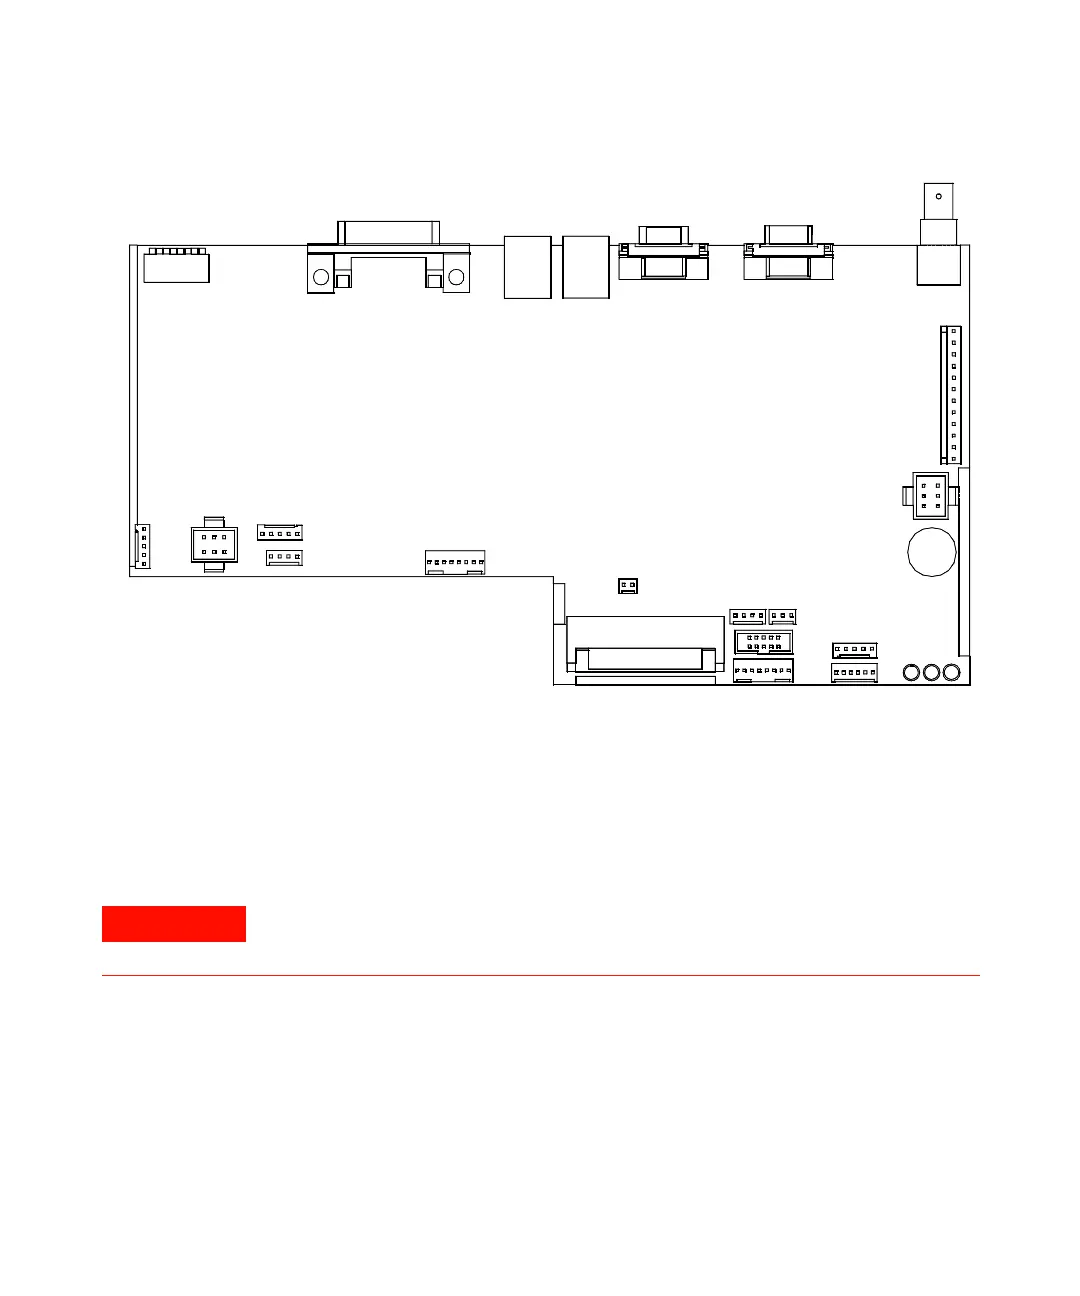
Figure 22 Board Layout of the NPM Board
S1 J1 J2 J3
J4 J6
P2
P8
P20
P22
P21
P16
P17
P15
P18
P9
P11
J5
P19
P14
P12
The RFI spring plate sitting on the board connectors is very sharp! Be careful, not to
cut yourself, when removing it from the old board and sliding it onto the new board.
 Loading...


