129
Maintenance and Repair
Exchanging SDA Board
Replacing the SDA Board
1 Position the SDA board on the bottom chassis of the instrument and fix the
three scews that hold the board in place.
2 Connect the three cables to the SDA board, see Figure 41.
3 On the side which is near the front of the instrument, feed the broader cable
through the hole in the lower front foam block and place the foam block on
the chassis of the instrument.
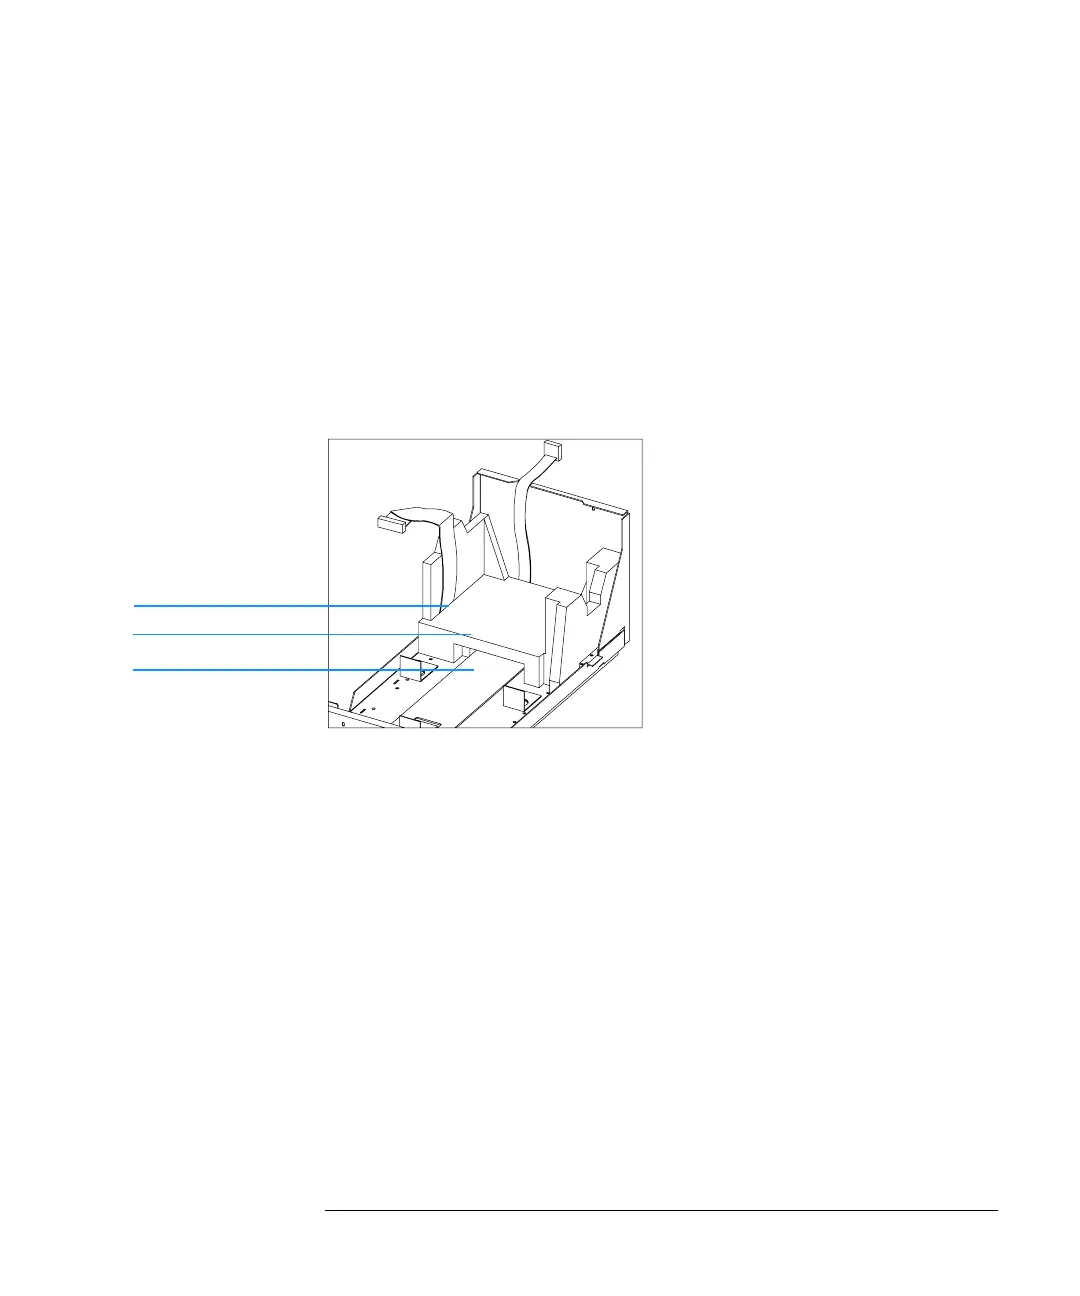
Figure 42 Replacing SDA Board and Cables
4 To replace the optical unit, see “Replacing the Optical Unit” on page 123.
5 Replace the plastic and sheet metal rear cover. Push the plastic rear cover
down so that it locates on both sides, see “Removing and Replacing Covers”
on page 109.
6 Reconnect line power and turn on the instrument. Check that the
spectrophotometer passes its self-test, this means that the green light on the
front panel comes on and that you can do a blank measurement from your
software.
Hole in foam block
Lower front foam block
SDA board

 Loading...


