6.2 The basics of 3D tuning tables and load types 6 TUNING THE MS3PRO
• The last item may look like a divide sign, but it interpolates between selected rows instead.
The two blue arrows at the bottom of the cell stand for Undo and Redo. The Burn button writes (“burns”) the data
to flash memory, and the close button closes the table. Note that changes to the cells will take effect as soon as
you enter them, but if they are not burned to flash memory, the MS3Pro will not keep the changes after it shuts
down.
When the engine is running, a blue dot indicating the current RPM and load will appear on the table, and the
nearest cells under the dot will be highlighted in yellow. The MS3Pro interpolates between the closest four cells if
the engine is not directly on top of a load point.
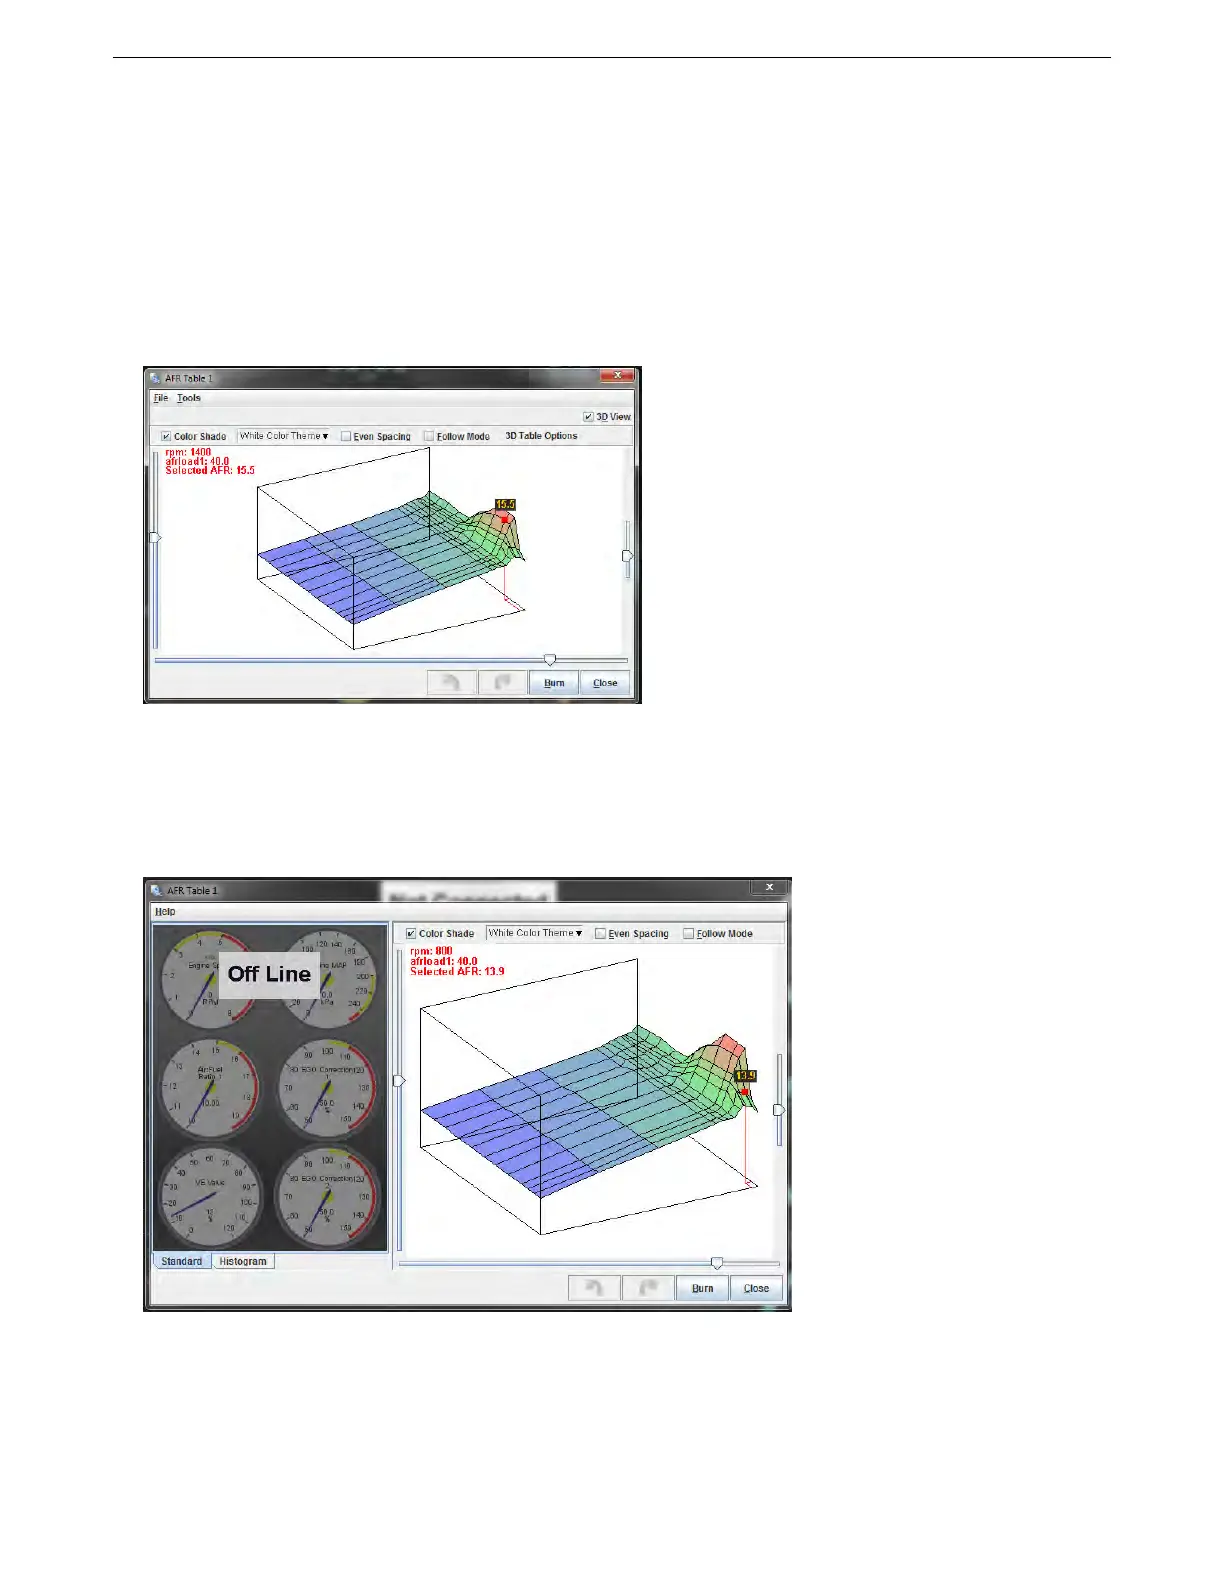
The 3D view checkbox at the top of the table will change it to a three dimensional drawing with a different set
of commands.
You can rotate the drawing with the mouse to get a better view, or press Z to toggle a flat overhead view. When
the engine is running, a blue dot will appear showing what RPM and load point the engine is currently running at.
The red dot shows which cell you are currently adjusting. Use the arrow keys to move the dot around the map,
and shift-up arrow or shift-down arrow to move the map value up or down. Checking Follow Mode will cause the
red adjusting dot to follow the blue dot around the table.
Many of the tuning maps can also be viewed under the 3D Tuning Maps menu. This brings up both a 3D table
and a bank of gauges to let you monitor the status of the engine while the table is active.
You may change the gauge style to “Histogram” to change them to a line graph, or right click any gauge to swap
it to a different gauge style if you want to see different variables.
AMP EFI MS3Pro manual version 1.202, firmware 1.5.0, 4/21/2017 Page 108