ML248xA / ML249xA Common Procedures
5-90 13000-00162
September 2005
Capturing the Screen Image
The screen on the ML248xA / ML249xA can be captured as a bitmap image using the
“ScreenCapture.exe” program on the CD supplied with the power meter. Follow the
procedure below.
1. Use a GPIB cable and card to connect the ML248xA / ML249xA to the PC in the
normal manner for remote operation.
2. Copy the “ScreenCapture.exe” program from the CD to a suitable location on the PC.
It can be copied to any location on the PC, but users should be aware that the screen
images are also generated at the same location.
3. Press the System hard key followed by the Config soft key.
4. Press the Display soft key followed by the Screen Dump Mode soft key. The LED on
the soft key is lit when screen dump mode is enabled.
Pressing the Screen Dump Mode soft key allows the user to retain the display of the
soft keys even when the unit is being operated remotely. Screen dump mode also
hides the remote indicator that would otherwise appear in the status window.
5. Ensure that the GPIB address of the power meter is set to 13. The procedure for this
can be found on the following page. If the power meter is not configured at this
address the program will exit and an explanatory message will appear on screen.
6. Display the screen to be captured on the ML248xA / ML249xA.
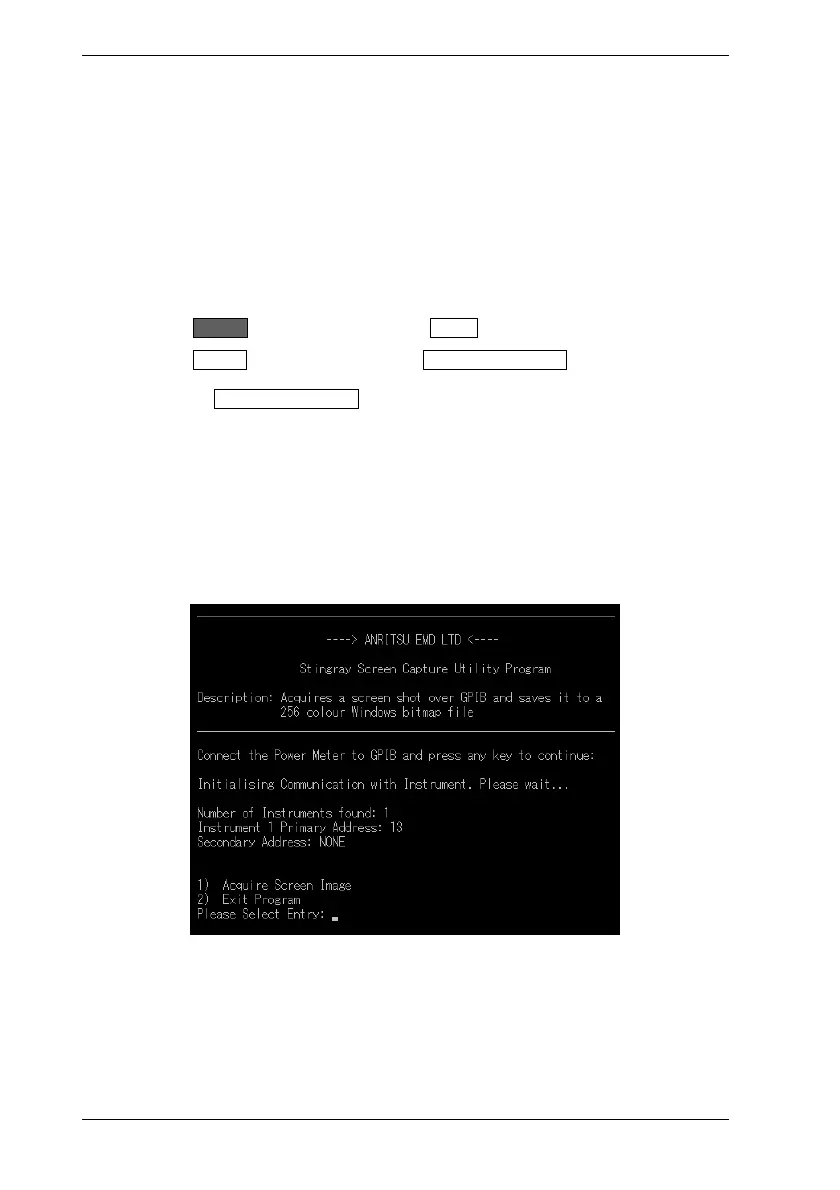
7. Double click the “ScreenCapture.exe” icon on the PC to open the program as shown
below.
8. Press any key to continue, and then press [1] followed by [Enter].
9. Enter a name for the bitmap image followed by the extension “.bmp”. For successful
generation, the file name must not exceed 8 characters in length.
10. The image is generated at the same location as the “ScreenCapture.exe” file.

 Loading...


