Chapter 7 Performance Test and Maintenance
7-6
7.2.2 Level Accuracy
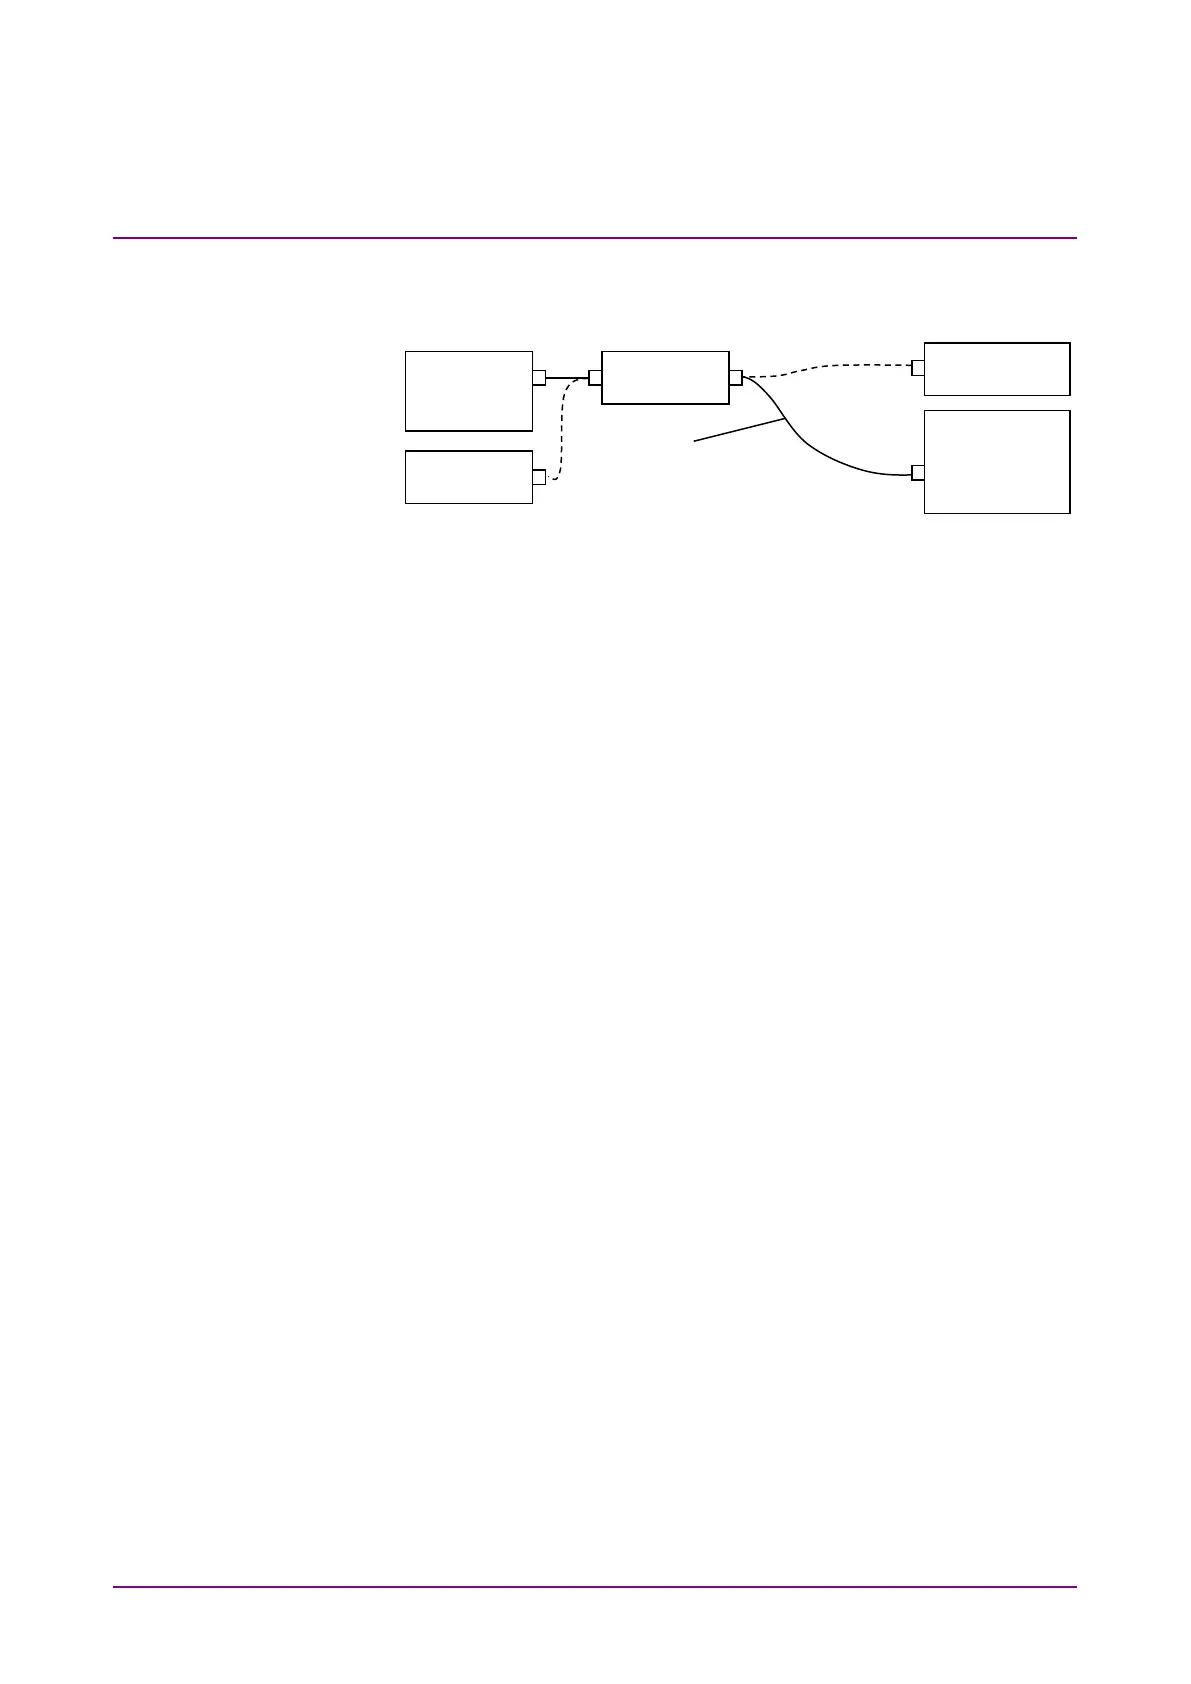
Figure 7.2.2-1 Level Accuracy Test Setup
Test using the following procedures.
1. Connect the MS9740B and the wavelength tunable laser source as
shown in Figure 7.2.2-1.
2. Set the wavelength of the light source and optical power meter to
1550 nm.
3. Set the output of the light source to CW and On.
4. Connect the output of the optical attenuator to the optical power
meter.
5. Adjust the attenuation of the optical attenuator to display –10 ±0.1
dBm at the optical power meter display. Record the display value.
6. Connect the output of the optical attenuator to the main frame.
7. Set the following values to the MS9740B, and press
Single
.
Center 1550 nm, Span 0.3 nm, Res 0.1 nm, VBW 100 Hz, Sampling
Points 501
8. Press
Peak Search
. Record the wavelength and level.
9. Connect to the 1310 nm light source and set the wavelength of the
optical power meter to 1310 nm.
10. Repeat steps 3 thru 8 for the following wavelengths. Set to
wavelength of 1310 nm light source for Center in step 7.
11. Calculate the difference between the values measured at step 5 and
step 8.
12. Check that the value calculated in step 11 satisfies the following
specifications for level accuracy.
tuanable
laser source
Optical
Spectrum
Single mode fiber
Master FC connector