Epson Artisan 800/Epson Stylus Photo PX800FW/TX800FW/Epson Artisan 700/Epson Stylus Photo PX700W/TX700W
Routing FFC/cables
https://www.manualsbooks.com
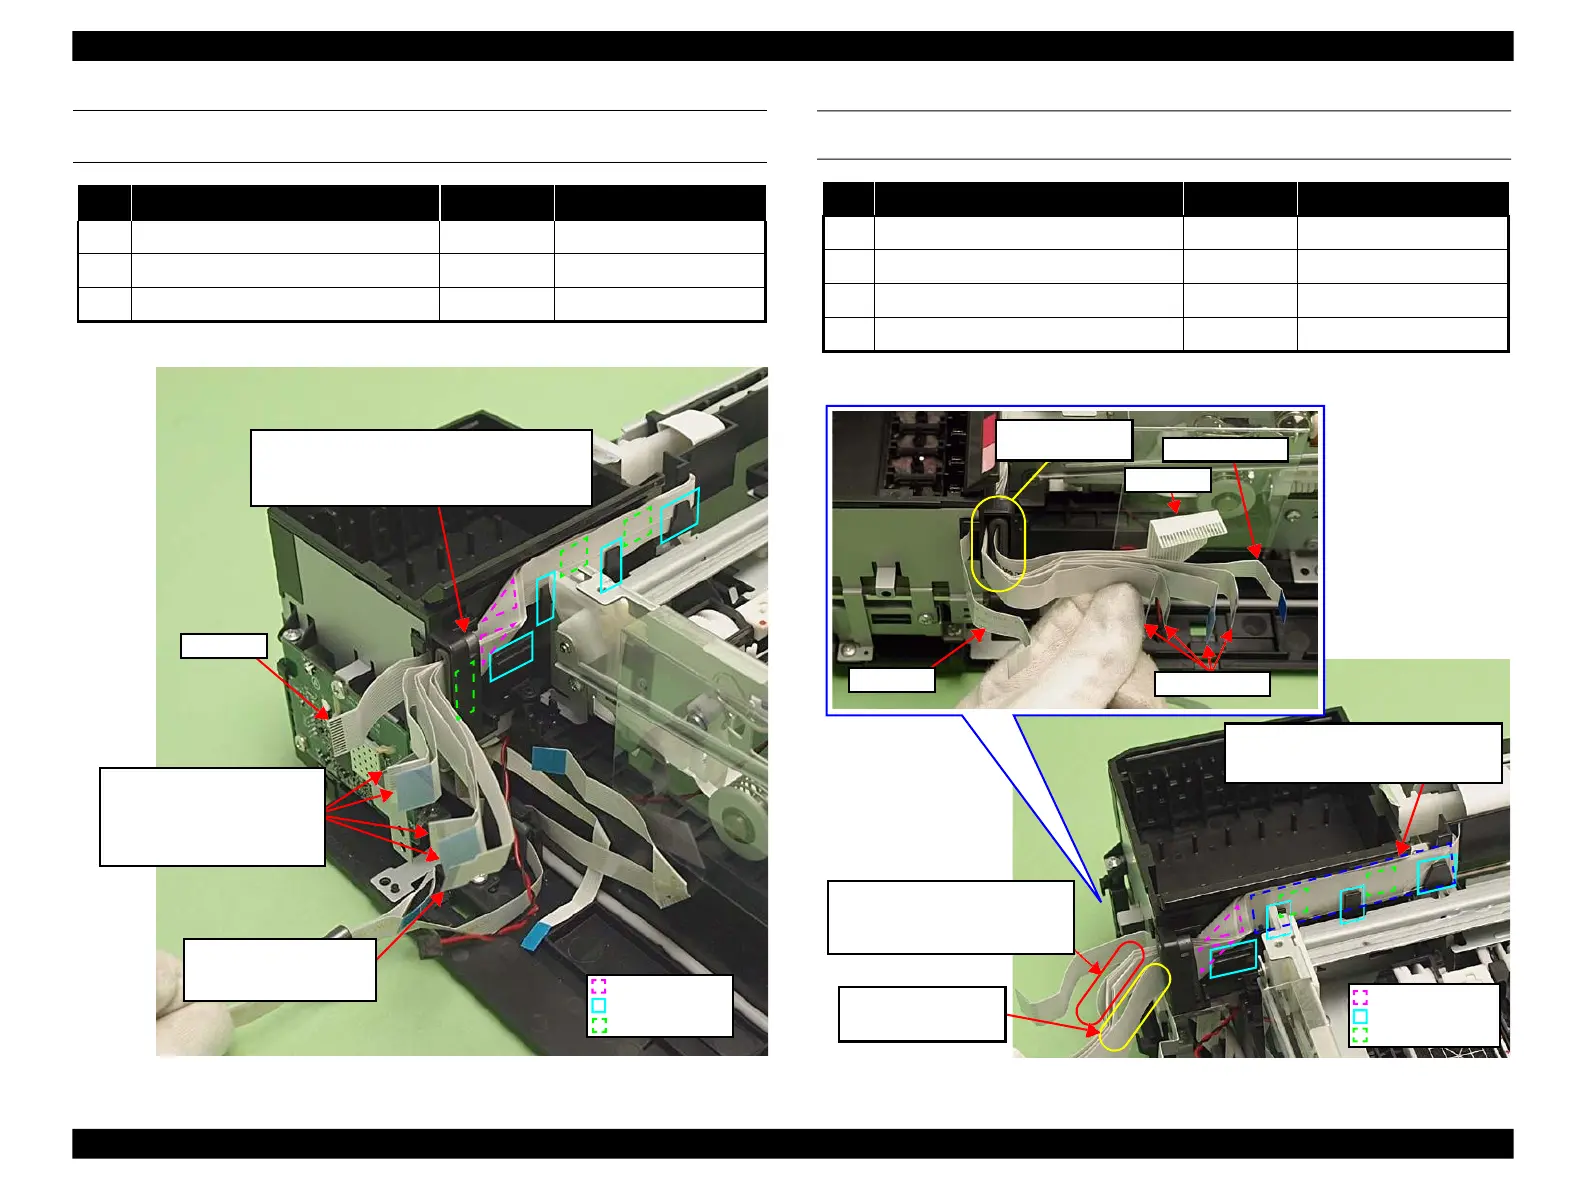
MAIN BOARD (REAR SIDE OF THE CARTRIDGE BOX)
(ARTISAN 800/PX800FW/TX800FW)
Note * : See Fig. 4-245 for the connector positions on the Main Board.
Figure 4-251. Rear side of the Cartridge Box(Artisan 800/PX800FW/TX800FW)
MAIN BOARD (BEHIND CARTRIDGE BOX)
(ARTISAN 700/PX700W/TX700W)
Note * : See Fig. 4-247 for the connector positions on the Main Board.
Figure 4-252. Routing to the FFC Holder(Artisan 700/PX700W/TX700W)
CR Encoder FFC:
Route this through the ribs
(x4) and ferrite core.
Head FFC (x4):
Route them through the ribs (x4)
and ferrite core, and secure them
on the rear side of Cartridge Box
with double-sided tape.
Put Head FFC (x4) and CR Encoder FFC through
this, and place it on the rear side of Cartridge Box
and secure it with double-sided tape.
Panel FFC:
Route it through the ribs
(x4), and ferrite core.
CR Encoder FFC & Head FFC (x4):
Route them through the ribs (x4),
and secure them with double-sided
tape (x2) behind the Cartridge Box.
Spacer:
Attach it to Panel FFC with double-sided
tape, and secure it with the hooks (x3).
Put Panel FFC only
through ferrite core.
 Loading...


