System Options: MEMS – Heating Stage
C O N F I D E N T I A L – FEI Limited Rights Data 7-25
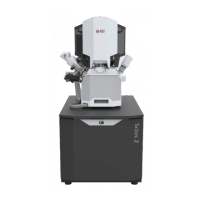
Temperature tab
The Manual Control is available when no profile is running. Clicking
the On button starts (highlighted in yellow) heating the MEMS
chip to achieve the Target Temperature set via the slider.
Temperature growth speed can be set via the Ramping Speed
slider and the Actual Temperature readout shows temperature
calculated from the heating wires resistance.
A Temperature Profile can be Loaded or Saved by clicking the
appropriate button. To create a new profile, edit for desired
number of steps (lines) the:
• Time schedule column is calculated automatically according to
values entered.
• Temp. – target temperature;
• Ramp – temperature growth speed;
• Soak time – time (in seconds) for how long the target
temperature should be held after it is reached;
Note
Edits are active when the profile is not running; values are checked for
limits, values out of limits are not accepted.
• Clicking the Start button starts (highlighted in yellow) / stops
the temperature profile execution.
• Clicking the Hold button (highlighted in yellow) suspends a
profile execution and actual temperature is maintained until
the button is clicked again and the profile continues.
• Clicking the Next button when a profile is running stops an
actual step immediately and proceeds with next one.
• Ticking the Repeat profile check box causes the profile to start again from the beginning when it is finished.
When a profile is running the actual step line is highlighted in yellow.
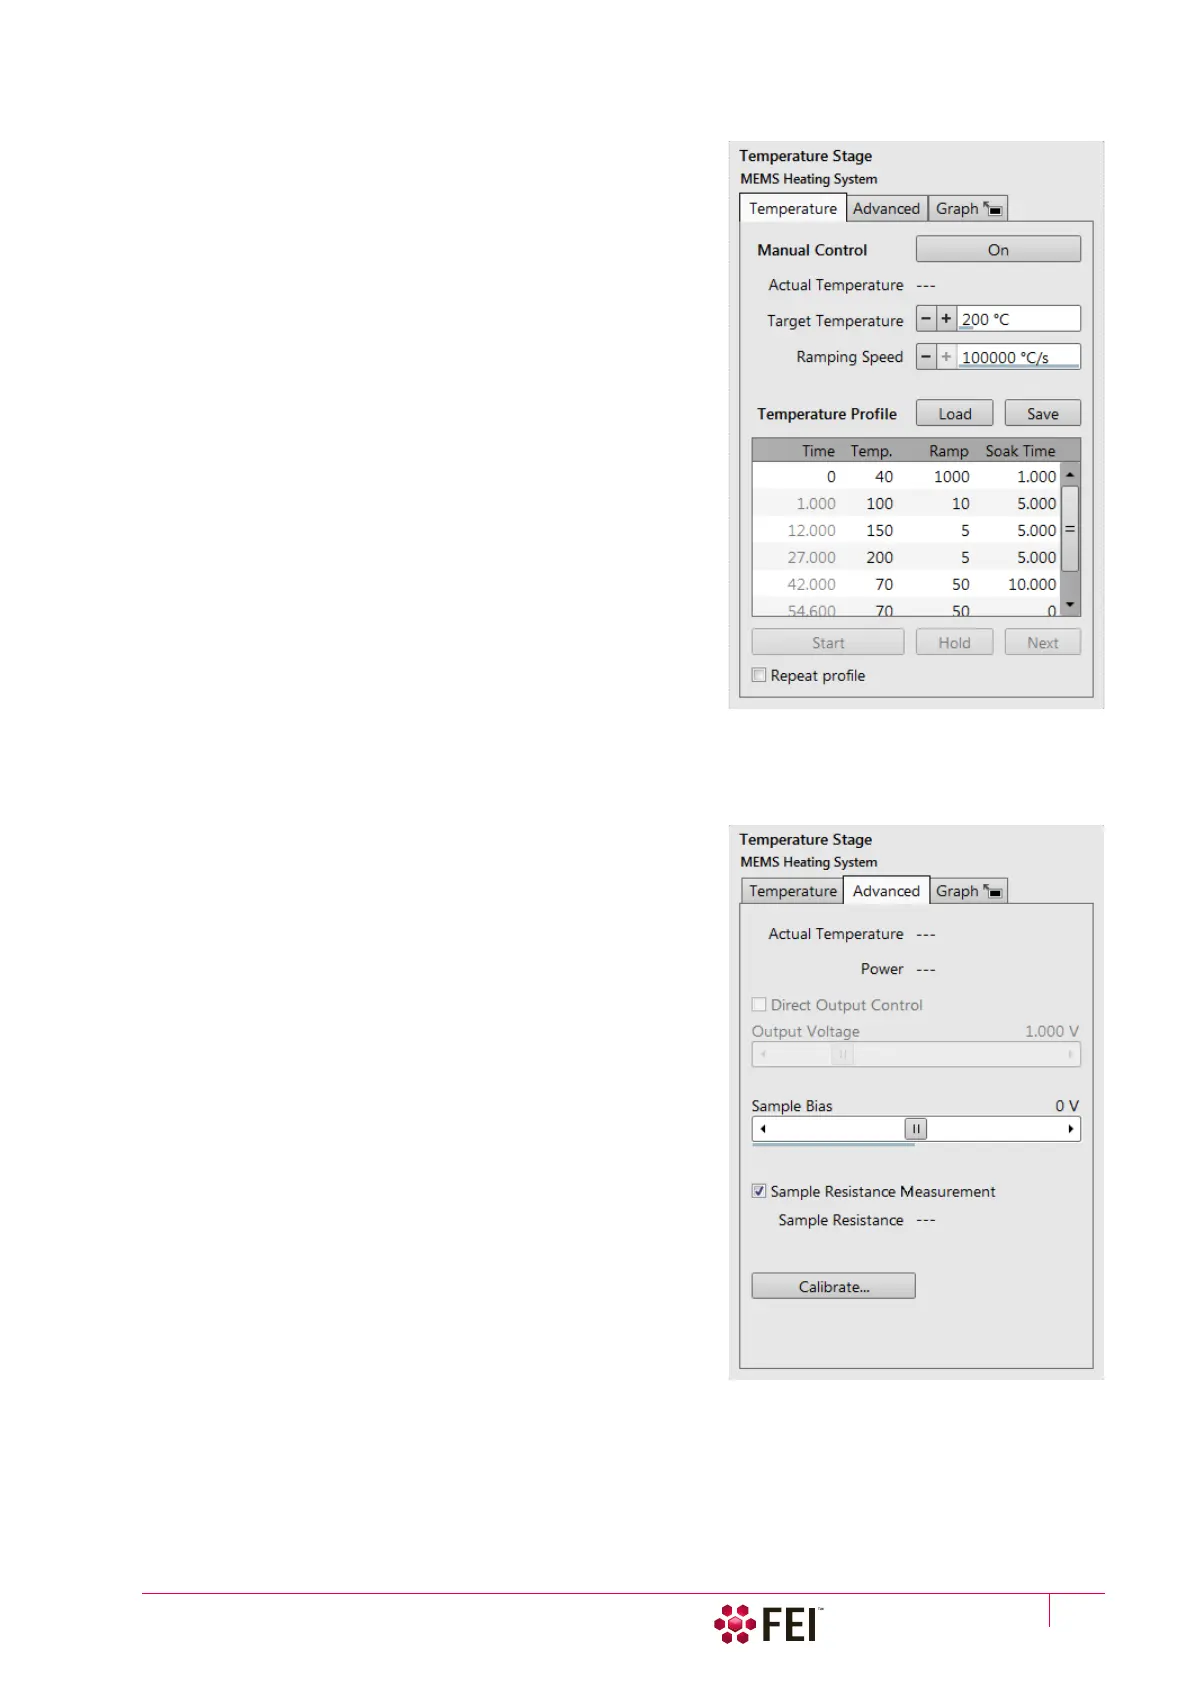
Advanced tab
The Advanced tab shows Actual Temperature of the chip and its
heating Power.
• Ticking the Direct Output Control check box makes Output
Voltage slider available. It applies desired voltage to the heater.
This functionality is useful when sample temperature should
be monitored precisely, for example during phase transition
like quenching or melting.
• The Sample Bias slider applies potential from -40 V to +40 V to
a sample.
Potential is applied to contact pads on the chip, to which the
sample needs to be connected (for example by means of the
GIS deposition).
• Ticking the The Sample resistance measurement check box
shows the Actual Resistance value calculated from the MEMS
chip resistance value measured by contact pads on the chip.
Resistance range is from 1 mOhm to 1 kOhm, (10% to <1% rel.
error).
• Clicking the Calibrate button opens the MEMS Heating System
Calibration dialog (see above).