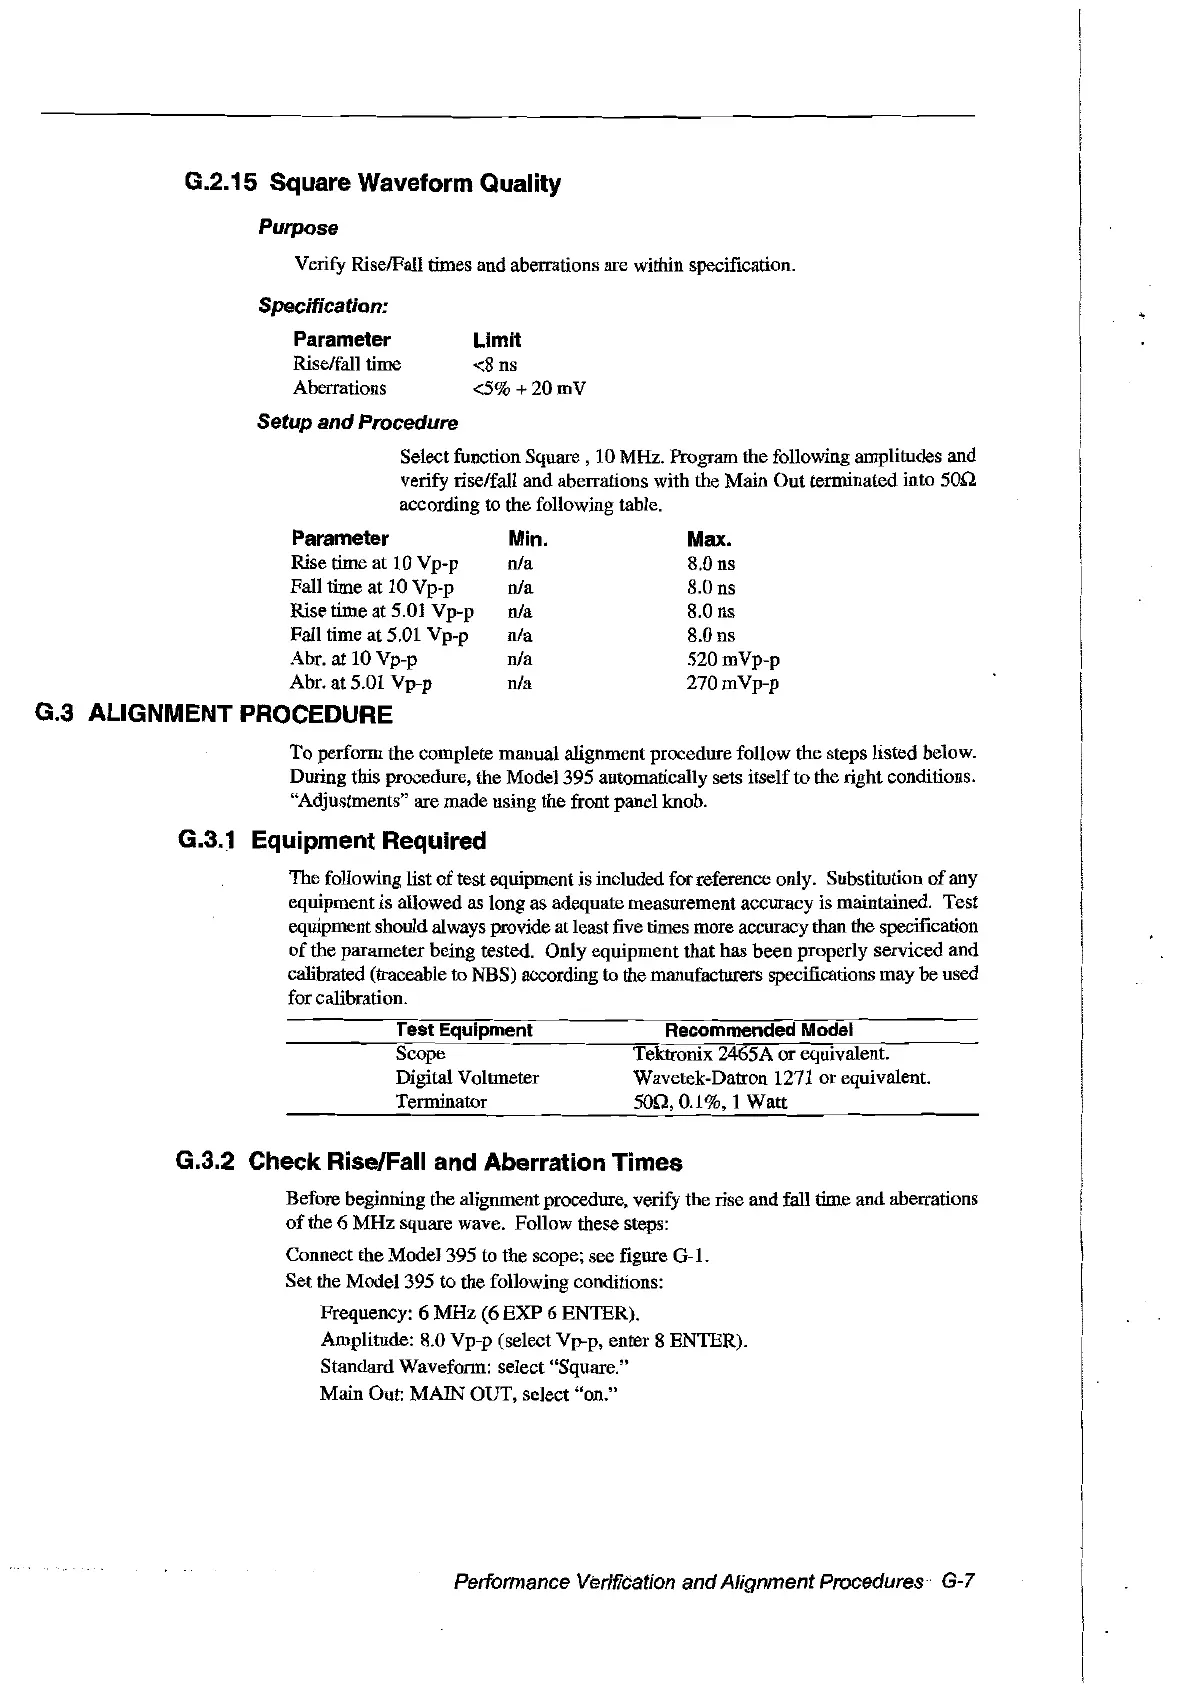
G.2.15 Square Waveform Quality
Pur
pose
Verify RiselFalI rimes and aberrations are within specification.
Specification:
Parameter
Rise/fall time
Aberrations
Limit
<8
ns
<5%
+20mV
Max.
8.0ns
8.0ns
8.0 ns
8.0ns
520mVp-p
270mVp-p
Setup and Procedure
Select function Square,
10
MHz. Program the following amplitudes and
verify rise/fall and aberrations with the Main Out terminated into
son
according to the following table.
Parameter
Min.
Rise time at 10 Vp-p nia
Fall rime at 10 Vp-p nia
Rise time at 5.01 Vp-p nia
Fall time at 5.01 Vp-p nia
Abr. at 10 Vp-p nia
Abr. at 5.01 Vp-p nia
G.3
AlIGNMENT
PROCEDURE
To perform the complete manual alignment procedure follow the steps listed below.
During this procedure, the Model 395 automatically sets
itselfto
the right conditions.
"Adjustments" are made using the front panel knob.
G.3.1 Equipment Required
The following list
of
test equipment is included for reference only. Substitution
of
any
equipment is allowed as long as adequate measurement accuracy is maintained. Test
equipmentshould always provide atleast five tilles more accuracy than the specification
of
the parameter being tested. Only equipment that has been properly serviced and
calibrated (traceable to NES) according to the manufacturers specifications may be used
for calibration.
Test Equipment
Scope
Digital Voltmeter
Terminator
Recommended Madel
Tektrouix 2465A
or
equiv~a-'-le~n~t.----
Wavetek-Datron 1271 or equivalent.
son,
0.1
%,1
Watt
G.3.2 Check RiselFa.ll and Aberration Times
Before beginning the alignment procedure, verify the rise and fall time and aberrations
of
the 6
MHz
square wave. Follow these steps:
Connect the Model 395 to the scope; see figure G-1.
Set the Model 395 to the following conditions:
Frequency: 6 MHz (6 EXP 6
ENfER).
Amplitude: 8.0 Vp-p (select Vp-p, enter 8 ENTER).
Standard Waveform: select "Square."
Main Out: MAIN OUT, select "on."
Performance Vérification and
Alignment
Procedures
d
G-7
Artisan Technology Group - Quality Instrumentation ... Guaranteed | (888) 88-SOURCE | www.artisantg.com
 Loading...