11 Job Status
370
Job Status
11
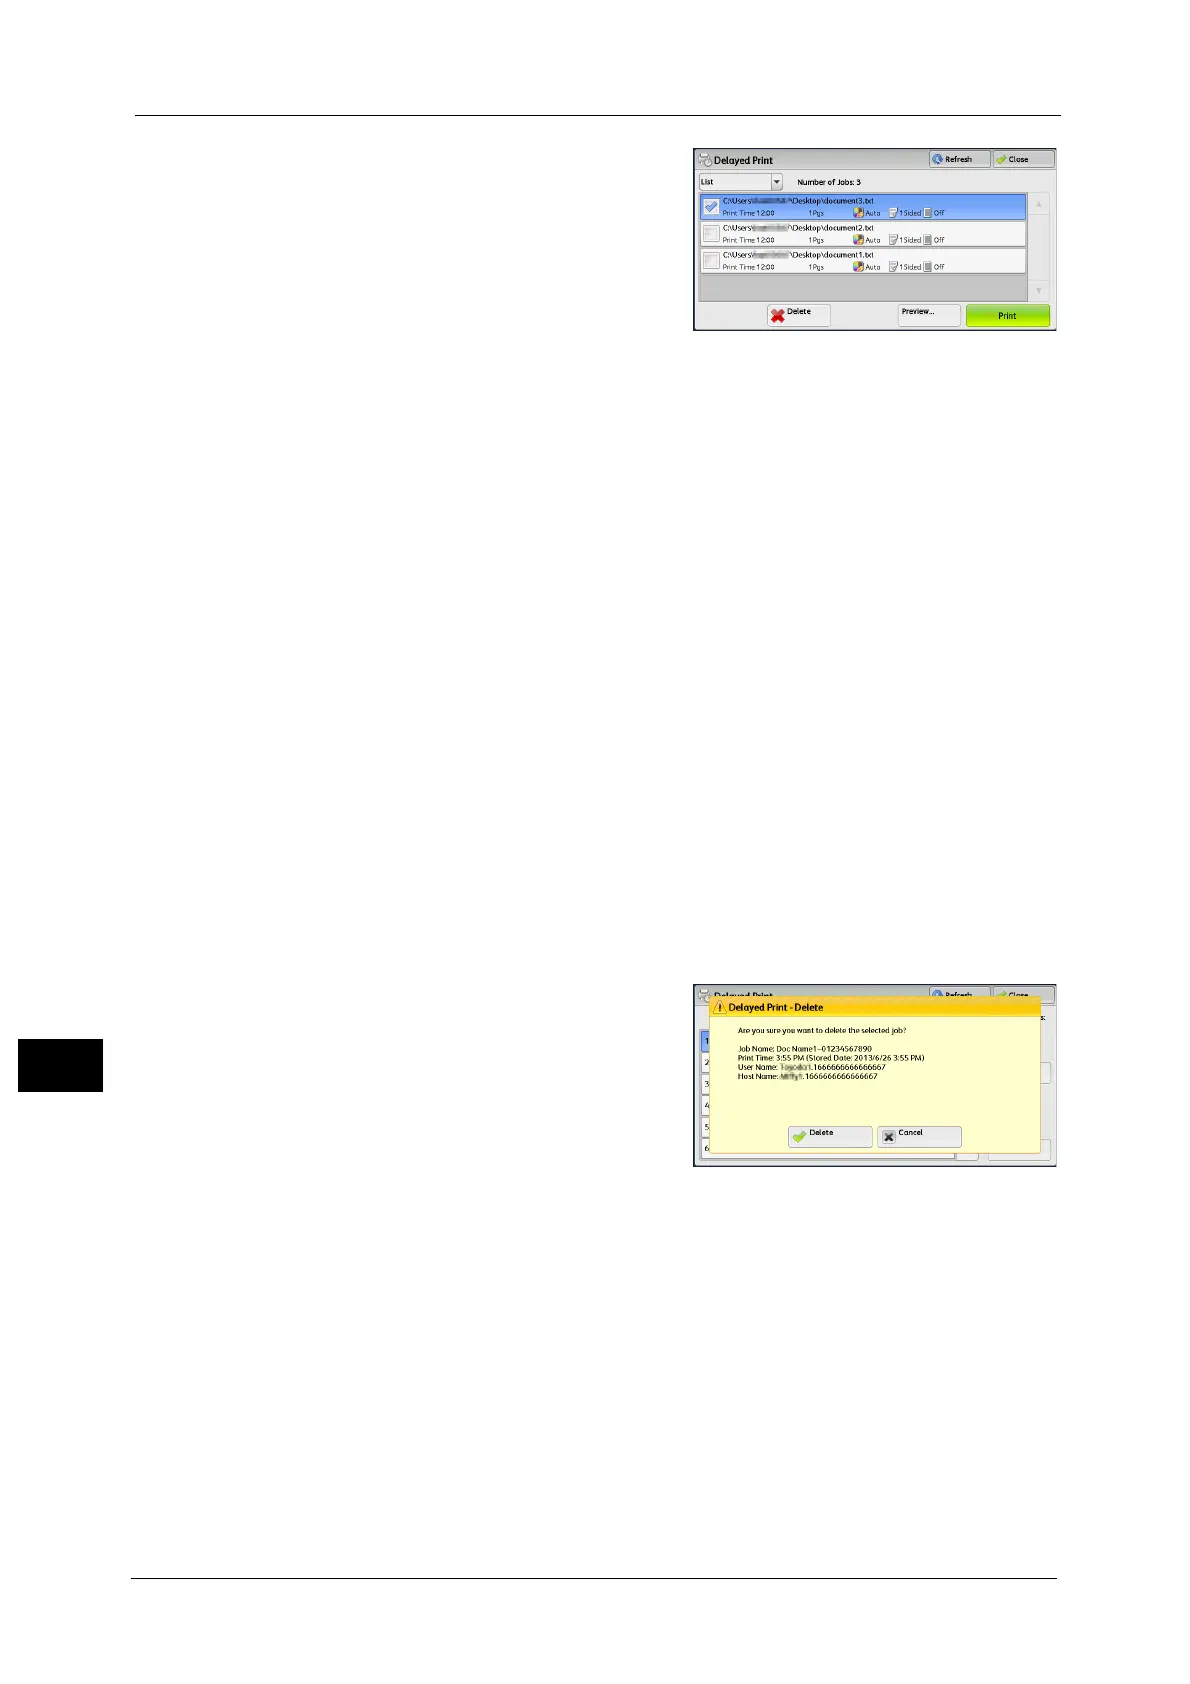
2 Select the job to be printed or deleted.
Note •Select [Refresh] to display the updated
information.
• Scroll the list by drag or flick operation to
switch the screen to be displayed. For
information on how to drag or flick, refer to
"Touch Screen" (P.88).
• [Print Time] shows the time to start printing.
• Stored files can be displayed in a list or
thumbnailed view. You can also preview the
files.
• You can set whether or not to display
detailed information in the list screen of the
stored files. For more information, refer to
"Display Details of Stored Print Job List" (P.514).
3 Select any option.
Delete
Deletes the Delayed Print job.
Refer to "When [Delete] is Selected" (P.370).
Preview
Displays the previewed image on the first page of the selected job.
Note •If you select multiple documents, [Preview] cannot be selected.
Refer to "When [Preview] is Selected" (P.370).
Print
Prints the Delayed Print job. After printing, the job is deleted. If printed manually, the job
will not be printed at the specified time.
Refer to "When [Print] is Selected" (P.372).
When [Delete] is Selected
1
Select [Delete].
Delete
Deletes the job.
Important • Once the job is deleted, it cannot be restored.
Cancel
Cancels deleting the job.
When [Preview] is Selected
1
Select any option.
Note •Only the first page is displayed for the preview screen.

 Loading...
