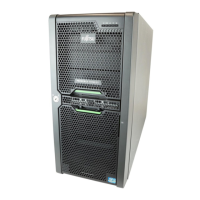
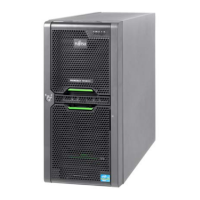
TX140 S2
Upgrade and Maintenance Manual
Contents
9.4.4 Replacing the riser card . . . . . . . . . . . . . . . . . . . . . 185
9.4.4.1 Preliminary steps . . . . . . . . . . . . . . . . . . . . . . . 185
9.4.4.2 Removing the defective riser card . . . . . . . . . . . . . . 185
9.4.4.3 Installing the new riser card . . . . . . . . . . . . . . . . . 186
9.4.4.4 Concluding steps . . . . . . . . . . . . . . . . . . . . . . . 187
9.4.5 Replacing the TFM . . . . . . . . . . . . . . . . . . . . . . . 188
9.4.5.1 Preliminary steps . . . . . . . . . . . . . . . . . . . . . . . 188
9.4.5.2 Removing the defective TFM . . . . . . . . . . . . . . . . 188
9.4.5.3 Installing the new TFM . . . . . . . . . . . . . . . . . . . . 189
9.4.5.4 Concluding steps . . . . . . . . . . . . . . . . . . . . . . . 189
9.5 Backup Units . . . . . . . . . . . . . . . . . . . . . . . . . . 190
9.5.1 Basic information . . . . . . . . . . . . . . . . . . . . . . . . 190
9.5.2 Installing an FBU . . . . . . . . . . . . . . . . . . . . . . . . 190
9.5.2.1 Preliminary steps . . . . . . . . . . . . . . . . . . . . . . . 190
9.5.2.2 Installing TFM to the RAID controller (if applicable) . . . . . 191
9.5.2.3 Installing the FBU in the holder . . . . . . . . . . . . . . . 192
9.5.2.4 Installing the FBU holder into the chassis . . . . . . . . . . 193
9.5.2.5 Connecting the FBU adapter cable to the TFM . . . . . . . 195
9.5.2.6 Concluding steps . . . . . . . . . . . . . . . . . . . . . . . 195
9.5.3 Installing a BBU . . . . . . . . . . . . . . . . . . . . . . . . . 196
9.5.3.1 Preliminary steps . . . . . . . . . . . . . . . . . . . . . . . 196
9.5.3.2 Connecting the BBU cable to the BBU . . . . . . . . . . . . 196
9.5.3.3 Installing the BBU in the holder . . . . . . . . . . . . . . . 197
9.5.3.4 Installing the BBU holder into the chassis . . . . . . . . . . 197
9.5.3.5 Connecting the BBU cable to a controller . . . . . . . . . . 197
9.5.3.6 Concluding steps . . . . . . . . . . . . . . . . . . . . . . . 198
9.5.4 Removing an FBU . . . . . . . . . . . . . . . . . . . . . . . . 199
9.5.4.1 Preliminary steps . . . . . . . . . . . . . . . . . . . . . . . 199
9.5.4.2 Disconnecting the FBU adapter cable from the TFM . . . . 199
9.5.4.3 Removing the FBU holder from the chassis . . . . . . . . . 200
9.5.4.4 Concluding steps . . . . . . . . . . . . . . . . . . . . . . . 200
9.5.5 Removing a BBU . . . . . . . . . . . . . . . . . . . . . . . . 201
9.5.5.1 Preliminary steps . . . . . . . . . . . . . . . . . . . . . . . 201
9.5.5.2 Disconnecting the BBU cable from the controller . . . . . . 201
9.5.5.3 Removing the BBU holder from the chassis . . . . . . . . . 201
9.5.5.4 Concluding steps . . . . . . . . . . . . . . . . . . . . . . . 201
9.5.6 Replacing an FBU . . . . . . . . . . . . . . . . . . . . . . . . 202
9.5.6.1 Preliminary steps . . . . . . . . . . . . . . . . . . . . . . . 202
9.5.6.2 Removing the defective FBU . . . . . . . . . . . . . . . . . 202
9.5.6.3 Installing the new FBU . . . . . . . . . . . . . . . . . . . . 204
9.5.6.4 Concluding steps . . . . . . . . . . . . . . . . . . . . . . . 204
 Loading...
