206 Upgrade and Maintenance Manual
TX140 S2
Expansion cards and backup units
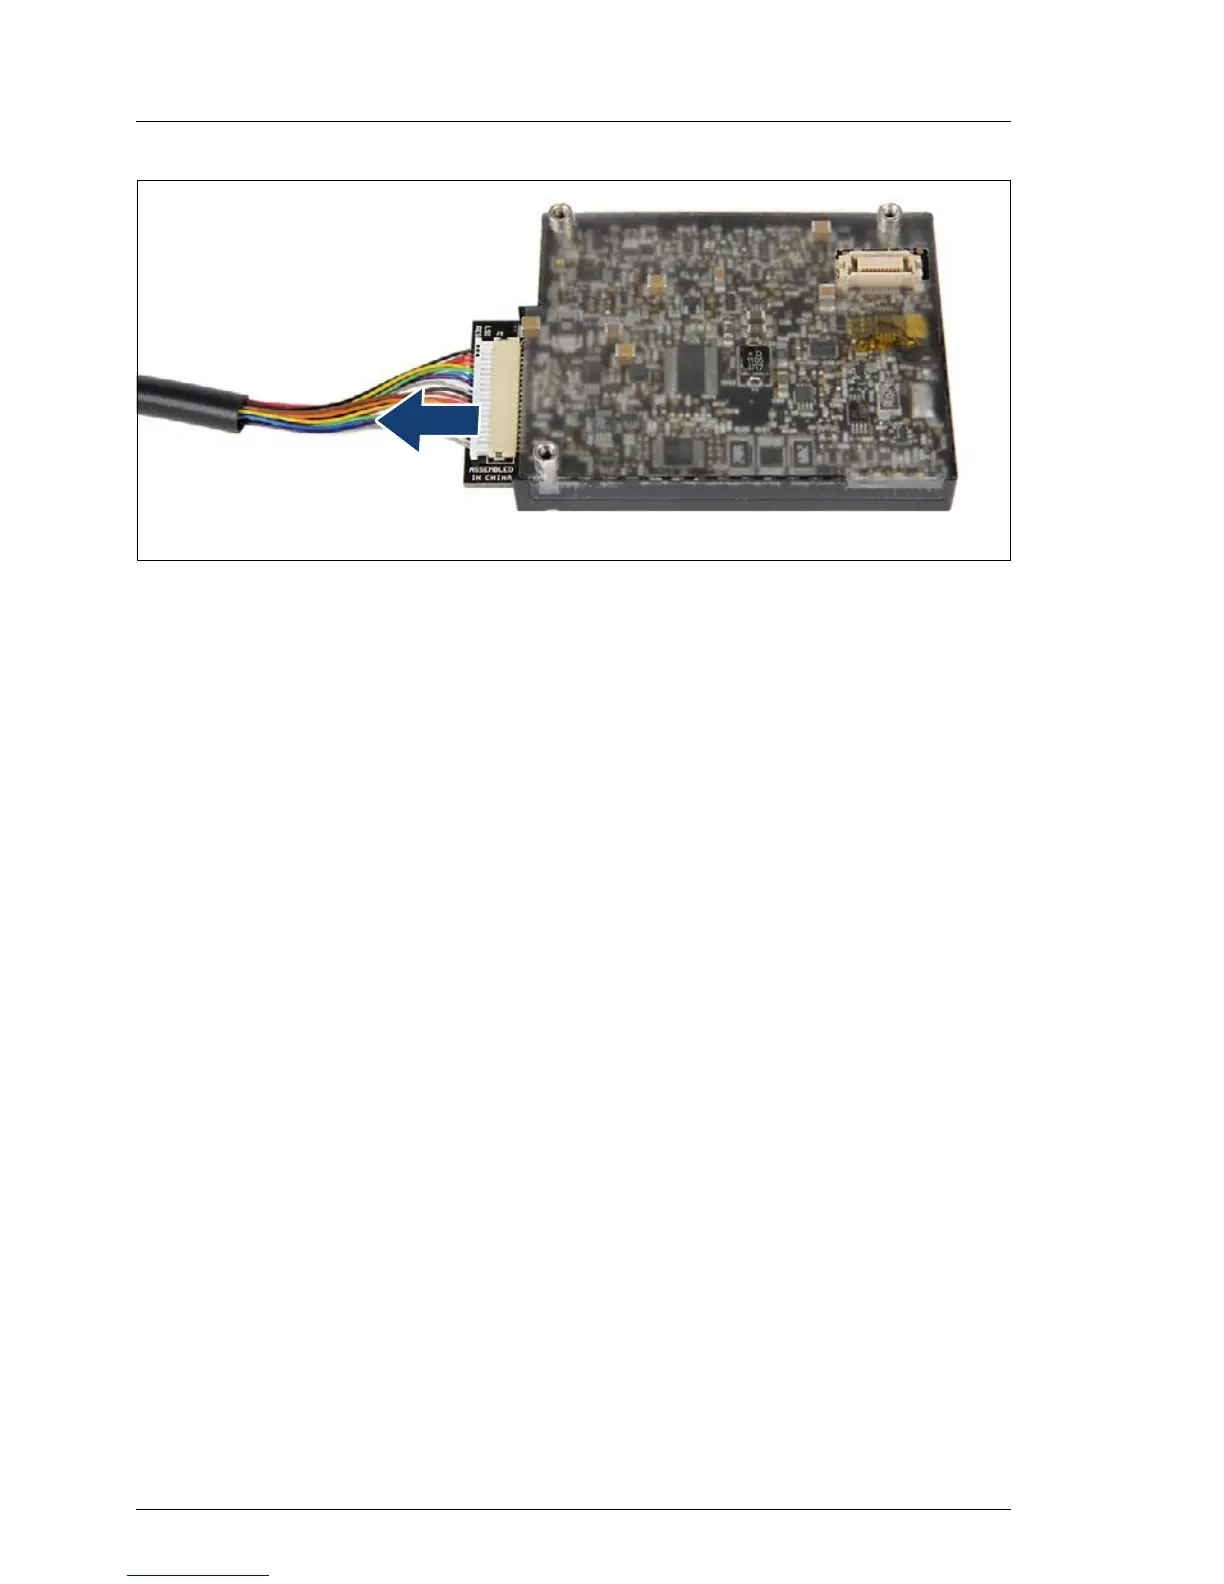
Figure 122: Disconnecting the BBU cable from the BBU
Ê Carefully disconnect the BBU cable from the BBU.
9.5.7.3 Installing the new BBU
Ê Install the BBU as described in section "Installing a BBU" on page 196.
9.5.7.4 Concluding steps
Ê "Installing the fan module" on page 152
Ê "Reassembling" on page 58
Ê "Connecting the server to the mains" on page 67
Ê "Switching on the server" on page 68
Ê If applicable, "Updating RAID controller firmware" on page 80
Ê "Enabling SVOM boot watchdog functionality" on page 85
Note on BBU charging and calibration
The BBU may be deeply discharged due to extended storage time and wrongly
show as bad or defective in the ServerView RAID Manager.
In this case, the BBU will automatically enter a trickle charge cycle for recovery.
This initial charge may take up to 8 hours before the BBU will initiate a
recalibration cycle.
Ê Enter the ServerView RAID Manager and check the current BBU status.

 Loading...