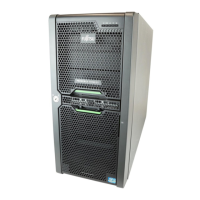
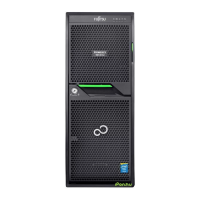
TX140 S2
Upgrade and Maintenance Manual
Contents
11.3 Replacing the processor heat sink . . . . . . . . . . . . . . 227
11.3.1 Preliminary steps . . . . . . . . . . . . . . . . . . . . . . . . 227
11.3.2 Replacing the processor heat sink . . . . . . . . . . . . . . . . 227
11.3.3 Concluding steps . . . . . . . . . . . . . . . . . . . . . . . . 228
12 Accessible drives . . . . . . . . . . . . . . . . . . . . . . . 229
12.1 Basic information . . . . . . . . . . . . . . . . . . . . . . . 230
12.2 Installing accessible drives . . . . . . . . . . . . . . . . . . 231
12.2.1 Preliminary steps . . . . . . . . . . . . . . . . . . . . . . . . 231
12.2.2 Removing accessible drive dummy covers . . . . . . . . . . . 232
12.2.3 Installing mounting brackets to RDX and DAT72 backup drives
(if applicable) . . . . . . . . . . . . . . . . . . . . . . . . . . 234
12.2.4 Installing the slimline optical disk drive in the slide-in unit
(if applicable) . . . . . . . . . . . . . . . . . . . . . . . . . . 236
12.2.5 Installing an accessible drive . . . . . . . . . . . . . . . . . . 237
12.2.6 Concluding steps . . . . . . . . . . . . . . . . . . . . . . . . 239
12.3 Removing accessible drives . . . . . . . . . . . . . . . . . . 239
12.3.1 Preliminary steps . . . . . . . . . . . . . . . . . . . . . . . . 239
12.3.2 Removing an accessible drive . . . . . . . . . . . . . . . . . . 240
12.3.3 Installing accessible drive dummy covers . . . . . . . . . . . . 241
12.3.4 Concluding steps . . . . . . . . . . . . . . . . . . . . . . . . 242
12.4 Replacing accessible drives . . . . . . . . . . . . . . . . . . 243
12.4.1 Preliminary steps . . . . . . . . . . . . . . . . . . . . . . . . 243
12.4.2 Removing the defective accessible drive . . . . . . . . . . . . 243
12.4.3 Installing the new accessible drive . . . . . . . . . . . . . . . 244
12.4.4 Concluding steps . . . . . . . . . . . . . . . . . . . . . . . . 244
13 Front panel module . . . . . . . . . . . . . . . . . . . . . . . 245
13.1 Replacing the front panel module . . . . . . . . . . . . . . . 246
13.1.1 Preliminary steps . . . . . . . . . . . . . . . . . . . . . . . . 246
13.1.2 Removing the defective front panel module . . . . . . . . . . . 247
13.1.3 Installing the new front panel module . . . . . . . . . . . . . . 249
13.1.4 Concluding steps . . . . . . . . . . . . . . . . . . . . . . . . 250
 Loading...
