9100c
9-20 M1207026
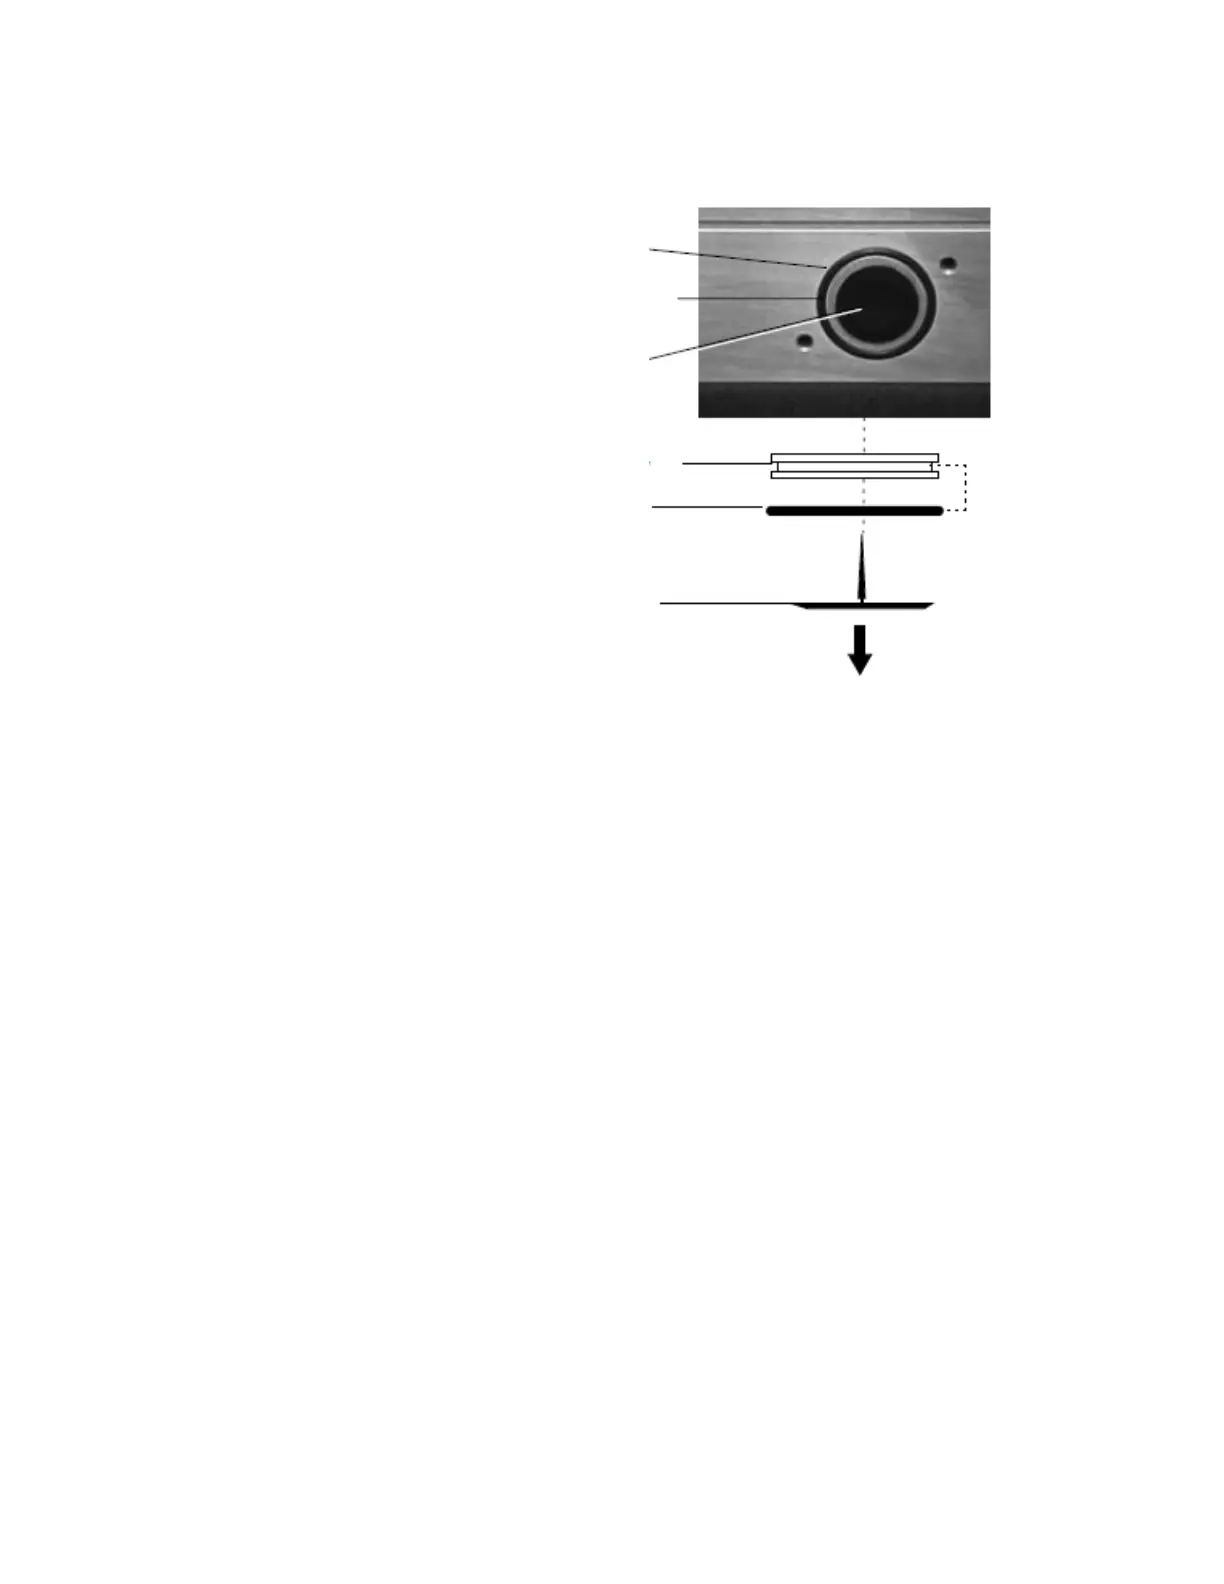
7. Pull the flapper out of the valve body.
8. Using a hex wrench, put the wrench through one of the holes of
the valve body and pull out
to remove the valve body and o-ring.
9. Verify that parts are free of dust and dirt.
10. Replace the flapper by inserting the flapper stem and gently
pulling the stem until the flapper secures to the valve body.
11. Lightly lubricate the o-ring with Krytox.
12. Place the lubricated o-ring on the valve body port at the back of
the manifold.
13. Gently install the valve body in the manifold:
• Check that the o-ring makes a good seal between the
manifold and the valve body.
• Check that the flapper valve makes solid contact with the
valve body.
14. Install the valve block.
15. Reconnect the tubing to the valve block. Pull on the tube to
ensure that it is locked in the fitting.
16. Install the vaporizer front panel.
17. Perform the checkout procedure (Section 3).
O-ring
Valve body
Flapper
Valve body
O-ring
Flapper
M1207027 004 MANUAL−DOC, Technical Reference Manual, Technical Reference Manual for 9100c, English−default
Reproduced from the electronic master in MATRIX