151430-L8 Emergency Communication System Operation
11-12
Follow these steps to record a user message using Aux Audio Input:
Note: Refer to section 9 for detailed programming information.
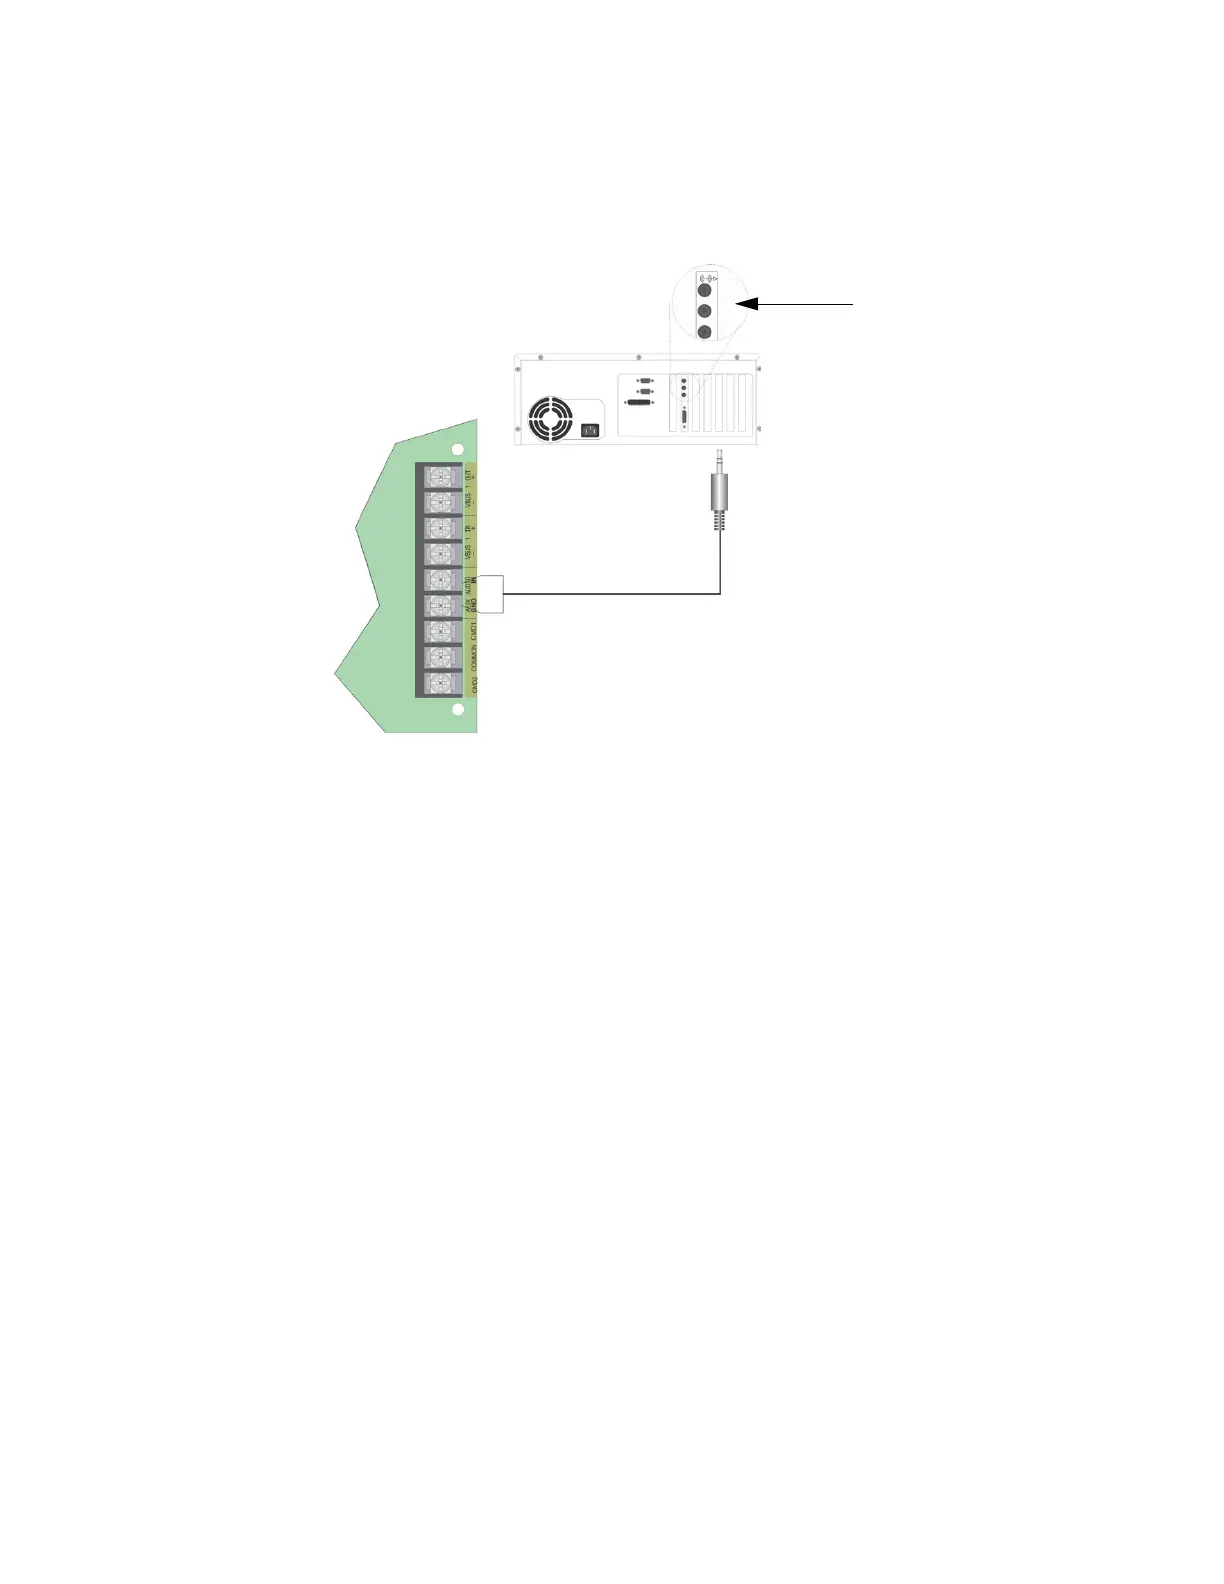
1. Wire a speaker cable with 1/8” mini plug (Radio Shack Cat. No. 42-2454) to the Aux AUDIO GND and IN
terminals. Refer to Figure 11-5 on page 12.
Figure 11-5 Aux Audio Connection for Recording
2. Plug the mini plug into the Line Out/Headphone jack on a PC or laptop. See Figure 11-5 on page 12.
3. Enter programming mode at main control panel.
4. Select 5 for System Options.
5. Select 8 for ECS-VCM Maintenance.
6. Select 2 Local Recording.
7. Select the amplifier and circuit for the audio to play through during programming. A user would generally
pick the audio circuit that is in closest proximity to them.
Note: The VCM will light the green Select Key LED for message slots that are occupied.
If a message is already
stored in the desired slot, then you must erase the message first. (see Section 11.8.3).
8. Press ECS Message Key 1 to enter the message slot selection mode. Then, press the Select Key 1-15 that
corresponds to the message slot that you wish to record to. The associated Select Key red LED will begin
flashing, indicating that the message slot is ready for recording.
9. Simultaneously press ECS Message Key 3 and start playing the audio source on the PC or laptop.
10. When the audio file from the PC is finished playing, press ECS Message Key 3 again to stop the recording.
The Select Key green LED will come on.
11. To playback the recorded message, press the Select Key 1-15 that was just recorded to.
Recording with Aux Audio Input Example:
The user wants to record into memory slot 2 via the Aux Audio Input channel.
Upon entering the Local Recording mode via the keypad menu, the VCM will light the Select Key green LEDs
1-15 for each occupied message slot.
If a message already exists in message slot 2, it must first be erased. Press ECS Message Key 8, then press Select
 Loading...