Web Client Operation
163
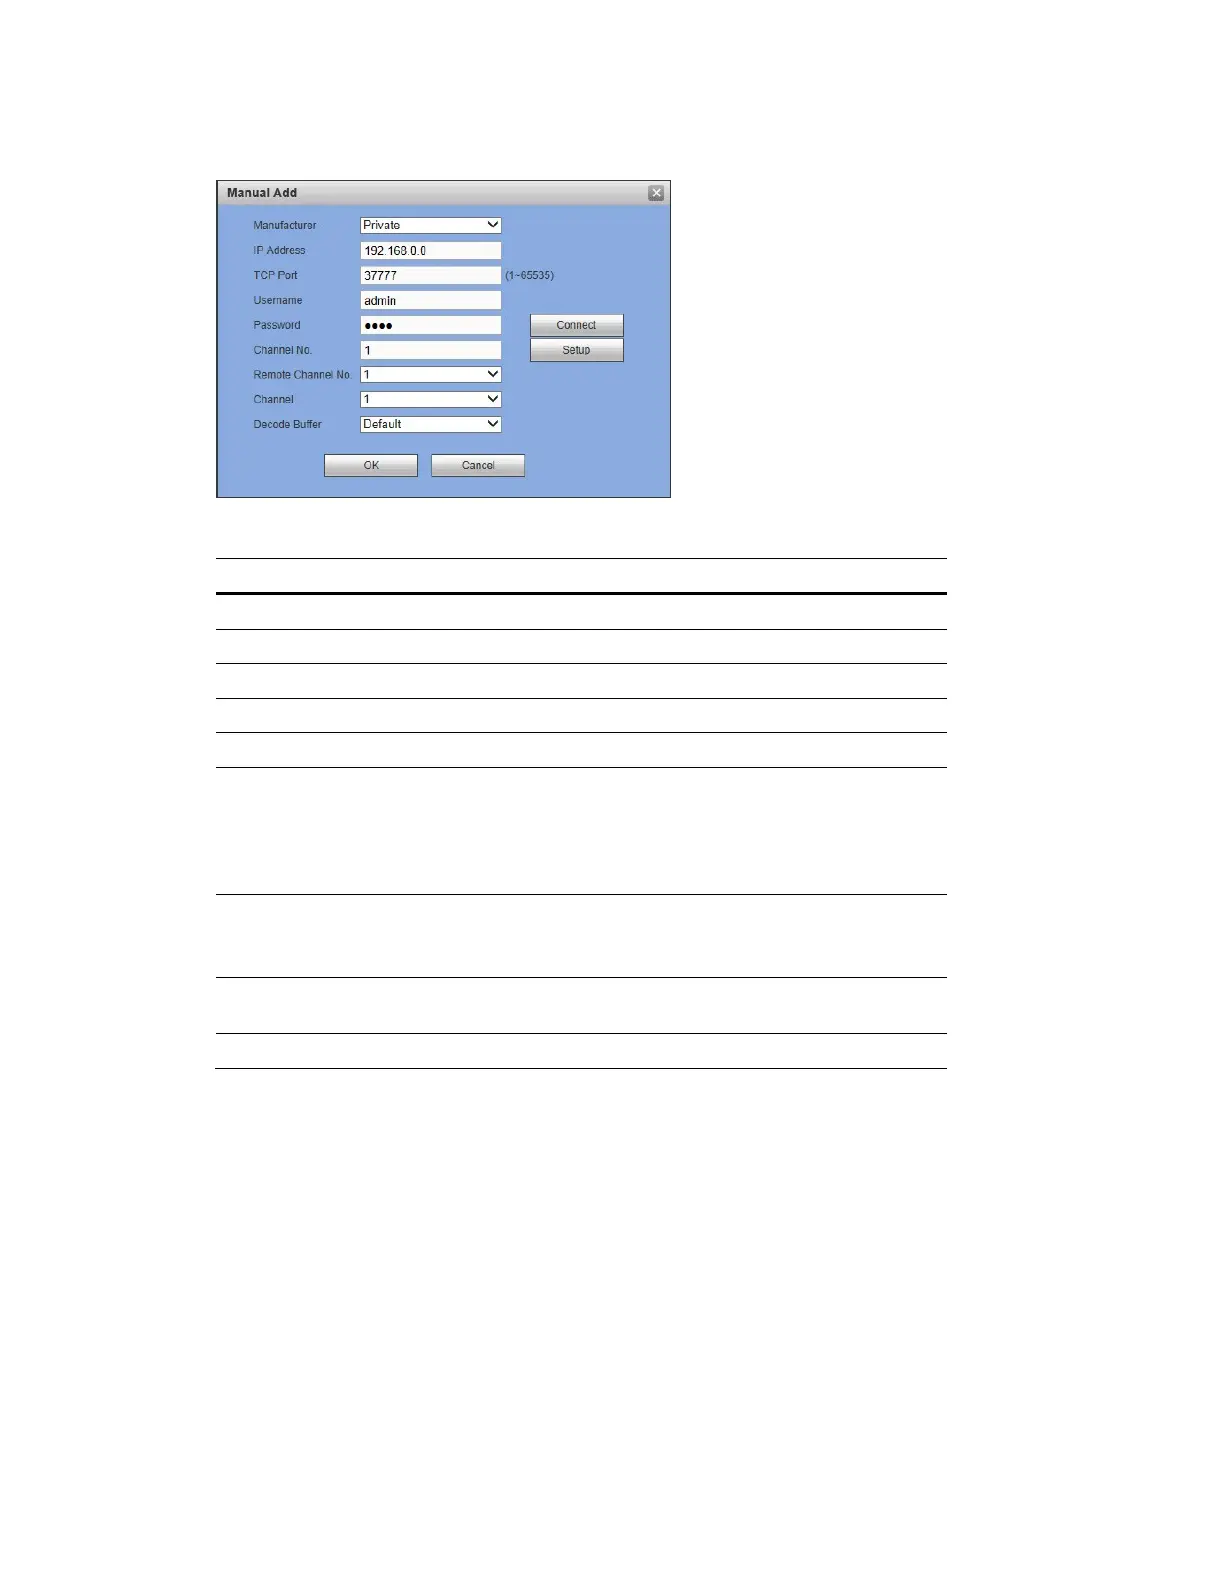
Figure 12-29 Manually Adding a Camera Window
Table 12-7 Manual Add
Parameter Function
Manufacturer Select the manufacturer that applies to your camera from the list.
IP Address Enter the IP address for the camera.
TCP Port Enter the TCP port for the camera. (Optional)
Username Enter a username.
Password Enter a password
Channel No.
Enter a channel amount or click the Connect button to get the
channel amount of the remote device.
Note: We recommend click the Connect button to get remote
device channel amount, the manual add operation may result in
failure if the input channel amount is not right.
Remote Channel
No.
After getting the remote device channel amount, click Setup to
select a channel.
Note: Click to select one or more remote channel numbers here.
Channel
The local channel number you want to add. One channel name
has corresponding one channel number.
Decode buffer Select from the drop-down menu of options.
Click OK. The newly added camera appears in the Added Device list.
Configuring the Camera Setup through the Remote Interface
If the NVR connects to an IP camera through a private protocol, then the Camera Image
Conditions page displays. If the NVR connects to an IP camera through the ONVIF protocol,
then the Camera Image Conditions does not display.
Configuring Camera Image Conditions Settings
In the Camera Image Conditions window, you can view the camera device properties. Any
changes are immediately active after you set them.
On the Setup tab, click Image under IMAGE to open the Conditions. After making any
Condition changes, click OK to save the changes.

 Loading...